Author: Amjad Izhar

  • Trump’s Presidency: Rhetoric, Reality, and Global Impact by Rohan Khanna India

    Trump’s Presidency: Rhetoric, Reality, and Global Impact by Rohan Khanna India

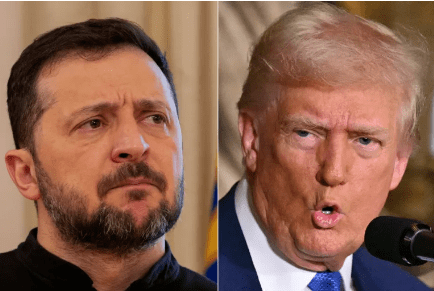
    The source critiques Donald Trump’s political rhetoric and actions, particularly his stance on Islamic terrorism and his travel ban. It argues that Trump’s policies alienate moderate Muslims and are counterproductive. The author suggests Trump’s approach is similar to that of inexperienced politicians, prioritizing short-term interests over long-term stability. The text also points to the role of extremist organizations in shaping negative perceptions of Islam. Ultimately, the author expresses hope that the American system, including the judiciary, will constrain Trump’s more divisive policies. The piece warns that his administration’s actions risk alienating allies and repeating past mistakes.

    Navigating Politics and Perception: A Study Guide

    Quiz:

    1. According to the author, how is the word “politics” generally perceived in their society and media?
    2. What qualities, according to the author, should a politician possess to effectively lead a nation in modern times?
    3. What comparison does the author draw between Donald Trump and Pakistani politicians?
    4. What was President Trump’s initial announcement regarding “Islamic Terrorism,” and what was the author’s reaction to it?
    5. What was President Trump’s order to ban citizens of seven Islamic countries from entering America, and what were the consequences of this decision?
    6. According to the author, what group is made happy because of the ban on citizens of seven Islamic countries entering America?
    7. According to the author, who is the culprit that is draining a large section of people in the West away from Muslims?
    8. What is the author’s opinion of extremist organizations that link every inhuman incident with Islam?
    9. What is the author’s opinion about people “who cover their veils?”
    10. How does the author view the American judiciary’s role in checking President Trump’s executive orders?

    Quiz Answer Key:

    1. The author believes that their society and media generally present the word “politics” as being synonymous with cleverness, cunningness, and even deception, rather than the art of governance or advancing a nation with understanding and intelligence.
    2. According to the author, a politician should possess qualities of subtlety, understand the psychology of their people in accordance with modern demands, and have the consciousness to take them forward, rather than being thick-minded or superficial.
    3. The author compares Donald Trump and Pakistani politicians based on their perceived lack of experience, mental and conscious imbalance, and tendency to make temporary or self-interested decisions, rather than those of a permanent or national nature.
    4. President Trump announced that he would support “Islamic Terrorism” and delete the page from the entity; the author responded by stating that Muslims were not hurt by this announcement, and that terrorism is not the agenda of any religion.
    5. President Trump ordered a ban on citizens from seven Islamic countries from entering America; this order upset liberal Muslims while Violent Muslims with negative thinking were happy with this order; and led to large-scale protests in America and Europe.
    6. The author believes Violent Muslims with negative thinking are made happy because of the ban on citizens of seven Islamic countries entering America.
    7. The author believes that the culprit that is draining a large section of people in the West away from Muslims is “our own foreigners” that are responsible organizations that connect every inhuman incident with Islam.
    8. The author does not approve of extremist organizations that link every inhuman incident with Islam such as ISIS, Taliban, Hamas, Bukohram, Al-Shabab and Jamaat-ul-Islamia.
    9. The author refers to them as “stupid friends of Islam and the Muslims.”
    10. The author sees the American judiciary as playing a crucial role in checking President Trump’s power by declaring some of his executive orders unconstitutional, suggesting a healthy system of checks and balances within the American government.

    Essay Questions:

    1. Analyze the author’s critique of the modern perception of “politics” and discuss the potential consequences of viewing politics as merely “cleverness and cunningness.”
    2. Evaluate the author’s comparison between Donald Trump and Pakistani politicians. Do you find the comparison valid? Why or why not? Support your argument with specific examples.
    3. Discuss the author’s perspective on the relationship between the West and the Muslim world, focusing on the idea that “our own foreigners” are partly responsible for the growing divide.
    4. Assess the author’s view on the role of the American judiciary in checking the power of the executive branch, particularly in the context of President Trump’s administration.
    5. Explore the broader themes of identity, representation, and global relations within the text. How does the author navigate these complex issues in their analysis of President Trump and international politics?

    Glossary of Key Terms:

    • Politics: The art or science of governance; the activities associated with governing a country or area, especially the debate or conflict among individuals or parties hoping to achieve power. (As defined within the text, the term has a more elevated sense of advancing a nation with understanding and intelligence.)
    • Rhetoric: The art of effective or persuasive speaking or writing, especially the use of figures of speech and other compositional techniques.
    • Executive Order: A rule or order issued by the President of the United States to an executive branch of the government and having the force of law.
    • Darul-War: An Islamic term referring to a territory or country where Islamic law does not prevail.
    • Islamic Terrorism: Terrorism committed by groups or individuals who profess Islamic motivations or goals.
    • Liberal Muslims: Muslims who embrace more open-minded interpretations of Islamic texts and values, typically favoring tolerance and progressiveness.
    • Propaganda: Information, especially of a biased or misleading nature, used to promote or publicize a particular political cause or point of view.
    • Modern Western Civilization: The norms, values, traditions, and practices that are part of Western culture, and have evolved over time.
    • Judiciary: The judicial authorities of a country; the branch of government that interprets and applies the law in the name of the state.
    • Checks and Balances: A system that allows each branch of a government to amend or veto acts of another branch so as to prevent any one branch from exerting too much power.

    Critique of Trump: Rhetoric, Islam, and International Relations

    Briefing Document: Analysis of “Pasted Text” Regarding Donald Trump

    Date: October 26, 2023 (Assumed based on request) Subject: Analysis of an opinion piece criticizing Donald Trump’s political approach, rhetoric, and impact, particularly on the perception of Islam and international relations. Sources: Excerpts from “Pasted Text”

    Executive Summary:

    This document analyzes an opinion piece strongly critical of Donald Trump, focusing on its core arguments regarding his perceived lack of political acumen, inflammatory rhetoric concerning Islam, and detrimental impact on international relations. The author paints Trump as an immature and interest-driven leader whose policies and statements have alienated allies and exacerbated existing tensions. The text also discusses the perception of politics as cunning and deception, contributing to the rise of inexperienced leaders like Trump. It further argues that extremist Islamic groups contribute to the negative perception of Islam, indirectly enabling figures like Trump.

    Main Themes and Key Arguments:

    1. Trump’s Inexperience and Lack of Political Subtlety: The author believes Trump lacks the intelligence, consciousness, and understanding of psychology required for effective governance. They compare him to “clowns or claimants of national leadership” who are “mentally and consciously…unbalanced” and incapable of making sound, long-term decisions. The author suggests his entrepreneurial, interest-driven mindset prevents him from seeing beyond immediate gains.
    • “Ahead of the recent US elections, we used the acronym of the popular Indian film “Three Edits” when criticizing the presidential candidate Donald Trump and wanted to say in a lighter manner that clowns or claimants of national leadership who do not have much experience in this field. Mentally and consciously they are unbalanced. Unfortunately, when they get leadership, they cannot make better decisions of a permanent nature for their nation because their entrepreneurial and interest thinking fails to see beyond the general emergency and temporary interests.”
    1. Criticism of Trump’s Rhetoric Regarding Islam: The author criticizes Trump’s pronouncements regarding “Islamic Terrorism” and the travel ban on citizens from several Muslim-majority countries. The piece argues these actions alienated moderate Muslims and emboldened extremists, ultimately serving to divide rather than unite.
    • “For example, when he took his first presidential oath, he said that he is supporting “Islamic Terrorism.” Will delete the page from the entity. Apparently it was a charming announcement or slogan, but such slogan could not be expected from a thoughtful politician…Then they took something more demonstrative, i.e. ordering to ban citizens of seven Islamic countries from coming to America. We wrote on it that with this idiotic order, they have upset the average liberal Muslims while Violent Muslims with negative thinking are happy with this order “Darul-War”.”
    1. The Role of Extremist Groups in Shaping Perceptions of Islam: The author argues that actions of extremist groups like ISIS, the Taliban, and others contribute to the negative perception of Islam, thereby indirectly enabling leaders like Trump to gain support through divisive rhetoric.
    • “If you analyze it with integrity, the culprit is not the West, but our own foreigners. There are responsible organizations that connect their every inhuman incident with Islam. In this regard, there is no use in naming extremist organizations such as ISIS, Taliban, Hamas, Bukohram, Al-Shabab and Jamaat-ul-Islamia etc.”
    1. Impact on International Relations and Alliances: The author suggests Trump’s policies and pronouncements are damaging US relationships with key allies, particularly in Europe and Saudi Arabia. The text points to Vice President’s harsh language in Munich as an example.
    • “If today, your historical ally like Saudi Arabia is saying yes to your illegitimate yes, then here is the background. To be understood right now the whole of Europe is upset with the language your vice president has used in Munich regarding European allies if you guys continue your irresponsible upbringing like this what will you make new allies many old ones too Will lose.”
    1. Politics as Cunning Deception: The author laments the degradation of the term “politics,” associating it with trickery and deception rather than the art of governance. This negative perception contributes to the appeal of outsiders and inexperienced leaders.
    • “Our society and our media presents this word in the sense of cleverness and cunningness. Linguistically though it is the art of governance or symbols where as the founder may mean “politics” to advance a nation or people of the nation with understanding and intelligence.”

    Important Ideas and Facts:

    • The author draws a parallel between Trump and “clumsy” Pakistani politicians, implying a similar lack of competence and understanding.
    • The author acknowledges the US judiciary’s role in checking Trump’s power by declaring some of his executive orders unconstitutional.
    • The author believes that Trump should study his own history in order to better understand the geopolitical landscape he was navigating.
    • The article highlights how anti-immigrant sentiment in Europe and America are impacting legal and illegal immigration. Conclusion:

    This opinion piece presents a scathing critique of Donald Trump’s political approach, particularly focusing on its negative impact on international relations, the perception of Islam, and its emphasis on cleverness and cunning. The author portrays Trump as an inexperienced and divisive figure whose rhetoric and policies have alienated allies, emboldened extremists, and contributed to a global environment of increased tension and misunderstanding. The text also underscores the importance of internal moderation and introspection within the Muslim community to combat extremist narratives and prevent the negative perception of Islam.

    Trump, Politics, and Global Perceptions of Islam

    Here is an 8-question FAQ based on the provided text:

    1. What is the author’s critique of Donald Trump and his approach to politics?

    The author critiques Trump for his rhetoric, lack of experience, and perceived mental imbalance. They argue that his policies and statements, such as the initial travel ban on citizens from seven Islamic countries and his focus on “Islamic terrorism,” alienate moderate Muslims and empower extremist groups. The author sees Trump’s approach as driven by short-term interests rather than long-term strategic thinking, comparing him unfavorably to thoughtful politicians.

    2. How does the author view the term “politics” as it is commonly understood and practiced?

    The author believes that “politics” is often presented in a negative light, associated with cleverness, cunningness, and deception rather than the art of governance. They argue that true politics should be about advancing a nation with understanding, intelligence, and consideration for the people’s well-being, requiring subtle qualities rather than thick-mindedness.

    3. What is the author’s opinion on Trump’s statement about “Islamic Terrorism?”

    The author finds Trump’s initial focus on “Islamic Terrorism” to be a thoughtless slogan that could not be expected from a thoughtful politician. While acknowledging that some Muslims might not be hurt by it, they emphasize that terrorism should not be associated with any particular religion. The author suggests that concrete actions, rather than announcements, are needed to address the issue.

    4. How does the author analyze the reactions to Trump’s travel ban?

    The author notes that Trump’s travel ban upset liberal Muslims while potentially pleasing violent Muslims with negative thinking. They question who Trump is serving by implementing such policies. The author also observes that the protests against the ban were more significant in America and Europe than in Muslim countries themselves.

    5. What role do “stupid friends of Islam and the Muslims” play in the global perception of Islam, according to the author?

    The author argues that certain groups, such as ISIS, the Taliban, and other extremist organizations, contribute to negative perceptions of Islam by associating every inhuman incident with the religion. They are referred to as “stupid friends of Islam and the Muslims” because their actions provide ammunition for those who seek to demonize the religion.

    6. How does the author explain Trump’s rise to power in the context of these issues?

    The author suggests that the intensity in the ranks, caused by the negative actions and rhetoric associated with certain extremist groups and their “idiot friends,” helps explain the rise of leaders like Trump and Modi. These leaders benefit from the fear and anxiety generated by these issues.

    7. What is the author’s view of the American political system’s ability to check Trump’s power?

    The author expresses admiration for the American system, particularly the judiciary, for its ability to check Trump’s power by declaring some of his executive orders unconstitutional. They expect that the realities of the world will force Trump to compromise and learn from past mistakes, referencing President Bush Jr.’s approach to Iran.

    8. What is the author’s concern regarding Trump’s relationship with allies?

    The author is concerned about Trump’s approach to foreign relations, noting that Europe is upset with his Vice President’s language in Munich regarding European allies. They suggest that his irresponsible behavior could lead to the loss of old allies and difficulties in forming new ones, particularly if he continues to ignore historical lessons.

    Donald Trump: Policies, Reactions, and Global Implications

    Here’s a discussion of Donald Trump, based on the provided sources:

    • Before the US elections, Donald Trump was criticized using the acronym of the Indian film “Three Edits,” suggesting that he and other national leadership claimants lacked experience and were mentally unbalanced. The source suggests that such leaders may make poor, temporary decisions due to their entrepreneurial and self-interest thinking.
    • The source mentions that after winning the election, Donald Trump made statements that echoed those of his European allies, described as “fall their own”. The author uses the phrase “Masha Allah, when there are such internal ‘friends’ there is no need for external enemies” to describe this.
    • According to the source, since taking office, President Trump has made controversial statements, such as claiming he would eliminate “Islamic Terrorism”. The author suggests that such slogans are not expected from a thoughtful politician and that concrete actions, rather than announcements, are more effective.
    • One demonstrative action mentioned was the ban on citizens from seven Islamic countries from entering America. The source indicates that this order upset liberal Muslims and pleased violent Muslims with negative thinking, raising the question of whom Trump was serving. The ban led to protests in America and Europe.
    • Despite the above, the judiciary of the American system has checked some of Trump’s executive orders by declaring them unconstitutional. The author expresses the hope that “bitter ground realities will force Trump to compromise”.
    • The author also suggests Trump should study his own recent history and understand the implications of alienating allies, as Europe is upset with his vice president’s language in Munich. The author goes on to assert that if such “irresponsible upbringing” continues, he may lose old allies and fail to make new ones.

    American Politics: Rhetoric, Leadership, and Governance

    Here’s a discussion of American politics, based on the provided sources:

    • The sources suggest that American politics, particularly during Donald Trump’s presidency, has been characterized by controversial rhetoric and policies.
    • The author expresses concern over the state of politics, where propaganda is used to manipulate the common people, presenting politics as a negative thing. According to the source, this is described not just as trickery but as deception. The author questions what power is involved in spreading this propaganda.
    • American political leaders are described as sometimes lacking experience and being mentally unbalanced, which can lead to poor decision-making.
    • The American judiciary has acted as a check on the executive branch, declaring some of President Trump’s executive orders unconstitutional.
    • The source suggests that American politicians should learn from their own history and avoid alienating allies. The author cautions against the potential consequences of “irresponsible upbringing” in politics, which could lead to the loss of old allies and the failure to gain new ones.
    • The source contrasts the traditional understanding of “politics” as the art of governance aimed at advancing a nation with understanding and intelligence, against a modern perception of politics as mere cleverness and cunningness. According to the source, superficial and inexperienced individuals are sometimes favored over experienced and worldly politicians, to the detriment of the nation.

    Islamic Terrorism: Origins, Impact, and Perceptions

    Here’s a discussion of Islamic Terrorism, based on the provided sources:

    • The source mentions that President Trump stated he would eliminate “Islamic Terrorism”. The author suggests that terrorism cannot be the agenda of any religion. Instead of such announcements, the author suggests that concrete steps should be taken silently to address the issue.
    • The source mentions specific extremist organizations such as ISIS, Taliban, Hamas, Bukohram, Al-Shabab, and Jamaat-ul-Islamia. The author asserts that these organizations connect their inhuman acts to Islam. The author goes on to say that these groups are “stupid friends of Islam and the Muslims” and that their actions contribute to negative perceptions.
    • The source suggests that the intensity of these groups and the actions of their “idiot friends and allies” is a reason why individuals like Trump or Modi have found success in politics.
    • The source claims that some Muslims with violent or negative thinking were happy with Trump’s order to ban citizens from seven Islamic countries from entering America, viewing it as “Darul-War”.

    Western Civilization: Humanity, Relationships, and Alliances

    Here’s a discussion of Western Civilization, based on the provided sources:

    • According to the source, modern Western civilization is based on humanity, despite various stumbling and bitter experiments.
    • The source suggests that a large section of people in the West are drained from the Muslims. The author claims the culprit is not the West, but rather “our own foreigners,” referring to organizations that connect inhuman incidents with Islam. These organizations contribute to a negative perception, influencing Western views.
    • The source mentions that Europe is upset with the language used by the U.S. Vice President in Munich regarding European allies, suggesting potential strains in relationships within the West.
    • The author warns against alienating allies and suggests that irresponsible behavior could lead to the loss of old alliances and failure to form new ones.

    By Amjad Izhar
    Contact: amjad.izhar@gmail.com
    https://amjadizhar.blog

  • Excel VBA: Mastering Macros, Procedures, and Variable Usage

    Excel VBA: Mastering Macros, Procedures, and Variable Usage

    The provided text offers a comprehensive guide to using Visual Basic for Applications (VBA) within Microsoft Excel. It covers a wide range of topics, from recording and editing macros to creating custom functions and user forms. Key concepts explored include variable declaration, data types, control structures like loops and conditional statements, and object-oriented programming principles. The text provides practical examples and step-by-step instructions to automate tasks and enhance Excel’s functionality. Debugging techniques and strategies for error handling are also discussed. The ultimate goal is to equip readers with the skills to create sophisticated Excel-based applications.

    VBA Macro Programming: Study Guide and Reference

    VBA Macro Study Guide

    Quiz

    1. What is the purpose of commenting your code in VBA? Comments are used to describe the code’s functionality and intent, making it easier to understand and maintain. They also help in recalling the code’s purpose after a period of time.
    2. How do you rename a module in the VBA editor? In the Project Explorer window, select the module. Then, in the Properties window, change the “Name” property of the module to the desired name.
    3. How can you access a macro stored in another open workbook? You can access the macro via the View tab (Macros -> View Macros) or the Developer tab. Make sure “All Open Workbooks” is selected in the “Macros in” dropdown.
    4. Explain the difference between a Property and a Method in VBA. A Property is a characteristic or attribute of an object (e.g., name, color). A Method is an action that can be performed on an object (e.g., clear contents, activate).
    5. What is the purpose of the “Option Explicit” statement? “Option Explicit” forces explicit variable declaration. This means all variables must be declared before they can be used, preventing errors caused by misspelled or undeclared variables.
    6. Explain what “scope” means in the context of procedures. Scope determines where a procedure can be called or used. Procedures can be public, private, or undeclared; undeclared defaults to public.
    7. Describe the purpose of the Immediate Window in the VBA editor. The Immediate Window is used to test code snippets, display the values of variables, and execute commands directly during development and debugging. You can execute or print by either typing “print” or a question mark.
    8. What is a user-defined function (UDF) in Excel VBA? A user-defined function is a custom function created in VBA that can be used in Excel worksheets just like built-in functions, performing calculations and returning values.
    9. What does the term “debugging” mean in the context of coding? Debugging is the process of identifying, tracing, and correcting errors (bugs) in code to ensure the program runs correctly and produces the expected results.
    10. Explain the purpose of a “breakpoint” in VBA debugging. A breakpoint is a marker inserted into the code that causes the program execution to pause at that line. This allows the developer to examine the state of the program, inspect variables, and step through the code line by line to identify errors.

    Quiz Answer Key

    1. Comments are used to describe the code’s functionality and intent, making it easier to understand and maintain. They also help in recalling the code’s purpose after a period of time.
    2. In the Project Explorer window, select the module. Then, in the Properties window, change the “Name” property of the module to the desired name.
    3. You can access the macro via the View tab (Macros -> View Macros) or the Developer tab. Make sure “All Open Workbooks” is selected in the “Macros in” dropdown.
    4. A Property is a characteristic or attribute of an object (e.g., name, color). A Method is an action that can be performed on an object (e.g., clear contents, activate).
    5. “Option Explicit” forces explicit variable declaration. This means all variables must be declared before they can be used, preventing errors caused by misspelled or undeclared variables.
    6. Scope determines where a procedure can be called or used. Procedures can be public, private, or undeclared; undeclared defaults to public.
    7. The Immediate Window is used to test code snippets, display the values of variables, and execute commands directly during development and debugging. You can execute or print by either typing “print” or a question mark.
    8. A user-defined function is a custom function created in VBA that can be used in Excel worksheets just like built-in functions, performing calculations and returning values.
    9. Debugging is the process of identifying, tracing, and correcting errors (bugs) in code to ensure the program runs correctly and produces the expected results.
    10. A breakpoint is a marker inserted into the code that causes the program execution to pause at that line. This allows the developer to examine the state of the program, inspect variables, and step through the code line by line to identify errors.

    Essay Questions

    1. Discuss the advantages and disadvantages of recording macros versus writing VBA code from scratch. In what situations would recording a macro be preferable, and when is it better to write the code directly?
    2. Explain the different levels of variable scope in VBA (Procedure, Module, and Public). Describe how each scope affects the accessibility and lifetime of a variable, providing examples of scenarios where each scope would be most appropriate.
    3. Compare and contrast the different types of looping constructs in VBA, specifically Do While/Until loops and For/Next loops. Explain their use cases, advantages, and limitations, providing examples of when you might choose one type of loop over another.
    4. Describe the purpose of error handling in VBA. Explain the different error trapping options, discuss how to implement error handling using the On Error GoTo statement, and provide a detailed example of an error handling routine.
    5. Explain how the Select Case statement and the IF/THEN/ELSE/END IF structures achieve the same purpose. Discuss the scenarios in which one might be more suitable than the other.

    Glossary of Key Terms

    • Argument: A value passed to a procedure when it is called.
    • Breakpoint: A marker in code that pauses execution for debugging.
    • Calling Procedure: A procedure that invokes another procedure.
    • Called Procedure: A procedure invoked by another procedure.
    • Code: Instructions written in a programming language.
    • Collection: A group of related objects.
    • Comment: Explanatory text in code that is ignored by the interpreter.
    • Compile: To translate source code into machine-executable code.
    • Constant: A named storage location that contains data that cannot be changed during program execution.
    • Data Type: The classification of a particular type of information (e.g., Integer, String, Boolean).
    • Debugging: Identifying and fixing errors in code.
    • Declaration: Specifying the name and type of a variable or procedure.
    • Explicit Declaration: Declaring variables before use (using Dim, Private, Public, or Static).
    • Implicit Declaration: Using a variable without declaring it (generally discouraged).
    • Function Procedure: A procedure that performs a calculation and returns a value.
    • Immediate Window: A VBA window for executing code directly and displaying values.
    • Intrinsic Function: A built-in function provided by VBA.
    • Loop: A programming construct that repeats a block of code.
    • Macro: A series of commands and instructions that are grouped together as a single command to accomplish a task automatically.
    • Method: An action that can be performed on an object.
    • Module: A container for VBA code (procedures, declarations).
    • Object: An entity in VBA that has properties and methods.
    • Object Browser: A VBA tool for exploring available objects, properties, and methods.
    • Parameter: A variable passed to a function or subprocedure.
    • Procedure: A named block of code that performs a specific task (either a Sub or a Function).
    • Project Explorer: A window in the VBA editor that displays the project’s files.
    • Property: A characteristic or attribute of an object.
    • Public: A scope that makes a variable or procedure accessible from any module.
    • Private: A scope that restricts a variable or procedure to the module in which it is declared.
    • Run Time: The period during which a program is executing.
    • Scope: The region of a program where a variable or procedure is accessible.
    • Statement: A complete instruction in a programming language.
    • Sub Procedure: A procedure that performs a task but does not return a value directly.
    • Syntax: The rules governing the structure of a programming language.
    • Variable: A named storage location that can hold data that can be changed during program execution.
    • With…End With: A VBA construct that simplifies code by allowing multiple operations on a single object without repeatedly referencing the object.

    VBA Macro Recording and Editing Fundamentals

    Okay, here’s a briefing document summarizing the key themes and ideas from the provided text excerpts:

    Briefing Document: VBA Macro Recording and Editing

    Overview:

    The provided text is a transcript from a course or tutorial on VBA macro recording and editing within Microsoft Excel. It covers various aspects of working with macros, from recording and cleaning up code to understanding procedures, scope, error handling, and using the Visual Basic Editor (VBE). The text emphasizes practical, hands-on learning, with numerous examples and step-by-step instructions.

    Key Themes and Ideas:

    1. Macro Recording as a Starting Point: The text highlights the value of recording macros as a way to generate VBA code quickly. It suggests recording, then modifying the generated code. “We’re going to record a macro again to get this lesson started, and along the way… whether we’re recording macros or we’re writing VBA code from scratch, we’re also going to be using properties and we’re going to be using methods.”
    2. Importance of Code Comments: The document stresses the significance of commenting code liberally for clarity and maintainability. “ments are meant to describe your code it’s a good idea to comment your code liberally i’ve written code before and didn’t comment it and six months later i had to figure out what the intent of the code that i wrote was so comments are really good.” The comments generated from the macro recorder serve as a basic form of documentation.
    3. Understanding VBA Code Structure: The text explains the anatomy of VBA code, including modules, sub procedures, function procedures, and the With…End With construct. It illustrates how recorded actions translate into specific VBA commands (e.g., Rows(“1:1”).Select, Selection.Insert).
    4. Procedures: Sub vs. Function: The document differentiates between sub procedures (which perform actions) and function procedures (which perform calculations and return values). It explains how function procedures can be used as User Defined Functions (UDFs) in Excel worksheets. “a function procedure performs a calculation and returns a single value or an array of values so differs from a sub procedure.”
    5. Module Management: The transcript stresses the organization of VBA code through modules and the importance of giving modules descriptive names. A prefix “mod” is suggested to identify modules in a list. “You want your module names to be as descriptive as possible… we don’t want them to be module one module two module three module four so we’re gonna use the properties window to make some changes to properties so we’re going to start with renaming module 1… we’re going to use lowercase mod mod to indicate that it is a module.”
    6. Properties and Methods: The course material makes the distinction between properties and methods: “properties to change the name of a module we use properties to change the name of this particular sheet tab and a method is an action that is taken on an object so you’ll learn how to access methods along the way as well.”
    7. Scope of Procedures: The importance of understanding procedure scope (Public, Private, Undeclared/Public) is discussed. Scope determines where a procedure can be called from. “Scope determines where the procedure may be used…If a procedure declaration is preceded by the keyword public this makes the procedure accessible to all modules in the visual basic project…If the procedure declaration is preceded by the keyword private this makes the procedure available only in the module where it resides.”
    8. Variable Declaration and Data Types: The text emphasizes the importance of explicit variable declaration and assigning appropriate data types. Implicit declaration can lead to errors. Various data types are mentioned (Byte, Boolean, Integer, Long, Single, Double, Currency, Date, String, Variant). The Option Explicit statement is key to enforcing explicit declaration.
    9. Intrinsic Functions (String Manipulation): The document introduces built-in VBA functions like Left, Mid, and Right for manipulating strings. It demonstrates how to extract specific characters or substrings from a larger text string (like a VIN number).
    10. Conditional Logic (If…Then…Else, Select Case): The transcript covers conditional branching using If…Then…Else constructs and the Select Case statement. These are used to execute different blocks of code based on specific conditions. These control structures are analogous to the IF function in Excel.
    11. Looping Constructs (Do While/Until, For…Next, For Each): The document introduces looping constructs for repeating code blocks. It covers Do While and Do Until loops, as well as For…Next loops for a specific number of iterations and For Each loops for iterating through collections (e.g., worksheets).
    12. Object Variables and the Set Keyword: The course material explains the use of object variables, which hold references to objects (e.g., worksheets, ranges). The Set keyword is essential when assigning objects to variables.
    13. With…End With Construct: The With…End With block is presented as a way to simplify code by avoiding repetitive object references.
    14. The Offset Property: This property is discussed as a means to easily reference cells relative to a starting cell using rows and columns offsets.
    15. User Interaction (MsgBox, InputBox): The transcript shows how to use MsgBox (message box) functions to display information to the user and InputBox functions to prompt the user for input.
    16. Event Procedures: Event procedures are introduced as a way to trigger code execution based on specific events (e.g., worksheet activation). The example given shows how to run a macro when a specific sheet is activated. “as soon as we activated that sheet it ran our get new inventory calling procedure.”
    17. Error Handling: The text provides an overview of error handling in VBA, covering the types of errors (logic, runtime, syntax). It introduces the On Error GoTo statement for trapping errors and creating error handling routines. “We’re going to get into trapping errors with the on error statement which includes understanding the error object writing an error handling routine and working with inline error handling.”
    18. Debugging Tools: The transcript refers to using debugging tools in the VBE, such as breakpoints, stepping through code (Step Into, Step Over, Step Out), the Immediate Window, Locals Window, and Watch Window.
    19. The Object Browser: This tool is described as a way to explore available objects, their properties, methods, and events, as well as to get online help. “The object browser allows you to browse through all available objects in your project and see their properties methods and events.”

    Quotes Highlighting Key Concepts:

    • “Apply a counting format to columns we’re going to make that plural columns g and then and h and when you move away from that line it will turn green again indicating that it’s a comment.” (Illustrates commenting and how the VBE recognizes comments.)
    • “Clear contents is a method of the range object it would empty the cells delete everything that’s in the cells in the range add is a method of the workbook’s collection object and it’s used to create a new workbook and then you have activate and that’s a method of the worksheet object it’s used to activate a worksheet” (Illustrates the use of methods on objects)
    • “the scope of a variable determines not only where it can be used but the circumstances in which the variable is removed from memory.” (Highlights the importance of variable scope.)
    • “We need to tell it what values to assign to each variable and now we’ve told it where to display those variable values which column and cell to display it in by using our offset statements within the with end width structure.” (Highlights the importance of assigning values and specifying where to display)

    Overall Impression:

    The excerpts provide a solid foundation for learning VBA macro recording and editing. The practical examples, step-by-step instructions, and emphasis on code organization and error handling make it a valuable resource for beginners and intermediate users alike. The course’s emphasis on troubleshooting and debugging is especially valuable.

    VBA Macro Programming: Recording, Modification, and Usage

    Macro Recording, Modification, and VBA Basics

    1. What are the benefits of commenting code in VBA, and how are comments created when recording a macro?

    Comments are crucial for code maintainability and understanding. They explain the purpose and intent of specific code sections, making it easier to revisit and modify the code later, especially after a significant time has passed. When recording a macro, the descriptions entered in the “Record Macro” dialog box are automatically inserted as comments in the generated VBA code.

    2. What is a “With…End With” block in VBA, and what purpose does it serve?

    A “With…End With” block is a construct in VBA that allows you to perform multiple operations on a single object without repeatedly specifying the object name. It improves code readability and reduces redundancy. For instance, when modifying multiple formatting properties of a cell, you can use a “With Selection” block to apply changes to Selection.Font.Bold, Selection.Alignment, etc., without rewriting “Selection” each time.

    3. How can you rename a module in the VBA editor, and why is it important to do so?

    To rename a module in the VBA editor, select the module in the Project Explorer window, then go to the Properties window (usually found below the Project Explorer). Double-click the “Name” property and enter a descriptive name for the module. Renaming modules helps organize your code into logical sections, especially when a project contains multiple modules. Using a prefix like “mod” is helpful for quickly identifying modules in a list.

    4. How can you access a macro stored in one Excel file from another Excel file?

    To access a macro stored in one Excel file (e.g., vehicles.xlsm) from another, the file containing the macro (vehicles.xlsm) must be open. You can then access the macro by going to the “View” tab, clicking “Macros,” and selecting “View Macros.” In the Macros dialog box, you can choose the macro from the open file. The macro will be listed as [filename]![macroname].

    5. What are properties and methods in VBA, and can you provide examples?

    In VBA, properties are attributes or characteristics of an object, while methods are actions that can be performed on an object.

    • Properties: Examples include changing the name of a module or a sheet tab, and you can do this using the properties window.
    • Methods: Examples include Range(“A1:B11”).ClearContents (clears the contents of cells), Workbooks.Add (creates a new workbook), and Worksheets(“Sheet1”).Activate (activates a specific worksheet).

    6. What is the difference between a Sub procedure and a Function procedure in VBA?

    • Sub Procedure: A block of code that performs a series of actions. It does not return a value. Sub procedures are commonly used to automate tasks or manipulate data.
    • Function Procedure: A block of code that performs a calculation and returns a single value or an array of values. Function procedures can be used in VBA code or directly in Excel worksheets as user-defined functions (UDFs).

    7. What is the “Immediate Window” in the VBA editor, and how can it be used for testing Function procedures?

    The Immediate Window in the VBA editor allows you to execute VBA code directly and view the results immediately. To test a Function procedure, you can type a question mark (?) followed by the function name and its arguments (e.g., ?MSPRStatus(10000)) and press Enter. The result returned by the function will be displayed in the Immediate Window, allowing you to quickly verify its correctness. The print command functions the same as the question mark.

    8. Explain the difference between implicit and explicit variable declaration in VBA, and why is explicit declaration preferred?

    • Implicit Declaration: Occurs when you use a variable without first declaring it using a Dim statement. VBA automatically creates the variable, but its data type may not be what you intend, potentially leading to errors.
    • Explicit Declaration: Involves declaring each variable with a Dim statement, specifying its name and data type. This is the preferred method because it forces you to define the variable’s purpose and helps prevent errors due to typos or unintended data type conversions. To enforce explicit variable declaration, you can set the “Require Variable Declaration” option in the VBA editor’s options. This will automatically insert Option Explicit at the top of every module, forcing you to declare each variable before using it.

    VBA Programming in Microsoft Office Applications

    VBA (Visual Basic for Applications) is a Microsoft programming language integrated into Office applications like Excel, Word, PowerPoint, Outlook, and Access. It allows users to automate repetitive tasks and extend the capabilities of these applications.

    Key aspects of VBA programming include:

    • Object-Oriented Programming (OOP): VBA is an object-oriented language where everything in an application is an object with its own features (properties) and actions (methods). For instance, in Excel, the application itself, cells, worksheets, charts, and shapes are all objects.
    • Automating Tasks: VBA enables automating recurring tasks, creating user-defined functions, and controlling other Office applications. It can attach code to events, allowing it to run automatically when an event occurs (e.g., activating a worksheet).
    • VBA vs. Macros: While Excel macros are powerful, VBA offers advantages like attaching code to events, decision-making capabilities, looping structures, and the ability to create user input forms and dialog boxes. Macros have limitations because you are restricted to tasks that you can perform in the Excel interface.
    • Excel Object Model: VBA uses a hierarchical structure of Excel and its objects. The application resides at the top, followed by objects like workbooks, worksheets, and ranges. VBA accesses these objects by moving down the hierarchy using the dot operator.
    • Collections: These are groups of objects of the same type, such as all open workbooks (the Workbooks collection) or all worksheets in a workbook (the Worksheets collection). VBA code can loop through members of a collection to perform actions on each one.
    • Modules and Procedures: VBA code is stored in modules. Sub procedures define specific tasks, while function procedures return a value. Procedures have naming rules and conventions.
    • Variables: Variables store data in the computer’s memory during procedure execution. They have naming rules, scope (where they can be used), and data types (e.g., Integer, String, Boolean). Explicit declaration of variables is preferred to avoid errors.
    • Language Elements: VBA has language elements like variables, data types, and intrinsic functions. Intrinsic functions are built-in functions that perform specific tasks.
    • Control of Flow Structures: VBA uses control of flow structures to make decisions in code. These include conditional branching (If Then Else, Select Case) and looping constructs (Do While, For Next).
    • User Forms: VBA allows the creation of user forms with controls (text boxes, check boxes, etc.) for user input. Code can be applied to these controls to perform specific actions.
    • Debugging: VBA includes debugging tools to identify and correct code errors. The Visual Basic Editor has a debug toolbar for stepping through code, setting breakpoints, and inspecting variable values. There are three types of errors: logic errors, runtime errors and compile errors.
    • Error Handling: VBA provides error trapping options using the On Error statement to handle runtime errors.
    • Object Browser: The object browser allows browsing through all available objects in a project and see their properties, methods, and events.
    • Code Protection: VBA code can be password protected to prevent unauthorized access.

    Excel Macros and VBA: Automation Guide

    Macros in Microsoft Excel are a way to automate repetitive and recurring tasks. While macros and VBA (Visual Basic for Applications) both contribute to automation, VBA offers more advanced capabilities.

    Here’s a comparison of Excel macros and VBA:

    • CapabilitiesMacros are limited to tasks that can be performed within the Excel interface.
    • VBA allows for more complex operations, such as attaching code to specific events (like activating a worksheet), decision-making processes, looping structures, and creating custom user input forms.
    • LimitationsWhen recording macros, users are restricted to actions achievable through the Excel interface.
    • VBA removes these limitations, offering greater flexibility and control over Excel and other Office applications.
    • Code Access and ModificationVBA enables users to write and modify code, including the code behind recorded macros.
    • Users can access the Visual Basic Editor (VBE) to view and edit the VBA code associated with macros.
    • Saving Files with MacrosWorkbooks containing macros must be saved in a macro-enabled format (.xlsm) to preserve the VBA code.
    • Failure to save in this format will result in the loss of the code.
    • SecurityExcel has security measures that, by default, disable macros upon opening a macro-enabled file.
    • This is indicated by a yellow band with a security warning.
    • Users can enable content from trusted sources.
    • Trusted locations can be set up to avoid security warnings for files from known and secure sources.
    • Creating MacrosMacros can be created by recording actions within Excel or by writing VBA code directly.
    • The developer tab in Excel provides tools for recording, viewing, running, and editing macros. If the developer tab isn’t visible, it can be enabled in the Excel options.
    • Macros can be initiated from the “View” tab or by using the shortcut Alt + F8.
    • Running MacrosMacros can be run using a button in the developer tab or using Alt+F8.
    • Macros stored in one file can be used in another if the file containing the macro is open.

    Visual Basic Editor (VBE) in Microsoft Office: A Guide

    The Visual Basic Editor (VBE) is the environment used to write, edit, and manage VBA code in Microsoft Office applications. Here’s a breakdown of its key aspects, based on the sources:

    • Accessing the VBE: The VBE can be accessed from the Developer tab in Excel by clicking the “Visual Basic” button. A shortcut key, Alt + F11, can also switch between Excel and the VBE.
    • Environment Overview:
    • The VBE opens in a separate window from Excel.
    • It has a menu bar with options like File, Edit, View, Insert, and Tools.
    • Toolbars provide quick access to frequently used commands.
    • Key Components:
    • Project Explorer: Located in the upper left corner, it displays all open projects (files) and their components (modules, sheets, forms).
    • Code Window: This is where VBA code is written and edited. To view a code window, click on a module in the Project Explorer.
    • Properties Window: Displays the properties of selected objects (e.g., modules, forms, controls). Properties can be modified to change the appearance and behavior of objects.
    • Immediate Window: Accessed via the View menu, this window is used to test function procedures and execute single lines of code. For example, ? msrpStatus(10000) will print the result of the msrpStatus function with the argument 10000. The question mark is the same as print in VBA.
    • Modules: Containers that store VBA code. There are different types of modules:
    • Standard modules
    • Class modules
    • UserForm modules – each form has a built-in class module that contains code related to the form and its controls
    • Customization:
    • Options: The Tools > Options menu allows customization of the VBE.
    • The Editor tab includes code settings, such as “Require Variable Declaration,” which forces explicit variable declaration.
    • The Editor Format tab allows changing the font size and style of the code window.
    • Toolbar: VBA commands, like comment block, uncomment block, and compile project can be added to the toolbar. Right-click on the toolbar and select “Customize” to add commands. The compile project icon checks the code for errors.
    • Debugging Tools: The VBE includes a debug toolbar to investigate errors.
    • Breakpoints: Breakpoints can be inserted to pause code execution at a specific line.
    • Step Into: Executes code one line at a time.
    • Locals Window: Shows the current value of variables.
    • Quick Watch: Displays the value of a selected expression.
    • Object Browser: The object browser (View > Object Browser, or F2) allows browsing through all available objects in a project and see their properties, methods, and events.
    • Help: Context-sensitive help is available by pressing F1 when a keyword is selected. This opens the Microsoft documentation for VBA.
    • Code Protection: VBA code can be password-protected via Tools > VBAProject Properties > Protection tab.

    VBA Procedures, Functions, Modules: A Developer’s Guide

    Procedures and functions are fundamental building blocks of VBA (Visual Basic for Applications) code, serving to organize and execute specific tasks.

    Here’s a breakdown of procedures and functions in VBA:

    • ProceduresA procedure is a named group of statements that execute as a unit to perform a specific task.
    • A sub procedure defines specific tasks, such as inserting a new row or adding column headers.
    • Sub Procedures:
    • Begin with a Sub statement and end with an End Sub statement.
    • Can be executed in several ways, such as through a macro dialog box, by calling it from another procedure, by attaching it to a button in the quick access toolbar in Excel, or by attaching the procedure to an event.
    • Event Procedures:
    • Respond to specific events within the application.
    • To create an event procedure, you must access an object’s events.
    • Typically, the names of event procedures should not be changed.
    • Property Procedures:
    • Allow a programmer to create and manipulate custom properties.
    • Outside the scope of the training course in the sources.
    • Calling Procedures:
    • A sub procedure can act as a calling procedure by bundling multiple other procedures together.
    • A calling procedure calls other procedures to execute them in a specific order.
    • FunctionsFunction procedures perform a calculation and return a value or an array of values.
    • Begin with a Function statement and end with an End Function statement.
    • Can be called from a sub procedure or another function procedure, or used in a worksheet formula.
    • When created in VBA, a function procedure can only be executed in two ways:
    • By calling the procedure from a sub procedure or another function procedure.
    • By using the function in a worksheet formula, where it becomes a user-defined function.
    • Can be tested using the Immediate Window in the Visual Basic Editor.
    • ModulesModules act as containers that store VBA code.
    • There are two main types of modules:
    • Standard Modules: Used for storing standard code.
    • Class Modules: Used for creating one’s own objects.
    • Naming Rules and ConventionsProcedure names can be up to 255 characters long.
    • They can be alphanumeric, but the first character must be a letter.
    • Spaces and special characters are not allowed.
    • Procedure names must be unique within a module.
    • Conventions include starting names with a verb and using proper case for each word.
    • Scope of ProceduresDetermines where a procedure can be used.
    • Public: Accessible to all modules in the VBA project.
    • Private: Accessible only within the module where it resides.
    • Undeclared: If a procedure’s scope is undeclared, it defaults to public.
    • Executing ProceduresProcedures can be executed or run in different ways within VBA:
    • Using the macro dialog box.
    • Using the run sub user form button on the VBE toolbar.
    • Calling the procedure from another sub procedure.
    • Adding a button to the quick access toolbar in Excel.
    • Attaching the procedure to an event.
    • Running it from the immediate window in Visual Basic Editor.

    VBA Object Variables: Declaration, Assignment, Scope, and Benefits

    Object variables in VBA are used to make code more concise and avoid lengthy object references. Instead of repeatedly typing out the full reference to an object, you can assign the object to a variable and then use the variable name to refer to the object.

    Here’s what you need to know about object variables in VBA:

    • Declaration:
    • Object variables are declared using the Dim, Public, or Private keywords, just like regular variables. The Static keyword can also be used.
    • Instead of a data type (like Integer or String), you declare the variable with an object type, such as Worksheet or Range.
    • Example: Dim mySheet As Worksheet
    • Assignment:
    • To assign an object to an object variable, you must use the Set keyword.
    • Example: Set mySheet = Worksheets(“Sheet1”)
    • After this assignment, you can use the variable mySheet to refer to the “Sheet1” worksheet.
    • Scope:
    • The scope of object variables is determined by where they are declared (module-level or procedure-level) and the keyword used (Dim, Public, Private).
    • Dim or Private: The variable is available only within the module or procedure where it’s declared.
    • Public: The variable is available to all procedures in all modules.
    • Benefits:
    • Conciseness: Object variables shorten code by replacing long object references with a simple variable name.
    • Readability: They can make code easier to read and understand.
    • Efficiency: Although not explicitly stated in the sources, using object variables can improve performance by reducing the need to repeatedly resolve object references.
    • Example (Based on the sources):
    • This example is based on information in the sources and demonstrates the use of object variables to sum the selling price in a column and place the total two rows below the last populated cell:
    • Sub AddTotals()
    • Dim lastCell As Range ‘ Declares object variables
    • Dim totalFormula As String ‘ Declares object variables
    • Set lastCell = Range(“I2”).End(xlDown) ‘ Sets lastCell to the last populated cell in column I
    • lastCell.Select ‘ Selects the last cell
    • ActiveCell.Offset(2, 0).Select ‘ Offset moves the active cell 2 rows down
    • totalFormula = “=SUM(I2:I” & lastCell.Row & “)” ‘ Formula for total
    • ActiveCell.Formula = totalFormula ‘ Enters the formula in the offset cell
    • End Sub
    Excel 2019 VBA Full Course Tutorial (7+ Hours)

    The Original Text

    hi everyone i’m trish connor cato welcome to the excel 2019 visual basic for applications video course this course is for beginning users looking to automate repetitive and recurring tasks in microsoft excel vba is microsoft’s programming language and it’s built into the office applications our focus during this course is on excel specifically you’ll be equipped with the basics to start writing your own vba code modify the code behind macros you’ve already recorded and have an understanding of how vba lends itself to creating efficiency in your daily tasks we’ll start with the basics where you’ll learn the types of things you can do with vba versus recording macros in excel as well as some key terminology which will help in your vba journey and you will get to edit vba code you’ll learn the importance of macro enabled workbooks and how to save them as well as how to modify some security settings we’ll move on to understanding the excel object model collections and how to reference objects in vba code once these basics are covered you’ll be ready to move on learning about the different types of procedures creating procedures learning the scope of procedures and working with methods you’ll also learn how to get vba context-specific help from within the visual basic editor if you’re enjoying these videos please like and subscribe if you want to earn certificates and digital badges please become a member of our patreon the link is in our video description if you have any questions you want answered by one of our instructors please join our off-site community the link is in the description as well as always if this course has exercise files you’ll find them in the video description below in our first lesson getting started you’re going to be learning about an overview of vba that includes what type of language it is why you would want to use visual basic for applications versus recording macros and advantages that it can give you in terms of efficiency we’ll move into recording a macro and running it in excel and then we’ll go into the visual basic editor environment and you’ll get an overview of the environment before we start editing a macro in vba you’ll learn how to save a macro enabled workbook and the importance of doing so you’ll learn a little bit about macro security now in this lesson we’re going to be using two files that are in the video description there both excel files one is named vehicles and the other one vehicles two we will be creating a vehicle’s macro enabled workbook during this lesson and the name of that workbook is shown on the slide you will not find it in the video description at this time so what you would want to do is grab those two excel files vehicles and vehicles too from the video description and put them somewhere on your system where you have easy access to them before we get hands-on let’s go ahead and get an overview of vba so as mentioned in the introductions vba is a microsoft programming language that is currently built into the excel word powerpoint outlook and access applications it’s one of the many programming languages that evolved from the basic programming language which was developed in the 1960s it was first released in excel 5 and that was in the office 1995 suite since then it evolved to encompass the applications that are mentioned in this slide vba is known as an object-oriented programming language oop this means that everything within an application is an object including the application itself objects have their own set of features and uses known as properties and methods respectively here’s an example of object oriented programming so the example using excel would be that excel is an object that contains other objects for example cells worksheets charts pivot tables shapes etc each object has its own properties for example a worksheet has a name a workbook can be opened and closed and these are a couple of a workbook’s so methods are like actions you will work with objects and manipulate them via their properties and methods throughout this course so why vba it can give you the ability to run macros automatically create user defined functions which can be used in the excel application you can use vba to control other office applications and mostly to automate recurring and repetitive tasks don’t get me wrong the power of macros is excellent in excel but vba does have some advantages so for example there are no limitations when you’re recording macros you are limited to those tasks that you can perform in the excel interface with vba you can attach code to events so that it runs automatically when the event occurs for example activating a worksheet would be an event vba allows for decision making and it has several decision-making structures ensuring code only runs when certain conditions are met the looping structures in vba ensure code runs multiple times based on a condition and then there’s forms and boxes you can use vba to create user input forms dialog boxes and message boxes in excel so we’re going to get started i have the vehicles excel file open from the video description and we are going to be recording a macro in this file now the thing is we want to prepare excel for recording a macro there are several ways that you can start a macro recording but we want to add the developer tab to the ribbon as that is one of the ways that you can record your macros review your macros so on and so forth so the first thing we’re going to do is right click on any ribbon tab home insert page layout whatever and when you right click on a ribbon tab you’re going to choose customize the ribbon in the customize the ribbon options box on the right side everything that has a check mark is a tab that’s showing on your ribbon we want to check the box in front of developer and then at the bottom you’re going to click ok and now you have the developer tab on your ribbon and let’s navigate to that tab so for parts of this course we’re going to be using this make vehicle information so we have make-believe then numbers we have year we have make model classification color dealer cost and manufacturer suggested retail price columns in here and we’re going to record a macro that is going to apply the column headings and also a little bit of formatting so on the developer tab of the ribbon in the first group the code group you’re going to click on the record macro button and don’t worry it’s not going to be recording until after we clear the dialog box so when you click that button the record macro dialog box opens and you have to give your macro a name well you don’t want your macros to have generic names so make them as descriptive as possible now of course there are rules to naming macros macro names must begin with a letter can be alphanumeric and can contain the underscore character no spaces so we’re going to name this macro capital a add capital f formatting almost together so it follows the naming convention we’re not going to assign a shortcut key to the macro to make it run later we don’t need to do that here and you have choices as to where the macro is going to be stored so by default it’s going to just be in this workbook the file that it’s going to be recorded in this workbook your other choices are a new workbook or your personal macro workbook if you store it in the personal macro workbook that workbook opens in the background every time you open excel and so the macro is available to any and all excel files we’re going to leave it on this workbook and there’s another way that you can access it from another file that you’ll see a little bit later i like to add a description to a macro so that if anyone comes behind me and they need information about what the macro is going to do the description will cover that so we’re going to type in a description box add column headers comma bold and centered period apply accounting format to column g period autofit columns a through h so that is the intent of the macro that we’re going to record so at this point once we click ok everything we do until we stop the recording is going to be recorded and i like to say this while you’re recording the macro if you make a mistake and you correct the mistake you don’t have to start all over again because it’s recording both the mistake and the correction so go ahead and click okay you’ll notice on the developer tab now where it used to say record macro we now have our stop recording icon there and we’ll use that when we’re completely done going through all the steps that we’re saving in our macro so for right now the first thing that we want to do here is right click on row heading 1 and choose insert so we get a blank row a new row one and that’s the row that we’re going to be adding our column headers in and so we’re going to click in cell a1 and we’re going to type then v i n and i’m doing it in all capital letters so vehicle identification number i’m going to press my tab key to get over to b1 and i’m going to type year tab make tab model tab again classification the next one is color the next one is dealer cost two separate words and lastly in all caps msrp for manufacturers suggested retail price after that one i’m going to just press enter so we have our headers in where they need to be and then we’re going to select row heading 1 again and we’re going to go to the home tab of the ribbon in the font group we’re going to make it bold and in the paragraph group we’re going to use the center alignment button so the headers are centered within their cells now we’re also going to add in adjusting column width in here so don’t worry about that right now the next thing we’re going to do is we’re going to select column g by clicking on its column heading so the entire column is selected and on the home tab in the number group we’re going to click on the dollar sign for the accounting number format and then the last thing we’re going to do is we’re going to select column headings a through h and i just clicked on a and dragged across and we want to auto fit these columns with right so that’s what we want to do we want to auto fit and we do that by going to the cells group over to the right on the home tab of the ribbon and in the cells group you’re going to select the format drop down and from that drop down you’re going to select auto fit column width so now every column is wide enough to display everything in the column and if we were to make entries and they were wider than what they are now it would automatically adjust the column width now typically when i’m done recording my macro before i click stop recording i just like to click on any blank cell just to make sure that nothing is selected we’re going to go back to the developer tab and choose stop recording in the code group typically you cannot undo the effects of a macro so we just recorded this macro while we were recording it we were doing the steps now what i’d like you to do is i’d like you to press ctrl z which is undo and the only thing it undid was the column auto with everything else our headings are there they’re bold and centered we have our accounting format and column g and it just undid the column autofit so we want to redo that step so we’re going to just do control y which is redo and we end up again with the result of our macro you will learn some workarounds for undoing the effects of a macro later on but for right now we want to test this macro on a different sheet so we’re on the inventory sheet tab in this file we have two other sheets let’s go to sheet two sheet two has the same data that was on sheet one initially when we came in here and this is a good sheet to test our macro on so we can go on the developer tab in the code group this is where you can use the macros button to access any macros that you may have in this file so we’re going to click on macros and we only have one ad formatting it’s already selected and on the right side you’re going to click the run button so at the end of the day you should have those column headings they should be centered and bolded and the auto width the column auto width is in effect and you have the accounting number format in column g so while we were recording our macro it was generating visual basic code in the background visual basic for applications code in the background now on the developer tab we can get to visual basic you will learn other ways of starting macro recording without using the developer tab you’ll learn shortcuts throughout the course on how to switch back and forth between visual basic for applications and the excel interface but for right now on the developer tab the first button in the code group is visual basic let’s go ahead and click on it visual basic for application opens in its own separate window and so you literally have this window and your excel window open at the same time and we’re just going to focus on the vba window right now and so before we get started in here we’re ultimately going to edit the code behind the macro we just recorded but i just want you to get acclimated to this environment this is known as the visual basic editor or vbe just so you know it doesn’t have a ribbon interface it never updated it still has the old school menu bar where you have file edit view and everything and then underneath it it has some tool bars that we use this was like pre-ribbon days how excel itself and all the other office applications used to be on the left side of your screen you may have two different panels open you have a project explorer window at the top and a properties window at the bottom if you don’t have both of those panes showing you can go up to the view menu and you can click on project explorer and then come back to view and click on properties window and you can see the shortcut keys for both of them or you could do ctrl r to bring up project explorer and f4 to bring up the properties window let’s talk about the project explorer window first for every excel file that you have open you will have a separate project so right now i only have one excel file open it’s the vehicles dot xlsx file so it creates its own vba project and it has the name of the file afterwards now i may have a few things here because i have some add-ins that create projects as well if you don’t have them you’re fine but this is a cautionary tale here because there have been times when i’ve had like five excel files open and i find myself doing some coding and then i look and see that i’m doing it in the wrong files project so i can always cut and paste it to the right project but you do want to be aware of what project you’re working in when you click on vba project vehicles.xlsx it expands and you can look up at the title bar and it lets you know that it is in that project now so just kind of get in the habit of making sure you’re in the right project it has two folders in that project microsoft excel objects those are your sheet tabs so we had the inventory sheet we had a sheet 2 and a sheet 3 and then the entire workbook is an object as well so it lists that then you have another folder called modules that folder was created when we started recording our macro actually when we finished recording our macro it created that modules folder your code is stored in modules so expand the modules folder and it created a default module it names it module one and if we were to go back over to excel now and record another macro it would also put it in module one if we were to close excel saving it properly and then reopen it and start recording a macro it would create module two it would always give it the next number module two module three you can also rename modules in here which you’ll see in a little bit so if you click on module 1 you will actually see the code window and that is everything that it created while we were recording our macro so it converted our steps into vba code and we’re going to edit this in just a little bit but i want you to have your editor window be as comfortable an environment for you to be working in so one of the things we’re going to do is we’re going to go up to the tools menu and click on options we will revisit some of these settings later in the course but when you go into options you have four tabs editor editor format general and docking one thing one setting that i want to make sure that you have checked well like make sure all of the code settings have a check mark in front of them and as we work in the course i’ll explain what these settings mean your windows settings you can actually have all of those checked as well go to the editor format tab and this is where you can set your font size so i have my font set to 14 point which is comfortable for me i can bump it up to 16 and then at the bottom i’m going to click ok so font size and if you want to go back in and change the font i’m cool with the code looking font courier font um that works for me i’m just so comfortable with it it doesn’t bother me so i just wanted you to know that you can change some of those settings in the environment for yourself and for the ones that we are going to be utilizing in the course we’ll go back in there and talk about what those settings are actually doing the other thing we want to customize before we edit our code is we want to add three icons to the toolbar that we’ll be using frequently throughout this course so what i’m going to do is i’m going to just right click in a blank area of any toolbar and go to customize and the customize dialog box opens you want to make sure you’re on the commands tab at the top and then you’ll see a list of categories that mimic the menus that are up there file edit view insert so basically you’re gonna have to tell it where it resides on the menu in order to add it to your toolbar so under categories we’re gonna select edit and then all the commands from the edit menu show on the right side of your screen and on the right side of your screen you’re gonna scroll down we’re looking for two commands the first one is comment block and the second is uncomment block so what i’m going to do when i find comment block i’m going to click and hold on it and i’m going to drag it right after the question mark on my toolbar and then i’m going to grab uncomment block and drag it right after comment block now we have one more command that we’re going to add up there under categories we’re going to click on debug and the command at the top of the list is compile project i’m going to grab that and drag it right after uncomment block so i have comment block uncomment block and compile project when we get ready to use those commands i will explain what they’re going to do for us they’re going to be kind of helpers for you let’s examine the code that was generated while we were recording our macro first of all let’s look at the information starting from the top we’ll talk about the option explicit statement a little bit later in the course don’t worry about that right now what i want you to focus on is the name of our code ad formatting it comes after the word sub and you’ll notice that both option explicit and sub are in blue that means those are visual basic for application keywords they mean a specific thing in this code and should only be used for their intended purpose it creates what’s called a sub procedure to contain our code so it starts with the sub statement and if you scroll down at the very bottom it concludes with an end sub statement you have to have both if you have a sub and not an n sub you’re going to get an error message but it did this automatically while we were recording our macro it gave it the name that we named it ad formatting and then after it it put a set of parentheses some procedures have parameters that need to be defined and that would happen inside the parentheses we’re not there yet but that’s why they’re there and they need to be there then you’ll notice several lines that are in green beginning with apostrophes those are comment lines so when we were filling out the record macro dialog box right we named it ad formatting and we put a description in add column headers bold and centered apply accounting format blah blah blah comments are meant to describe your code it’s a good idea to comment your code liberally i’ve written code before and didn’t comment it and six months later i had to figure out what the intent of the code that i wrote was so comments are really good and so when you put a description in the record macro box it comes in as comments they’re informational when you run your code or execute your code the comments do not execute and we can do a little bit of clean up there um we don’t need that blank apostrophe at the top so i’m going to just delete it and then i’m going to delete the two underneath because they’re not necessary either and then it starts our code well the first thing we did is we right clicked on row one and inserted a new row so that’s rows one colon one dot select and then selection dot insert right and so it moved everything it shifted everything down and gave us the blank row at the top and then we clicked in cell a1 and we typed it in so that’s range even though it’s a cell range a1 dot select notice the quote the double quotes inside the parentheses there surrounding a1 and an active cell which is now cell a1 don’t worry about formula r1c1 right now but activecell.formular1c1 equals whatever we typed in that cell then b1 c1 d1 e1 f1 g1 h1 same thing and then we selected row one again so at this point we’re all the way down here in the code when we selected row one again and once we selected it we made it bold so before that selection dot font dot bold would equal false when we made it bold it changed the false to true and then you have what’s known as a with end with block starts with the word with and if you go down several rows it ends with an end with statement and this is an interesting thing you’ll learn more it’s known as a construct right you’ll learn more about this construct as we go in the course but this allows you anything that you do in the paragraph group on the home tab is included in this width block bold is not in the paragraph group on the excel ribbon right but your alignments are the ability to wrap text your orientation whether you’re going to indent merging cells all of that is included in the paragraph group on the home tab in excel so all of these settings here are those things that mimic the paragraph group and what we did is we centered those headings so what happened is when we did that the dot horizontal alignment equals excel center it was changed from excel left because typically things are left aligned in a cell so all of these other settings are the default settings the only thing that changed was excel center one of the things you you want in your code is for it to be as concise as possible we don’t need everything that’s in that with block we we really would just keep the horizontal and vertical alignment but we didn’t do any wrap text orientation indenting any of that kind of stuff so we’re going to select the lines from wrap text all the way down to the dot merge cells equals false statement we need to leave that end with statement underneath that so once you have dot wrap text through dot merge cells line selected go ahead and press delete and then i’m a little ocd so i’m gonna shift tab to get the end with statement back in line with the with statement so if i have to troubleshoot code i want to make sure that i can see with and end with at the same margin if that makes sense and when we start putting our code together i’ll be walking you through how it should be formulated so when we were recording our macro we formatted column g as currency column g is the dealer cost column and we should have formatted the manufacturer’s suggested retail price column column h well it says currency in here but it’s actually accounting okay so we want both of those columns to be formatted in accounting underneath your end with statements you’ll see columns and then in parentheses in double quotes g colon g dot select the second g you’re going to change to an h so now we’re telling it when this macro runs select both of those columns and apply the format on both of those columns and that’s what we want to do and then we have where we selected columns a through h and we did our columns autofit and then i said at the end before we stop recording click on any blank cell whatever cell you clicked on it will say range and then in parentheses and double quotes that cell dot select we’re going to change whatever that cell is that cell reference we want it to be a one and so we just modified the code that was generated for our macros now we’re just going to modify our comment our second comment line here to make it accurate so apply a counting format to columns we’re going to make that plural columns g and then and h and when you move away from that line it will turn green again indicating that it’s a comment now that we’ve edited our code and we’ll test it shortly um we want to change the name of module one you want your module names to be as descriptive as possible um it’s kind of like folders that you’re organizing your code in so we’re gonna have several modules throughout this course and we don’t want them to be module one module two module three module four so we’re gonna use the properties window to make some changes to properties so we’re going to start with renaming module 1. in your project explorer window click on module 1 and then if you look down at your properties window it says properties for module one the object that we have selected and the only property a module has is the name property so if you double click on name it highlights module one for you and we’re going to talk about a prefix that we’re going to use here to identify it in a list as a module we’re going to use lowercase mod mod to indicate that it is a module and then we’re going to give it its name and that’s going to be capital f and the rest of the word first so mod first if we’re looking at a bunch of stuff in a list we’ll know that it’s a module because it has that three character prefix of mod and then when you press enter you’ll notice that it updated the name of the module in the project explorer window you can change the names of sheet tabs in here as well so in your project explorer you have that microsoft excel objects folder where you’re seeing your three sheet tabs we have one and it’s called sheet1 and in parentheses inventory sheet1 is how excel knows that sheet inventory is what it was renamed to but the system identifies it as sheet1 and then we have sheet2 and we have sheet3 we’re gonna click on sheet3 and in the properties window you’ll notice that there are two name properties the one at the top is indicative of the system name right so what excel knows is that name is the name property at the top my arrow got a little skewed there and then you have a name property lower down in your properties window and the one that’s lowered down is whatever you decide to name that sheet so the second name property the one that is not in parentheses you can double click right on name and it selects sheet three and we’re going to type new vehicles two separate words just like you would do it in excel if you were renaming the sheet tab and press enter so notice in your project explorer now you have your sheet1 which had already been renamed to inventory sheet 3 which we just named new vehicles we added the compile project icon to our toolbar and what that does is it kind of goes through your code for you and it checks to make sure that everything is okay if there’s a problem it will let you know by highlighting that problem so what we’re going to do is make sure you’re clicked anywhere between your sub and in sub statements you can be anywhere between those two statements and go up to your toolbar and find your compile vba project icon that we added there and just give it a click and it dims out and you didn’t get any notifications of anything wrong so your code is good good habit to get into good icon to have on your toolbar so now that we’ve modified our code we want to save this file and if you look up at the top you know your title bar is vehicles.xlsx the standard four character excel workbook extension if we don’t save this file in the right way it’s as if we didn’t record a macro and we wouldn’t have any vba code in it so you have to save it as a macro enabled workbook as a matter of fact let’s check this out on the toolbar you have a save button and notice when you hover over it it wants to save the file go ahead and click on that save icon and you get this pop-up message that says the following features cannot be saved in macro free workbooks and then it says vb project that’s your visual basic project to save a file with your code in it click no and then choose a macro enabled file type to continue saving as a macro free workbook click yes we are going to click no when you click no it gives you the save as dialog box now we’re going to leave the same name vehicles but we need to change the type right underneath the file name where it says save as type click on excel workbook and we want the second choice excel macro enabled workbook again if we just save this as a regular excel file it’s not going to keep your code so we need it to be macro enabled and part of that is for your security which i’ll explain in just a few moments and after we have it set as excel macro enabled workbook we’re going to go ahead and click save so now if you look up at the title bar it has a different extension dot xlsm that’s your macro enabled excel workbook extension and so it will retain our code and now that we’ve saved it as macro enabled we’re going to switch over to excel to test our edited code there’s a couple of ways that you can switch over to excel back and forth between excel and visual basic first of all and i’m not going to use this way but the first button on the toolbar is excel so i can use that to switch back over to excel i’m a real shortcut key person so alt f11 will also switch me back and forth between excel and the visual basic editor so i can just keep doing alt f11 and you see that it switches back and forth between the two separate application windows that are open when i am back in excel i’m going to do control o to get the open dialog box to display so this is where we’re going to open the vehicles 2 file and by the way if you look at my screen we have two files we have vehicles and vehicles too right we have two versions of vehicles i’m pointing to the macro enabled worksheet and then we have our original one which is just a regular excel file and if you look closely the icons are slightly different the macro enabled worksheet icon has an extra little thing in its lower right hand corner than the other regular excel icons so we want to open the vehicles to excel workbook and so we have two excel files open we have our macro enabled vehicles and we have vehicles too earlier when we went to record our macro i said if you save your macro in the personal macro workbook it opens behind the scenes every time you open any file in excel this is a workaround we save that macro in the vehicles file but we can use it in vehicles too as long as the vehicles dot xlsm file is open i don’t typically save in the personal macro workbook there are occasions that i do that if i’m going to use it across a wide range of files but typically my files are structured so differently that macros from one won’t work well with others so what we’re going to do here is we want to use the macro that we recorded the add formatting macro we want to use it in this file another way of getting to your macros instead of going to the developer tab is you can go to the view tab of the ribbon and all the way to the right the last button is macros so check this out if i do the drop down arrow under macros i can view or record them um and i’m going to just go to view macros notice that it gives the file name exclamation point and then the name of the macro that vehicles.xlsm file has to be open and it’s showing you macros in all open workbooks if we did the drop down and we choose this workbook right it’s showing there as well because the other one’s open so you can access it but it really resides in that other file vehicles the macro enabled vehicles file and so we’re going to just click on vehicles xlsm exclamation point ad formatting and choose run so you’ll notice that it gave us our headings they’re centered and bolded notice one of the changes we made is we had it do the accounting format on the msrp column right so that worked we also cleaned up some comments and stuff in there as well so you will see that if you have the file that contains the macro open you can access it from other excel files that you open also notice that the active cell is cell a1 because we changed that as well we’re going to close this vehicles 2 file without saving any changes to it so i’m going to just close that file when it prompts me i’m going to say don’t save the changes and i still have my macro enabled vehicles file open so in our macro enabled vehicles file first take a note look at your um sheet tabs so we renamed sheet 3 new vehicles and that’s what shows on the sheet down there we did that in the properties window in the visual basic editor so another change that we made in there that you’re seeing in here and i mentioned earlier and we saw that you can’t really undo the effects of a macro when we tried to do it it didn’t really undo it it only undid the column autofit right so we saw that but i said that there is a workaround like let’s say on the sheet 2 right that we wanted to test the macro and it’s already been run so we certainly don’t want it to put another row in here right at the top so on sheet 2 what i’m going to have you do is just delete row one so i’m just right clicking on the row header and choosing delete and now i’m gonna go to the view tab drop down view my macros and i’m going to rerun this macro so it puts the headings back in right we see that we have the currency format on or accounting format on the columns g and h and it put us in cell a1 so you would have to kind of manually delete the effects of a macro to rerun it on a sheet like that we’re going to go ahead and right click on the sheet2 sheet tab and we want to delete sheet 2 and confirm the deletion so now we have two sheets in this macro enabled file we have our inventory sheet and we have our blank for right now new vehicle sheet let’s go ahead and save and close this vehicle’s file now we’re going to explore what happens when you open a file that is macro enabled so what i’m going to do is i’m going to just relaunch excel and go to open and navigate to wherever you saved your macro enabled vehicles file and when you’re there you can go ahead and select the vehicles macro enabled file i’m going to just double click on it here and open it now because it’s macro enabled you’re going to get the yellow band underneath the ribbon that says security warning macros have been disabled and then there’s an enable content button microsoft does this by default that’s the default security settings for a file that contains macros that has been saved as macro enabled and it’s to kind of protect you so if you receive a file from an unknown source you probably do not want to enable the content it’s not the typical way of delivering viruses to computers anymore but it used to be delivered via macros that were infected via viruses so if it’s from a trusted source you can go ahead and enable the content which we’re gonna do now that can be annoying if you’re working with a lot of macro enabled files and you know the people that are creating them maybe your colleagues yourself you all work in teams or something like that so we’re gonna modify a truss center setting and you’ll see how this works so what we’re going to do is we’re going to go to the file tab and all the way at the bottom on the left you’re going to go to options on the left side of excel options at the bottom you’re going to click on trust center and then on the right you’re going to click on trust center settings so the first thing i want you to see here is on the left side click on macro settings so the default setting is to disable vba macros with notification that’s what the yellow band that we got and i wouldn’t suggest changing that what you can do to make it a little bit more convenient and you don’t get that yellow band when you’re you know using files back and forth amongst your teammates or colleagues is we can set either trusted documents on the left or trusted locations i always do trusted locations it’s more global than trusted documents so click on trusted locations and i’ll tell you um how this works right so i set up a folder on my desktop it’s called files for video description and it’s where i’ve stored all the files that we’re going to be using during this course and i want to set that as a trusted location so any of the macro enabled file formats that we’re going to be using during this course that folder and its any subfolders will be a trusted location so what i’m going to do underneath here is i’m going to click on add new location toward the bottom right and then i have to navigate to that location so i’m going to just do that i know it’s on my desktop so you’re navigating to wherever you put the files that you’re going to be using so the folder name for me is files for video description and i’m going to click ok and then i’m going to say subfolders of this location are also trusted so any folders within that folder would also be trusted and then i’m going to click ok and once i do that it shows up in this list of trusted locations so it could be a shared network drive if you’re all of your files that you and your team are working together on are in a specific shared network drive you can use that as a trusted location so that you don’t get the yellow warning and have to enable content at the bottom we’re going to click ok and then let’s close and reopen this vehicle’s macro enabled file so when i open it it’s in a trusted location now so i don’t get the yellow banner under the ribbon i don’t have to enable content and i didn’t disable the default trust center setting so that’s still in place but this file is now in a trusted location so i’m able to open it with no problems just to recap what we covered in this introductory lesson one on the getting started section we reviewed what you can do with visual basic for applications you learn that it is an object oriented programming language that is part of the microsoft office suite you learned that it’s the code that is produced in the background when you record a macro you also learn the advantages of visual basic for applications over recording macros we moved into customizing the ribbon to add the developer tab and we recorded a macro in excel that added and formatted column headings on a worksheet we then toured the visual basic editor environment and were able to edit the vba code produced by our recorded macro we also changed some vbe settings including font size and we saved a macro enabled file you tested your edited macro and lastly modified some trust center security settings by adding a trusted location you also understand the importance of saving a macro enabled workbook or else all of your work would be lost before we get hands on again in lesson three we need to go over some background information and i should mention at this point that this slide deck is also in the video description and you can use it for your future reference no one is expecting you to memorize all of these things so we need to talk about the excel object model you need to understand collections and how to reference objects and also how to simplify object references you learned that vba is an object-oriented programming language and we discussed that that means that excel is an object that contains objects objects that have attributes known as properties can be manipulated through vba and objects also have methods which are actions that can be performed on them via vba so this is a foundational lesson here and again you’ll be able to reference the slide deck so the excel object model hierarchy is a hierarchical structure of excel and all its objects with excel the application residing at the top of the hierarchy so you can see on this slide that we have the application at the top of the hierarchy here on the left and then underneath the application you would have add in objects window objects workbook objects and then we expand on the workbook object a workbook object has a name a visual basic project a workbook also contains worksheets worksheets can contain comments hyperlinks names ranges and pivot tables for example so a simplistic example is over on the right where you have excel the application which is an object at the top of the hierarchy then you have a workbook a worksheet is an object of a workbook and a range is an object of a worksheet and you’re going to be seeing this as we’re working in this video course the next thing you need to understand are collections now collections are key in vba programming a collection is simply a group of objects of the same type a collection is also an object collections are useful when you need to work with not just one worksheet but with a couple of them or all of them you’ll learn later that your vba code can loop through all members of a collection and do something to each one we have a table that shows the collections the most commonly used collections in visual basic so you have the workbooks collection and it would be all currently open workbook objects so all currently open cell files are part of the workbooks collection you have a worksheets collection and it’s a collection of all worksheets contained in a particular workbook the charts collection is a collection of all chart objects so these are excel worksheets that only have charts on them a collection of all chart objects contained in a particular workbook object a chart sheet is not part of the worksheets collection as it is not considered a worksheet it is in fact a worksheet but it only has a chart on it and then you have the sheets collection plural a collection of all worksheet objects contained in a particular workbook object so you have a worksheets collection and then you have a sheets collection what is the difference the sheets collection contains all worksheets and all chart sheets whereas the worksheets collection is just all of the worksheets and then the charts collection is just all of the chart sheets the sheets collection combines them all so you can reference these things sometimes across different collections as you will see when we resume with our hands-on stuff in order to access the objects that you want to reference in your code you’re going gonna have to learn how to reference them so you can work with an entire collection quite easily but it’s most often the case that you’ll need to work with a particular object in a collection for example if you need to work with a particular worksheet you’ll need to know how to reference it when it comes to referring to an object in a collection you can either use its name or its index number to reference a single object from a collection you put the item’s name or index number in parentheses after the name of the collection so you have two examples on this slide that refer to the exact same object the first worksheet in the workbook so worksheets and then in parentheses and double quotes sheet1 by name or worksheets and in parentheses 1 by index number when you refer to an object by its name the name must be enclosed in quotes when referring to an object by its index number you need to know that the first object in the collection has the index number of one using a workbook with three worksheets as an example sheet one has an index number of one sheet two would be two and sheet three’s index number would be three and index numbers are not enclosed in quotes we’re going to spend a few slides on referencing objects so each worksheet in the worksheet’s collection is an object in two collections which we mentioned already worksheets and sheets each chart sheet is an object in two collections charts and sheets so there’s another example of how to refer to sheet1 you could use the sheets collection instead of the worksheets collection like a typical office application you get several ways of referring to the same object you know there’s multiple ways of getting the same thing done in excel and along the way you’ll find a way that works best for you although i do have some suggestions so all excel objects are under the application object in the hierarchy remember excel the application is at the top of the hierarchy you access these objects by moving down the hierarchy and connecting each object with the dot operator you can even access the value of a particular cell on the worksheet by using the range object and you saw that when we reviewed our code there is no cell object in vba really it would be the range object even with one element and here are additional examples on this slide of object references so referring to a specific workbook application dot workbooks and then in parentheses and double quotes the name of the workbook including its extension and then a specific worksheet in the workbook if you’re using the entire hierarchy application.workbooks the name of the workbook and then dot worksheets 1 the first sheet referring to the value of a cell your application.workbooksname.worksheets1 dot range a1 dot value the last example is known as a fully qualified reference it specifically refers to all the objects in the hierarchy from application down to range so again you have this power point in your video description for future reference now i’m going to tell you about simplifying object references you want it to be as concise as possible and i i mentioned that earlier it’s easier to write and easier to troubleshoot should there be any issues so visual basic for applications can assume some of the object references for you for example it assumes that the workbook’s collection is within the application object and that means that you don’t have to reference that object in most cases another example here is that if you only have one workbook open one excel file open it is the only one in the collection so vba assumes it is the active workbook and you don’t have to reference the workbooks collection if the first worksheet is the active sheet in the workbook you don’t have to reference the worksheets collection as vba will assume it so gonna go over these examples the code that refers to the value of a cell so starting with the application application.workbooks the name of the workbook in parentheses and double quotes dot worksheets 1 by index number dot range a1 dot value if vba is assuming the application object it would just start with workbooks in the name of the workbook so on and so forth if it’s the only open excel file it will assume the workbooks object so you can just start with worksheets and if the first sheet is the active sheet all you would have to reference is range a1 dot value and so the last example is the most concise and therefore preferable you don’t want to have to type all of this line unless you just like to type like that my arrow drawing is getting horrible here but you don’t have to type all of that why would you want to type all of that maybe fat finger to keyboard whatever set of circumstances could happen when all you would have to type would be this and also if someone is coming behind you or if you have to troubleshoot the code this is a lot more difficult to troubleshoot because it has more on this line than the last and preferable example now that we’ve gained an understanding of the excel object model hierarchy collections and how to reference objects we’re ready to dive into lesson three which is working with procedures and functions previously you were introduced to modules and sub procedures when we edited the vba code that was generated by the macro we recorded you’re going to get more in-depth knowledge on those two topics during this lesson so we’re going to start by doing a deeper dive into modules and then procedures then we are going to move on to creating a standard module as well as creating a sub procedure you’ll learn different methods of executing procedures or running them including how to call procedures in this lesson then we’re going to create a function procedure and we’re going to use the immediate window within the visual basic editor to run it you’re going to learn how to get context sensitive help within the visual basic editor which is really cool we’re going to use the vehicles macro enable file that we created as well as another file in the video description and it’s another excel file named received vehicles those two files need to be in the same directory for this lesson you saw earlier that when we recorded a macro vba created a module to store the visual basic code in and so we discussed how a module is a container of sorts that stores your vba code well there are two different types of modules there are class modules which allow you to create your own objects and we’ll begin using class modules when we get to lesson seven and then there’s standard modules one of which you already saw and it uses the application objects we also discussed that our code was put in a procedure specifically in our case it was a sub procedure began with the sub statement and end it with the n sub statement so a procedure tells the application what to do as it defines a specific task specifically it’s a named group of statements that are run as a unit for example a block of code a sub procedure defines specific tasks like our ad formatting sub procedure it told the application what to do so insert a new row and then we typed in the headers that kind of thing when responding to events you’ll learn about these later they can be known as event procedures there are also function procedures and you’ll be introduced to creating function procedures during this lesson a function procedure actually returns a value property procedures are outside of the scope of this course but they exist and they’re are series of statements that allow a programmer to create and manipulate custom properties for example read-only properties for forms before we dive in we’re going to go over the naming rules and conventions for procedures now the rules cannot be broken conventions are suggestions but just so you’re aware of them you need to know what they are and i use conventions as well as the rules so if you inherit an excel macro enabled workbook and you’re looking at somebody else’s code they may be using the conventions so anyway let’s go over this and then we’ll get hands on and learn more about procedures and modules by recording another macro so when we’re naming procedures the name may be up to 255 characters it can be alphanumeric the first character must be a letter you can’t use any spaces or any of the special characters listed on the slide and the names must be unique within a module so you can’t have to add formatting sub procedures within the same module it will disallow it you just can’t do it and then the conventions begin the names with a verb use proper case for each word within the name when two or more procedures are related place the words that vary at the end and there are some examples so you could name a procedure close workbook get new inventory get selected date begin and get selected date end so if you’re looking at these in a list the ones that have the words that vary at the end would still be all together in the list so you know that they’re related procedures i’m back in the vehicles macro enabled file that we created earlier and i’m going to switch to the new vehicles sheet tab now we’re going to record a macro again to get this lesson started and along the way and going forward beyond this lesson whether we’re recording macros or we’re writing vba code from scratch we’re also going to be using properties and we’re going to be using methods now you saw properties we use properties to change the name of a module we use properties to change the name of this particular sheet tab and a method is an action that is taken on an object so you’ll learn how to access methods along the way as well and i want to show you another way of starting a macro recording without accessing the ribbon so i’d like to direct your attention to your status bar and it’s at the very bottom underneath your sheet tabs of your excel screen so the area all the way at the bottom now it starts with ready you may or may not have num lock and some of the other stuff that i have on my status bar but in particular i’m interested in making sure that you have this icon i don’t know it looks like a spreadsheet with a little camera on it in a way and if you don’t have it i’m going to show you how to get it down there you can right-click in a blank area of the status bar and you get the customize status bar menu and notice that a lot of the things on my customize menu are already checked which means they will show in my status bar as appropriate so for example caps lock and num lock my num lock is on and that’s why it’s showing down in the status bar my caps lock is currently not being held down i’m not enabling caps lock on my keyboard i should say so that one is not showing there but where i to enable it it would show in my status bar the setting that we’re interested in having you have down there is macro recording that’s that icon so if it doesn’t have a check mark in front of it and you click on it it will check it if it does and you click on it it unchecks it like it just did on mine so i’ll click on it again and then you just click on any blank cell you want to make sure you’re in cell a1 before we start recording this macro and what we’re going to do is we’re going to go down to that icon in our status bar that looks like a spreadsheet with a looks like a camera lens to me but if you hover over it it says no macros are currently recording click to begin recording a new macro and we’re going to do just that and it gives us our record macro dialog box so you could start this process from the developer tab or you can start it from that icon on your status bar now for this macro we want to name it using our rules and conventions so we’re going to start with a verb capital g get capital n new capital v vehicles because remember you can’t have spaces you could use the underscore character but i prefer to just use this convention we’re not going to use the shortcut key we’re going to store it in this workbook and we’re going to click in the description box and we’re going to type copy and paste data from the received vehicles file and again it once we click ok it’s ready to follow our instructions so go ahead and click ok notice that the icon on your status bar now looks different and it looks like a stop button and if you hover over it it says click here or a macro is currently recording click to stop the recording so we can start and stop it from the status bar as well so what we want to do is we want to open the received vehicles file that is in the same directory as this file and i’m going to use the shortcut combination control o to bring up my open dialog box i’m already in the proper directory for myself and i’m going to just double click that received vehicles excel file to open it and once it’s opened you’ll see that it has a limited amount of data there’s some then numbers and dealer costs and so what we’re going to do is we are going to click anywhere on the spreadsheet it’s only on sheet 1 and we’re going to hold down our control key and type the letter a and the letter c so a selects everything and c is the copy command and now we want to switch back to our vehicles macro enabled file so one way to do that is we can go to our view tab on the ribbon the next to the last button is switch windows and i’m going to use i’m going to just click on vehicles to switch back to that file we’re already in cell a1 in the vehicles file on the new vehicles tab i’m going to just do control v as in victor to paste in the information we have one more step we’re going to take before we stop this macro recording i’m going to switch back to the received vehicles file and i’m going to just close it and now i can go down to my status bar and stop the recording before we switch over to the visual basic editor to look at the code that we just generated just wanted to give you some examples of methods so i’ve said that a method is an action that is taken on an object so clear contents is a method of the range object it would empty the cells delete everything that’s in the cells clear all of everything that’s in the cells in the range add is a method of the workbook’s collection object and it’s used to create a new workbook and then you have activate and that’s a method of the worksheet object it’s used to activate a worksheet you know if i click on the inventory sheet tab i’m activating that sheet so examples of how you access the methods you start with the object so range a1 colon b11 in parentheses and double quotes you use the dot notation and then you can access the method clear contents workbooks dot add worksheets you have to give it the name or the index number of the sheet dot activate so we’re seeing the dot notation used to call methods as well and when you’re in the editor and you do the dot it sometimes gives you and usually gives you built-in help that it will list the methods that are available for that particular object i’m going to just delete this text box off of my spreadsheet then i’m going to alt f11 to switch over to the visual basic editor the first thing i want to point out is the project explorer window the upper left corner and if you look in your modules folder now we renamed what used to be called module 1 mod first so because we had closed the file and reopened it when we recorded this macro it created a new module since module 1 wasn’t in use anymore it used that and so we would have to go there to find the code that we just recorded the macro for so i’m going to switch to module one and it created a sub procedure we named it get new vehicles we put stuff in the description explaining what it is and you know we can get rid of those extra green lines that are preceded by apostrophes that don’t need to be there just to kind of clean up the code of course you want it as concise as possible when we did control o the open command it did this activewindow.close and then workbooks.open right so open is a method of the workbooks object close is a method of the active window object so we did workbooks open we had to give it the name of the file and these characters here so it says file name followed by a colon equal then there’s a space and an underscore the space and the underscore means the rest of this syntax the rest of what is needed here is on the next line it’s called the line continuation character space and underscore combined like that in visual basic is the line continuation character and that’s what we have after file name colon equal if we didn’t have that there we would get an error message because it’s saying hey you gotta give me the path to the file name including the file name so it just goes to where i have my on my hard drive users trish desktop files for video description and then it’s in that received vehicles the name of the file is receive vehicles.xlsx and that line starting with c begins with an open double quote and ends with a closing double quote and then i scrolled a little bit when i got over to that other file receive the vehicles and it took note of that that’s this active window small scroll down and then we did control a to select everything which is a 1 through b11 dot select select is a method of the range object and then we have range a2 activate and then we did copy so we actually just did control ac and it created those three lines of code and then after we copied it we switched back over to the vehicles macro enabled file we click in cell a1 and then we pasted what was on the clipboard onto the active sheet starting in cell a1 and then we went back over to received vehicles file calling the activate method and then we said close that window and then of course with every sub statement you have your n sub statement at the bottom now that we’ve reviewed this code that was generated from us recording that macro there’s a few things we want to do we want to rename module one so it’s more specific and we want to create a new sub procedure from scratch in the newly named module so let’s start in our project explorer window i’m gonna just click on module one go down the properties window double-click name and we’re gonna call this mod remember that three character prefix which is a convention not a rule mod new vehicles and i’m using the proper casing all mushed together and then i’m going to press enter so we have mod first and mod new vehicles in mod new vehicles click at the end of your in sub statement and press enter we’re going to go to the insert menu and we’re going to choose procedure and this is a microsoft product so this is just one way of doing this in the add procedure dialog box we’re going to start work our way from top to bottom right in the name box we’re going to name this procedure move cells so capital m capital c mushed together procedure name move cells the type defaults to sub for a sub procedure and we’re going to talk about the scope in a little while but we’re going to leave it on public and we’re going to just click ok so a couple of things happened it automatically put a dividing line between your get new vehicle sub procedure and this new sub procedure and it has the keyword public because we did it from within the dialog box and again you’ll learn about scope in a little while and that’s what public speaks to it gave us our sub and our n sub statements and of course the open and closing parentheses at the end of the first line so what i’m going to have you do is i’m going to have you click outside of the closing parentheses public sub move cells press enter twice and then press the tab key on your keyboard i talked about code being concise but also you need to know this you’re going to probably end up spending more time troubleshooting code than actually writing code it’s just the way it goes and there are certain things in terms of how you format you your code that makes it easier to review when you’re troubleshooting and indentation is one of those things i like to look at my code and see the public sub and in sub statements at the same margin and that’s what we’re doing by indenting here so now you’re going to type a few lines of code four lines to be exact and you can take them off of my screen the first line is going to be columns plural open paren open double quote b close your double quote close your paren so columns b so we’re referencing column b you’re going to use the dot notation and start typing select and if i don’t type it with a capital s when i press enter at the end it will automatically capitalize it for me and now we’re going to type selection dot cut enter i’ll explain it all when we get it in and then we’re going to type columns open paren open double quote g close the quote close the paren dot select active sheet dot paste and typically i like to have a blank line after public sub and a blank line before end sub so my previous block my get new vehicle sub procedure i’m going to just get that blank line above the n sub statement so basically it’s going to select everything in column b and it’s going to cut it put it on the clipboard and then it’s going to select column g and it’s going to paste what was in column b into column g congratulations you just wrote four lines of vba code from scratch now earlier we added some buttons to our toolbar and we used one of these earlier be anywhere in between your public sub and your in sub statements and go on and click that compile vba project that we put up on the toolbar earlier and again if there were any errors in your code you would be notified of it it’s kind of line checking your code you accessed the select method of the columns object and once you have something selected it is known as the selection object so you access the cut method of the selection object and the paste method of the active sheet object in that code block so let’s go ahead and save is save on the toolbar or you could do control s and then we’re going to do alt f11 to switch back over to excel so we can test this code there is another way that you can access your macros in here so earlier we accessed our macros from the developer tab by using the second button macros we also accessed it from the view tab of the ribbon by going to the last button which is macros well there’s another way of doing it and it’s a shortcut key so you can use alt f8 to open the macro dialog box and so in here you’ll see your ad formatting macro your get new vehicles macro both of those were based off of macro recordings i should say and then move cells is listed in here even though we created that sub procedure from scratch so this is just another way alt f8 that you can open the macro dialog box and we’re going to double click the move cells procedure so you could click it once and then choose run or you could just double click it to run it and it did exactly what we asked it to do just very quickly selected everything in column b cut it and then pasted it into column g so the next part we’re going to do is going to further our automation what we want to do is we want to edit the add formatting sub procedure so that it works on this sheet the new vehicle sheet that we’re currently on and before we do that we’re going to delete everything on this sheet new vehicles we’re going to do control a to select everything and then we’re going to just press delete and then just click in cell a1 now we want to go back over to the visual basic editor alt f11 will get you there and in the project explorer we’re going to double click mod first which is where our ad formatting sub procedure resides now notice the first two lines in our code block that’s when we right clicked on row one and we inserted a new row well we don’t want to do that again we want to keep the row headings that we already have so we don’t want it to insert a blank row above row one which now contains the headings so we need to delete just those two lines of code rows one colon one dot select and selection dot insert shift blah blah blah the first two lines so i already have them selected and i’m going to delete those two lines and then what i’m going to do is in your project explorer window go ahead and double click mod new vehicles again to get back into that module where we have our get new vehicles which is the result of a macro and notice when you do a macro it gives you in green that it’s based off of a macro you didn’t create this code and then whatever description you put in right so we should probably add comments just so i can be a good example here to our move cells sub procedure i’m going to click at the end of the public sub line and press enter twice and then i’m going to type an apostrophe now when you type an apostrophe it’s like saying the visual basic hey heads up the next thing i’m going to type is going to be a comment which means you’re not going to execute it when the code executes it’s just there for informational purposes and we’re going to say that this is going to select and cut contents of column b and paste into column g and then when i press enter it will turn that line green because we started with an apostrophe before we do the next bit i just want to go over that there are different ways to execute your procedures or run them within the application or in vba so we’ve used some of these already um we’ve used the macro dialog box the ones that are highlighted on in yellow on this slide we will use during this course so you’ll later on we’ll use the run sub user form button on the vbe toolbar we’ve already used the macro dialog box we’re going to call the procedure from another sub procedure which is the one the example we’re going to do next later on we’re going to add a button to the quick access toolbar in excel you can also attach the procedure to an event which you will learn later and also you can run it from what’s known as the immediate window in visual basic editor so many different ways to execute procedures so like i mentioned we’re going to be calling the procedure from another sub procedure in this lesson we’re going to click at the end of the end sub statement in your move cells public sub procedure and we’re going to press enter twice we’re going to create another sub procedure here going to do it in a different way and it’s going to be known as the calling procedure you’ll see how this works and i’ll explain more after we get it done now we’re going to actually just type this in we’re not going to use the add procedure insert procedure dialog box and so we clicked after in sub we pressed enter a couple of times and we’re going to type sub and then we’re going to name it get new inventory and press enter twice so you get the line the dividing line between the move cells sub procedure notice we didn’t have to type the opening and closing paren or the end sub statement the visual basic editor will supply you with those when you’re typing it from scratch so now we’re going to press i’m going to just do shift tab to out dent let’s do a comment here i’m trying to be a good example we’re going to type an apostrophe and we’re going to put this is a calling procedure that is calling three other procedures and press enter at the end of the line it turns green press enter again and then tab to indent we simply need to give it the names of the procedures so this is known as a calling procedures and the procedure names we’re going to type are known as called procedures so we are going to type get new vehicles enter move cells enter add formatting enter it should look like this on my screen so get new inventory’s purpose is to kind of bundle those three other procedures together in the order that they’re listed there and it will execute them when it is executed so we get three for the price of one we execute get new inventory and it executes three other sub procedures for us go ahead and compile your project and save we have our three procedures that are called procedures in our get new inventory sub procedure two of which reside in this same module ad formatting resides in mod first we’re going to talk now about the scope of procedures and why it’s possible that we can access the ad formatting procedure from a different module so of course we’re going to review the scope of procedures on the slide because again the slide deck is in the files in the video description and you’ll be able to re use it for future reference so scope determines where the procedure may be used you have basically three different scopes really two so the first one is public if a procedure declaration is preceded by the keyword public this makes the procedure accessible to all modules in the visual basic project if the procedure declaration is preceded by the keyword private this makes the procedure available only in the module where it resides it cannot be accessed from any other modules or from the excel workbook and then you have undeclared so we have no private procedures at this point if no keyword is inserted at the start of a sub or a function declaration the default is public okay so i’m going to switch back over to the visual basic editor and we’ll take a look at this and i’m still in mod new vehicles so we have the result of a macro we recorded a macro and we named it get new vehicles it simply named it sub it didn’t put public or private so it’s considered undeclared which means it’s public then we created a procedure by using the insert menu and because in there and i’ll bring up that dialog box the scope is defaulting to public so when we created the move cells procedure it added the public keyword and then we create it from one from scratch sub get new inventory we didn’t type public before sub we left it undeclared so all of these are public procedures and if we go to mod first add formatting is also undeclared which means it’s public and i look at the end of that and i want that blank line above in sub so i just modified it and did that so because ad formatting is public i’m going to go back to mod new vehicles we can access it by calling it from this module that’s why that’s possible the scope of procedures matter now one other little fix we’re gonna do because i already know it’s going to be an era and you may not even have this line in your get new vehicles sub procedure in mod new vehicles but that first line of code since get new vehicles is included in our calling procedure if we have the first line saying active window close it’s going to just close the file and then it won’t be able to run the rest of the code so that very first line active window close if you have that line you know could cause you to have an issue with the code if you don’t have that line as your first line if your first line is workbooks dot open file name so on and so forth you’re good to go but if not you want to delete that first line active window closed we’re going to leave it at the bottom but not at the top and then go ahead and save your code and now we’re ready to alt f11 to switch over to excel and we’re on the new vehicle sheet in cell a1 we’re going to do alt f8 to bring up our macros box and we want to run our calling procedure get new inventory so i’m going to just double click it and my screen will flicker for a moment and then ultimately stop okay so what happened well it ran the bundle let’s switch back over alt f11 the first thing that it did is it ran get new vehicles so it opened the received vehicles file it selected everything and then it copied everything and then it went back over to our vehicles macro enabled file made sure it was in cell a1 and it pasted the data and then it went back over to received vehicles file and closed it after that it did the move cells sub procedure so once it brought in that information from received vehicles it selected everything in column b and it pasted it it cut it and then it pasted it in column g and then after that it did add formatting which is in mod first and that’s where it added the headings for us right so it added our column headings and we didn’t want it to create a new row there because it came in with a heading row so we had already modified this it did the currency formatter accounting number format and it auto fitted the columns it also made the headings bold and centered in their cells so it ran the bundle we ran one sub procedure that called three other procedures so when i go back and look at it in excel we’re still on new vehicles right it moved the dealer costs to the appropriate column applied the appropriate formatting to it and it added the headings instead of the headings that came in from the received vehicles file and the formatting that it did so you saw that calling procedures lend themselves to efficiency but there is further efficiency to be had earlier we discussed how sometimes a sub procedure is known as an event procedure and that happens when you attach it to an event so first thing we’re going to do here is we’re going to do control a on this new vehicles sheet to select everything and then we’re going to press delete we’re going to clear the sheet just click in cell a1 and switch back over to your visual basic editor now on the left side you attach to in order to make something an event procedure you have to access an object’s events so we’re going to double click in the project explorer window we’re going to double click sheet 3 new vehicles now notice at the very top of your screen you have two different drop downs above option explicit which we still haven’t talked about but we’re getting there you have a general box and to the right you have a declarations box both of them have drop downs on their far right sides the left side where it says general is known as the object list the right side where it says declarations currently is known as the procedures or events list so we’re going to do the drop down arrow to the right of general and the only thing because we have sheet3 selected the only object we’re going to see is worksheet so we’re going to select worksheet and it creates this whole like sub procedure framework it’s private so it’s only available within where we’re putting it it’s attached only to the new vehicle sheet which the system knows as sheet 3 right so the first thing the default event for a worksheet if you look at the right now where it used to say declarations it says selection change that’s just the default event that’s not the event that we want what we want to happen is we want our calling procedure to run whenever the new vehicle sheet is activated so we’re going to do the drop down all the way to the far right of selection change and these are all worksheet events right activate before delete calculate you have a whole list we want to select the activate event so now it gives us the framework for a private sub procedure that it names worksheet underscore activate typically with event procedures you don’t change the names right it’s kind of like hard coded so it’s that particular worksheet activate event that we’re going to code so we don’t need this second block we don’t need this this is just what was created as soon as we selected worksheet it selected the default event which is selection change so we can just delete that click at the end of the parentheses on the private sub worksheet activate line press enter twice just so you get that blank space again we’re going to press tab so it’s indented and we’re simply going to call our calling procedure by name we named it get new inventory so that’s the one that has the the three called procedures within it so we’re saying whenever the new vehicle sheet is activated go ahead and run that bundled calling procedure known as get new inventory go ahead and compile your vba project using the toolbar you want to get in the habit of doing that and save and switch back to excel just make sure you’re in cell a1 on new vehicles which we deleted everything off of and now we’re going to go to our inventory sheet tab at the bottom and then we’re going to click back on the new vehicle sheet tab to activate it and voila as soon as we activated that sheet it ran our get new inventory calling procedure so we get the same result we didn’t have to do alt f8 to get into the macros dialog box to make it run or anything like that we simply made it an event procedure and it was the activate event for this particular sheet we are going to once again clear this sheet by doing control a and delete just click back in cell a1 and go ahead and save your vehicle’s file so now we’re ready to create a function procedure and if you remember from earlier a function procedure performs a calculation and returns a single value or an array of values so differs from a sub procedure so when you create a function procedure in vba it can only be executed in two ways compared to the nine ways you can execute a sub procedure you can call the procedure from a sub procedure or another function procedure or you can use the function in a worksheet formula it becomes a user defined function in your excel application and you’ll see both of these play out when we do this we’re going to create a new module for this so i’m going to just go up to the insert menu in the visual basic editor and i’m going to choose module so it gives me a new module one and and let’s rename that module using the properties window we’re going to call it mod and then capital f function and in this module we’re going to create a function and what it’s going to do is we’re going to give it different values for an msrp and depending on the value it’s going to display a message and once we get it typed in and stuff it’ll be easier to kind of explain it to you so in your mod function i’m going to click at the top after option explicit and just press enter and we’re going to type the word function and a space and we’re going to call it msrp so all of that is capitalized and then capital s status and then in the parentheses we have to have an open parenthesis we’re going to type msrp that’s a parameter you’ll also hear it as an argument so we have to pass the function an argument in order for it to give us a value as its return and after that you’re going to press enter and notice it gives you the end function statement just like it does when we do a sub procedure and it gives us the end sub statement so i’m going to press enter again and i am going to press my tab key to indent it’s just a structure thing visual basic doesn’t care now we’re going to build what’s known as an if construct it’s more specifically it’s an if then else if else construct which is a lot to say and can be overwhelming it’s similar to the if function in excel you’re being rudely introduced to it for this function but you’ll get a deeper dive in control of flow structures in a later lesson so i will explain this after we get it typed in so we’re going to type if and then msrp we’re going to do the less than symbol 20 000 no punctuation on the 20 000 and type then and press enter now tab a little bit more one more time so if the msrp value is less than 20 000 then if that is true it’s going to do what we say on this line we’re going to type now we’re going to type msrp status the name of our function equals and in double quotes less than 20k and close your quotes so if the msrp value is less than 20 000 it’s going to say as the function return the result of the function it’s going to display the text less than 20k press enter and then shift tab and you’re going to type else if and it’s all one word initial capital letters msrp less than thirty thousand then next line down you’re gonna tab msrp status the name of the function equals and then double quotes less than 30k and close your quotes enter and shift tab we’re almost done we have two more lines now we’re going to type else just else not else if space msrp status the name of the function again equals and then double quotes greater than or equal to 30 k and close your double quotes enter and we need an end if statement so end if and press enter one more time so you get that blank line between end if and in function so if the msrp is less than 20 000 it will display the tax less than 20k if it’s less than 30 000 meaning it’s not less than 20 000 but it’s less than thirty thousand it is say less than thirty k to display that text if neither of those statements are true if it’s not less than twenty thousand and it’s not less than thirty thousand it’s going to just display greater than or equal to 30k so the else statement and notice when you got to the end of the line it put that colon after else you didn’t have to type that so there’s a line editor every time you get to the end of the line it’s checking the line to make sure it’s okay so this is known as an if construct it’s going to do different things depending on whether a statement is true and that’s how you create the function procedure now we should go ahead and compile our project so again you just need to be anywhere between function and in function and do your compile project make sure there’s no errors and then we’re going to save so there are two ways to execute a function procedure the first way is by using what’s called the immediate window and it’s really testing the function to make sure that it works properly and so we’re going to do that way first and then i’ll tell you about the second way which is really super cool in my opinion um and you’ll see that soon so the first thing we need to do is get the immediate window open in visual basic editor so we’re gonna go to the view menu and we’re going to choose immediate window and it opens in the bottom of the screen in the immediate window we can test this function procedure i’ll explain it after we type it in you’re going to type question mark and then msrp status the name of the function and then in parentheses now if you notice right underneath where we’re typing in the immediate window right right underneath that it’s showing that in the parentheses it’s waiting for us to give it a argument so we use msrp in the parentheses as a parameter and now we have to pass it an argument in order for the function to work which means we have to give it a number that represents an msrp in the parentheses we’re going to just type 10 000 no punctuation close the parentheses and press enter question mark means the same as print in vb a right so it’s saying print the result right there in the immediate window so if we look at our if block we said if it’s less than 20 000 we want it to say less than 20k and that’s exactly what it did now we can use either the question mark or the print keyword to the same effect in the immediate window so now in the immediate window you’re going to type print and then msrp status open paren and we’re going to put 20 000 in there and close the parentheses and now press enter so it’s giving us less than thirty thousand so question mark and the print keyword do the same exact thing in the immediate window we’re testing our function to make sure that it works so let’s do another one we could do either question mark or print whichever your preferred one is and we’re going to set it up again msrp status and this time in the parentheses we’re going to put 40 000 close the parentheses press enter and we should get the greater than or equal to 30k the else statement is working because it’s not less than 20 thousand it’s not less than thirty thousand the parameter that we gave it the argument that we gave it in the parentheses it’s forty thousand so we’re getting greater than or equal to thirty k if you’re creating super complicated function procedures you would want to test them in your immediate window giving it different values to make sure it works the other way to test it let’s go ahead and switch over to excel i’m doing alt f11 there okay and let’s go to the inventory sheet tab and click in cell i to and so i2 you’re going to type an equal sign like you would for any built-in excel function and then you’re going to start typing the name of the function we’re going to type ms and our msrp status function shows up here it’s a user defined function in the excel application once you create it unless you go and delete that function you will be able to use it in excel we’re going to click on or since msrp is already selected i’m going to just tab key it’s called tabbing it in and then we are going to click on cell h2 the very first msrp and we don’t even have to type the closing parentheses here because we’re doing it in excel application so go ahead and press enter and then click on i2 and the little notch in the lower right hand corner of the cell is known as the fill handle and once i put my mouse on top of the fill handle it looks like a thin black cross and i am going to double click so you’ll notice it’ll fill it all the way down to the bottom until it runs into a blank right so if i do control n it filled it all the way down to row 105. and it’s looking at each msrp’s value and determining what to display in the adjoining cell and so we are going to right click on the column i column heading and delete that column and i want to show you something else since we’re in here go to the formulas tab on your ribbon and the first button is insert function click it where it says or select a category most recently used do the drop down arrow and you might have to scroll down to see it but you’re looking for a category called user defined now there’s going to be stuff in here that you’re like what does that mean don’t worry about it this stuff that comes into excel automatically but you’ll see your msrp status in that list so that is a user defined function in the excel application which i think is just pretty cool we can just cancel out of that and go ahead and save your file so our last topic in this lesson is getting context sensitive help in the visual basic editor so i’m going to do alt f11 and switch back over to vbe and in vbe i’m still in my mod function module i’m going to just click anywhere in the word function at the beginning of that function procedure and i’m going to press f1 on my keyboard so it brings up the context help box because you’re in excel visual basic for applications and it’s saying that there’s an object in both visual basic and excel called function we’re interested in the vba function so we can just either double click it or go over and click on help it’s already selected so it launches your browser and i can tell you that the vba documentation from microsoft is awesome so it gives you the function statement from vba it lets you know that it declares the name arguments and code that form the body of a function procedure it gives you the syntax so you know just like sub procedures there’s different statements public private right if it’s undeclared it’s public um there’s also friend and static and then the function name and then in parentheses the argument list and you can give it a data type as its return as well which we didn’t have to do on hours right um there’s also an exit function statement that we didn’t need to use so it gives you the breakdown about everything descriptions on everything right and so and then there’s remarks at the bottom and so it says there’s one line in here that says all execute all executable code must be in procedures you can’t define a function procedure inside of another function sub or property procedure and notice that sub there is a link so if i click on that link it brings me to context sensitive help about the sub statement and the other thing i’ll point out in here is on the left side it lets you know that you’re looking at the sub statement right so if i scroll up on the left side there’s the if then else construct and again we’re going to do a deeper dive into that later but if i wanted more information on that i can just click on it on the left side right and it gives you all the information you need to know about that if i continue to scroll up it’s all under the heading statements which is under the heading reference which is under the heading language reference so anything you need to know i’m going to just switch back over to my visual basic editor you can access it by pressing f1 when you are on a particular keyword right so it works that way it gets you into the microsoft documentation really good context specific help at your fingertips so we covered a lot in lesson three and just to recap what we covered we went into a deeper dive about the types of modules that are available within visual basic and the types of procedures then we went on to creating a standard module we created a sub procedure and we called procedures by creating a calling procedure you also learned about the scope of procedures then we created a function procedure and we tested it using the immediate window before going into excel and accessing it in its interface as a user defined function after that you were shown how to get context sensitive help from within the visual basic editor thank you for attending excel 2019 visual basic for applications video course hi everyone i’m trish connor cato welcome to the excel 2019 visual basic for applications video course this course is for beginning users looking to automate repetitive and recurring tasks in microsoft excel vba is microsoft’s programming language and it’s built into the office applications our focus during this course is on excel specifically you’ll be equipped with the basics to start writing your own vba code modify the code behind macros you’ve already recorded and have an understanding of how vba lends itself to creating efficiency in your daily tasks a key component of vba is its language elements you’ll learn about this important topic by learning about variables their scope and how to declare them you’ll also gain an understanding of vba data types intrinsic functions and the with end with structure and how it provides efficiency in your code you’ll also learn to create message boxes and input boxes in this lesson as well as gaining understanding of object variables the next lesson will teach you how to control program flow through supported control of flow structures this lesson begins with an overview of structures and boolean expressions you’ll then learn how to utilize conditional branching and the lesson ends with learning about how to use looping constructs if you’re enjoying these videos please like and subscribe if you want to earn certificates and digital badges please become a member of our patreon the link is in our video description if you have any questions you want answered by one of our instructors please join our off-site community the link is in the description as well as always if this course has exercise files you’ll find them in the video description below in our fourth lesson we’re going to dive into expressions variables and intrinsic functions you’ve already experienced comments seeing them when we fill out the description in the record macro dialog box and we’ve actually modified comments and added our own comments to code that we created from scratch and comments are known as a foundational vba language element well there are others and we’re going to get into them in this lesson so we’re going to get started by learning and understanding variables we’ll go over vba data types and intrinsic functions which include expressions we saw the with end with structure in the first macro we recorded the add formatting macro it created that structure with everything that resides in the paragraph group on the home tab of the excel ribbon and we deleted a lot of extraneous lines just to make our code more concise you’re going to learn about the offset property using message boxes and input boxes and object variables we’re going to be using our regular vehicles macro enabled file as well as two other excel files that are in the video description and you should be putting these files all in the same directory so we’re going to be using an excel file named then numbers and another one called sales fiscal year variables are often considered the most important vba language element since one of vba’s main purposes is to manipulate data variables store data in your computer’s memory when procedures are executed and the data may or may not end up on disk some data resides in objects like worksheet ranges other data is stored in variables you create data that is stored in a variable usually changes while your procedure executes there are of course naming rules and conventions when it comes to variables very similar to the rules and conventions or the rules for naming procedures variable names can be up to 255 characters alphanumeric the first character must be a letter cannot use spaces or any of the characters listed on the slide and then it has another one that is not a procedure rule vba is not case sensitive but it is case preservative so you’ll learn about declaring variables in a moment and you’ll see this play out when you declare a variable if you declare it in proper case right using the rules and conventions and then let’s say the next time you reference it you type it in all lowercase visual basic editor gonna automatically change it to the case it was when you declared it and that’s what case preservative is a convention is used proper case for each word within the name of the variable and we have a couple of examples today’s date then num before you can use variables they need to be declared and just like procedures variables also have a scope so there are two declaration methods they’re implicit and explicit implicit declaration means you declare the variable by just using it without writing a declaration statement and this method can lead to code errors so for example with implicit declaration let’s say i name a variable green for example and then when i go to use it i misspell green it’s going to think that i’m implicitly declaring another variable and you can see how that could lead to coding errors explicit declaration is the preferred method you write a declaration statement to officially declare the variable now when it comes to variable scope you can use either the dim or the private keyword they mean the same thing they’re used interchangeably they have the same result i typically use dim and you declared a variable at the top of the module before the first procedure and that area at the top of the module is known as the declaration section if you want the variable available to all procedures in a module you would use dim or private and declare it in the declaration section the public keyword is also used in the declaration section at the top of the module and you use it if you want the variable available to all procedures in all modules and then there’s a static keyword static variables retain their value even when the procedure ends and you declare a static variable at the procedure level it means it’s only available in that procedure and when you declare variables you should assign them a data type so on this slide it’s talking about the data types that are available in vba and you can see the name of the data type the number of bytes that are used and the data types range of values a byte uses the data type known as a byte uses one byte and has a range of values from 0 to 255 a boolean data type uses 2 bytes and has either true or false as its range of values you have integer long single double currency and then at the bottom you have decimal data type those are your numeric data types they use varying bytes and they have varying ranges of values you have a date data type i don’t think you will ever be in a situation where you’re not covered as concerns a date i mean it goes back to the year 100 and all the way up to the year 99.99 you have your string data types fixed length and variable length and you have a variant data type so if you declare a variable and you don’t assign it a data type it will automatically assign it the variant data type look how many bytes that’s using if it’s a value it’s going to use 16 bytes and if it’s a string it’s going to use 22 plus bytes so you want to be careful and really try your hardest to assign data types when you’re declaring variables i’ve gone ahead and opened the vin numbers excel file that was in the video description and i still have my vehicles macro enabled file open but our focus right now is going to be on this file so it only has one sheet it has one then number and it has several other columns year make model color country classification what we’re going to do is insert a new module create a sub procedure and declare six procedure level string variables we talked about the declaration section at the top of the module window and anything you declare there depending on the keyword that you’re using determines the scope of the variable and the scope of a variable not only determines where it can be used but also affects the circumstances in which the variable is removed from memory only procedure level variables that are declared using the dim keyword are removed from memory when its code has completed execution if you use the static keyword in a variable that’s declared at the procedure level that means it’s going to retain the value of the variable after it executes so you’ll see what this means and how we’re going to use it when we switch over to vbe which we’re going to do right now by doing alt f11 so i want to point out a few things to you now since i still and you do too have the vehicles file open there’s a vba project that we’ve been working in this whole time for that particular file i’m going to collapse that project because we have another open workbook we have another vba project and it’s thennumbers.xlsx file that we just opened one thing i want to point out at the very top of the screen and i’m going to just select like sheet one in here to get rid of the code that’s on my screen and at the very top of the screen we have that option explicit statement this is when it’s time to learn why that’s sitting there and what it means so let’s go to the tools menu and go into options like we did earlier in the course and one of the options under code settings on the editor tab is require variable declaration and that way we can’t do an implicit declaration we have to do an explicit declaration the implicit ones are where you don’t write a declaration statement you just use the variable but that’s the type that can lead to code errors so to get the system to force you to write declaration statements you want this setting to be checked in your options require variable declaration and that means that it produces i’m going to just cancel out of options it forces that option explicit statement to show at the top so it’s going to force you to do variable declaration the other thing we talked about just a moment ago is that the scope of a variable determines not only where it can be used but the circumstances in which the variable is removed from memory you can always use two techniques to remove all variables from memory one of them is the reset button on the vbe toolbar so it looks like a stop button when you hover over it it says reset and a lot of times if you get cold errors once you resolve the errors you’re going to want to reset anyway if you ever get a runtime error there’s a dialog box that will pop up and it has an end button on it if you click end it will remove all variables from memory so i’ve closed the immediate window as we won’t be using it it has an x in its upper right hand corner just to give me some more working space here and what we want to do we’re going to take this in little steps like i said we’re going to set up the framework of a sub procedure and we’re going to declare six string variables we are going to look up at the top of your screen right underneath the option explicit statement is known as the declaration areas that’s why it says declarations over to the right in the procedure box we are going to first insert a new module so we’re going to use make sure you’re on your vba project then numbers right we want to be on that one we’re going to go up to insert module so it gives us a module 1 which we are currently in and again i always verify in the title bar up at the top what file or what project i’m in and then what module i’m in and this is where we’re going to create a sub procedure we are going to type sub and we’re going to name it parse then since then is all capitalized i’m going to leave it that way parse then i’m going to press enter twice and press the tab key so it gave me my parentheses and my end sub statement i’m going to actually and actually we don’t have to press tab i’m going to shift tab i’m going to declare procedure level variables but first i want to type a comment so i’m going to do an apostrophe and type this procedure will parse the vin number into the appropriate columns and then i’m going to press enter and enter again so i have my comment line now we’re going to use the dim keyword so i’m going to type dim and i want to show you two examples here again you want your code to be as concise as possible so you guys you don’t have to type or do anything other than watch my screen just want to show you an example here so hopefully this example is going to show you how to make your code more concise i’m going to highlight the lines of interest here these variables are all using the string data type and i typed a separate line item using the dem keyword for each item why would i do that if they’re all the same data type i can type this line just using the dem keyword once separating the variable names by commas and at the very end giving it the as string data type so that’s the line that you’re going to end up typing and then i’m going to end up keeping but i have another example let’s say you were only declaring two variables and they had different data types so in that case you would end up with two lines dim dealer cost as single dim then number as string the ones that have the same data type i grouped them together on one line easier to type easier to troubleshoot so i am going to go ahead and delete these individual rows of variable declarations and i’m going to delete the last two and we want to declare six procedure level string variables and you’re going to type this dim statement that i have on my screen and you’ll notice that when you get to the as keyword and you start typing string a list of data types will appear so it’s not going to let you type in a data type that you just make up or pull from thin air that is not compatible with vva now that we have our six procedure level string variables declared and again they’re only going to be available to the procedure within which they’re declared we are going to look at building intrinsic functions so by definition they’re functions that are provided by the application like a function procedure an intrinsic function performs a specific task or calculation and returns a value you may be familiar with the three functions we’re going to use in this section because they’re essentially excel functions and there are string functions in excel so if you’ve ever used any of the excel text functions these may be familiar to you we’re going to use left mid and right so the left function extracts specified text from the left of the text string its syntax is left and then you have to tell it what string expression and then you give it a numeric expression don’t worry about memorizing this i will walk you through it when we’re ready to go back to visual basic editor the mid function extracts specified text from the middle of a string it has three arguments well first you use mid which is the name of the function and then it has a string expression that it needs to reference a starting position in that string and the number of characters you want extracted and then the right function does the opposite of the left it extracts specified text from the right of the text string it too has the same arguments as left so right and then the string expression that it’s referencing and a numeric expression that references how many characters are going to be extracted and again don’t worry about this i will guide you through these functions and now i want to show you just a split screen of a slide on the right and the vin numbers excel sheet on the left i mentioned earlier that these are just make believe then numbers but the way we’re using them in this course and the way we’re going to use them in this procedure that we’re developing is based on the slide so we’re saying the first character in the then so in this case the number one represents the country of origin honestly i don’t know if that’s true or not just make believe data here but this is how we’re using it the second character of the then would represent the make the third and the fourth characters would represent the model the 11th character would represent the year 12th character would represent the color and the 17th character of the then would represent the classification again i will guide you through this as we’re using our left right and mid functions but you have the slide for future reference if you want to kind of run through it again on your own you’ll know how we’re using the vin number now we’re ready to use our intrinsic functions in this parse then procedure we already created a blank line underneath our variable declaration dim statement in this procedure and we’re going to press tab on the keyboard to indent and what we’re going to type is range and then in parentheses and double quotes a 2 close your double quotes close the parentheses we’re going to use our dot notation and now you’ll see the list pop up with methods properties bunch of different things we’re gonna start typing select and when it shows up on the list and it’s highlighted i can stop typing and press my tab key to get it in and i’m going to press enter so it’s going to select cell a2 and then we’re going to reference one of our variables but we’re going to reference it in all lower case so we’re just going to type then num and then a spacebar equals and we’re going to type active cell dot and when the list comes up start typing value when i see it on the list i highlight it and tab it in so we’re saying select cell a2 and then that is the active cell once it’s selected we want the then number variable to be populated with whatever is in cell a2 so in excel you can see that the only then number in this file is in cell a2 so it’s going to select that cell and then assign the then num variable that then number go ahead and press enter at the end of that line and notice that it adjusted the casing on venn num remember vba is not case sensitive it’s case preservative so when we declared that variable we did uppercase v uppercase n and then when we typed it in we did it in all lower case as soon as we press enter at the end of that line it goes back and preserves its original declaration case that is an example of case preservative so now we’re going to type year so we’re going in the order of the way we declared the variables that’s easy to keep yourself organized so we started with select cell a2 and then populate the then num variable with the then number that is in cell a2 now we’re going to say what to populate the year variable with so we type year equal and then we’re going to type the mid intrinsic function open paren so right underneath it it’s telling you the arguments that it’s looking for so you’ll see that yellow banner there right right now it’s waiting for the string argument and then you have a numeric argument right and the string argument is bold because that’s the one that it’s waiting for in the open parentheses we’re going to type then num the name of our variable and again doesn’t matter how you do the casing because it’s case preservative then num comma 11 comma 1. so the mid function has three arguments the string argument the start as long argument right that’s the starting position and then the last argument is the number of characters so we’re saying the year is going to equal the 11th character of the then we’re saying in that then num variable which now holds the entire vin number we want you to go to the 11th character and extract one character which is the 11th character you’re gonna type a closing paren so the 11th character of the then represents the year and press enter our next one that we’re going to do is the make because we’re doing them in order here so instead of you watching me continue to type i finish this part of this procedure so we left off with doing the year so i’d like you to just copy from my screen and assign values based on the character or characters in the then to make model color and classification you can pause the video until you get it done and once you have the other variable assignments done go ahead and compile your vba project so just be anywhere between sub and in sub make sure there’s no errors by the way if you just watch my screen i’m going to take out this classification line and i just want to show you something you don’t have to worry about spacing you know the variable is a case preservative so i could type that line as classification no space equal mid open paren i’m typing then num in a weird mix of capitalization 17 comma 1 and i’m not typing spaces at all i’ll type the closing parentheses and when i press enter it gives me the appropriate spacing and it case preserved the name of the variable so you don’t have to worry about your spacing there’s a line editor so when you get to the end of the line and you press enter it will fix little stuff like that for you so you don’t have to worry about that now for the classification since we have 17 character then 17 characters total in the then we could have used the right function it would have just been right then num 17 right the last character but you can also use mid there same result now we’re going to go ahead and i’m going to compile again since i made a change and it’s saying the variable is not defined so i got a compile error this time class because i misspelled classification so it’s not defined i spelled classification and it’s like uh nope sorry you have explicit variable declaration turned on and you did not declare that variable so i’m going to just do ok correct my typo i’m going to compile again and now i don’t get the error we’re gonna test this at this point so we’re gonna switch over to excel i’m gonna use the excel icon on the toolbar to switch over since i have multiple files open and we’re going to test this we’re going to go alt f8 to open up our macros dialog box and we’ll see the macros that are in the vehicles macro enabled file that we still have open as well as this one that’s not prefaced by a file name parsfin because it’s in the current file that we’re working in so i’m going to just click on parsed then i double clicked it and absolutely nothing happened i wanted to show it to you at this stage let’s switch back over alt f11 and switch back over to our parseven sub procedure so all we’ve done at this point in this procedure is declare variables and use our intrinsic functions to assign each variable a value but we haven’t told it what to do with the values assigned to the variable so nothing happened it assigned the values to the variable but we didn’t say how to display those values in order to tell it where to display the values of the variables on the spreadsheet we’re going to take a look at the width end width structure and the offset property and then we’re going to go and complete that parseven sub procedure compare these two code blocks so the top one these four lines selection dot starts at the end of each line it’s repetitive and then you have whatever the thing is so selection dot horizontal alignment equals excel center selection dot vertical alignment equals excel center selection dot wrap text equals true selection dot merge cells equals false so you’re repeating the selection and the dot on every line as a compared to the with end with block of code so you say with selection and then you just do the dot and the thing that it is and what it equals and at the end of it you have an end with statement so with end with structure saves you some typing makes your code a bit more concise and that’s one thing that we’re going to use and then you’re going to learn how to use the offset property it allows you to refer to a cell that is a specific number of rows and or columns away from another cell so it has a syntax dot offset it is a property and then you have the number of rows comma the number of columns as arguments both arguments are not required if you use the rows argument only close the parentheses after it if you use only the columns argument use a comma as a placeholder for the rows argument when positive numbers are used in arguments the property goes down rows and right across columns when negative numbers are used in its arguments the property goes up rows and left across columns so i have some examples here range a1 so if you’re in cell a1 right dot offset one comma two refers to cell c2 the first argument is the rose argument so it’s saying go down one row and go to the right two columns so if i’m in cell a1 and i go down one row i’m in row two and if i go across two columns i’m in column c so it refers to cell c2 if i’m in cell c2 and i do an offset of negative 1 for the rows argument and negative 2 for the columns argument it’s going to go up rows because we’re using negative numbers there and it’s going to go to the left of cross column so it’s going to refer to cell a1 i have range a1 offset 1 and that refers to cell a2 i’m just using the first argument the rows argument so it’s just going down one row it’s staying in the same column no column offset and then the last example there range a1 offset comma two so we’re not using the rows argument but we need a comma as a placeholder or we’ll get an error message and we’re saying go to the right two columns but stay in the same row so that refers to cell c1 and again this powerpoint is in the video description for future reference and i already gave you the typing tips that are on the bottom of the slide so now we’re going to add our width and width structure and include it and it will be our offset statements we’re going to click at the end of the classification line and press enter and then tab and we’re going to type with active cell enter tab again and type dot and the letter o so the offset property shows at the top of the list notice it’s a property you can tell by the icons over time you’ll learn the different icons in the list but the one that looks like offset it looks like a spreadsheet or a piece of paper that a hand is holding that indicates it’s a property if you look down at the green icon that’s in the list for parse and paste special those are methods so just visual cues for you since offset is selected i’m going to tab it in so i don’t have to type and then i’m going to do an open paren comma because we’re not going to use the row offset but we have to use that comma as a placeholder we’re only doing column offsets here one close the paren dot value and you’ll see value on your list so you can double click it or tab it in equal year it’s saying the active cell is still cell a2 up at the very beginning we said select that cell and then we assign the then number variable the vennum variable the value of cell a2 where the actual then number resides that is still our active cell so we’re saying starting with cell a2 offset one column so go to b2 and put in the value of the year variable which is the 11th character of the then now again you don’t have to watch me type i’m gonna just pause and get the rest of these offset lines in and then you’ll be able to pause your video and type them in so after the year offset line you’re going to type the other remaining five offset lines on my screen for make model color country and classification but you’re also going to have to type the end with statement unlike when we do a sub or a function procedure when we type sub parsevin and press enter it gives us the open and closing parentheses for our parameters if any and it gives us the in sub statement or if it’s a function procedure the end function statement it will not give you the end with statement that is required with the with end with constructs so make sure you out dent and get your end within and you can go ahead and pause the video and get those lines typed in and once you’re done you’re going to go ahead and compile your project check to make sure there are no errors and we’re going to switch back over to excel i’m using the icon on the toolbar to get there and so now we’re ready to test it we told it what values to assign to each variable and now we’ve told it where to display those variable values which column and cell to display it in by using our offset statements within the with end width structure so i’m going to just be on any cell in here and i’m going to do alt f8 to bring up our macros dialog box and i’m going to click on parse then and then run or you can double click it and i’m like yay it worked it put the right bits of data in the right cells except for country what happened to country stay tuned and we’ll take a look and you’ll find out just so you know i did this on purpose you can blame me but i did it on purpose because a lot of coding is troubleshooting and we get to debugging code in like the last chapter of the last lesson of this course but along the way you’re going to run into situations and it’s helpful to get some guidance in what to do so in this case everything worked except it didn’t populate country in row two so the first thing we’re going to do since it didn’t work the way it’s designed to work is we’re going to delete we’re going to select b through g2 and just press delete and we’re going to switch back over to the visual basic editor so the last thing we did was our with endless structure and i’m going to start there and i look through the list and our offset statements pardon my ocd but i have them in order one two three four five six again i don’t want to be looking up and down if i’m troubleshooting to figure out where something is but i do have an offset statement for country so i’m like okay it’s not that the compiler did not pick up any errors so it’s something that i probably missed so i look up in the upper half of this and i said you know we’re going to tackle these variables in their order so we started with then num then we went to year make model color and then we skipped country and went to classification so we never did our country intrinsic function to tell it what value to assign to that variable which means that it can’t display anything even though we did an offset statement i’m going to click after the color mid function line and press enter so it’s in order the first character of the then represents the country so we’re going to use the left intrinsic function here we’re going to type country equals left open paren then num and we want it to extract one character which is the first character from the left side of the then number and we’re gonna close our parentheses we’re gonna press enter just so it does any formatting and then i’m gonna delete that extra line and shift tab so classification we’re going to go ahead and compile our project again make sure there’s no errors and now we’re going to switch back over to excel we’re going to do alt f8 to access our macros box and we’re going to run parse then again and now you’ll see that the year make model color country and classification columns are filled in appropriately as a result of the parse then procedure so because we created a sub procedure in this file you probably want to go ahead and save it as macro enabled workbook and i’m going to let you go ahead and do that on your own and when you’re done and you look in your working directory you have two vehicles file one is just a regular excel file and the other is macro enabled and now you have two vin numbers you have your regular one that we started with and then the macro enabled one that you just saved now we’re going to begin to get some background information on both the message box function and the input box functions in visual basic so we’re going to start with the message box function on the slide it has the syntax so in parentheses you have a prompt which is required and then you have two optional arguments buttons and title the message box function displays a pop-up box with a message for the user another thing vba will allow you to use the function without enclosing the arguments in parentheses a best practice here is to always enclose function arguments in parentheses so you err on the side of caution and to provide consistency in your code now if you do not use the title argument the title defaults to the name of the application which in this case is excel microsoft excel so the table on the right tells you about the argument it displays text in a message box for the end user the buttons is a number that specifies which buttons and icons appear in the message box this is optional if it’s not used the message box will default to the ok button and then you have the title argument like i said if you don’t use the title argument it defaults to the name of the application but if you want it to say something else in the title bar of the message box then you would use this argument to choose which buttons and or icons display in your message box you do that by using what are known as vba constants constants are similar to variables they are declared however while variable values can change during program execution constant values do not change and visual basic for applications constant names are preceded by lowercase vb so you have a table on the right we’re not going to review this again the slide deck is in your video description files and you can use it for future reference but if you just want an ok button in your message box the value for that particular constant is zero if you wanted a question mark icon in your message box you would use the value of 32 to represent that in addition to referencing the icons and the buttons in the message box by utilizing the values as we saw in the previous slide you can just use the vb constant name if you say vb yes no plus vb exclamation it will display the yes and no buttons with the exclamation point icon if you have vb ok cancel plus vb critical you’ll get the ok and cancel buttons and the critical warning icon and you can also have multiple lines for the prompt argument by using the vb newline constant so here’s an example msg box that’s the message box function in parentheses in double quotes because it’s text do you want to continue question mark then we’re using the concatenation character the ampersand to combine everything and we’re using the vb new line constant so it’s saying go down to the next line and on the next line it’s going to say click yes to continue then after that so all of that is the prompt argument and then we say vb yes no plus vb question so we want the yes and no buttons and the question mark icon and then the last argument is the title and we’re gonna put in step one of three for a title and when we get back into visual basic editor to use the message box function you’ll use the assignment operator which is the equal sign to assign the return value of a message box button to a variable you’ll see that in a bit and we’re also going to be using the input box function similar syntax to message box has three arguments one of which is required which is the prompt it has a title argument and a default argument and an input box is used to obtain a single piece of information from the user the information could be a value a text string or even a range address input boxes always display ok and cancel buttons so the prompt argument is just like the prompt argument for a message box the title argument is the same as well it’s optional but it’s the text value that appears in the title bar and if you don’t use it it would be the name of the application and then the default argument is new to you here it’s the default argument for the user’s input so it’s optional but you can pre-populate it and if the user doesn’t want what you pre-populated with they can type over it so we’re going to get ready to use both the message box and the input box functions we’ll be working again in our vehicles macro enabled file i’m in the visual basic editor for our vehicles macro enabled file and in the project explorer window i’m going to go ahead and double click sheet 3 new vehicles so this is where we use the event procedure when the new vehicle sheet is activated it runs the get new inventory calling procedure which bundles all the other procedures to retrieve that data and so we’re gonna make this further automated by modifying this procedure here and it’s going to give the end user a choice whether they want to get the new inventory or not so we’re gonna modify this worksheet activate subprocedure and click right in front of where it says get new inventory and press enter a few times and then use your up arrow to go back up so we want that blank line after private sub worksheet activate again just for spacing purposes and when you have to debug your code it’s easier to read so what we’re going to do is we’re going to declare a variable and it’s a procedure level variable so it’ll only be available in this sub procedure so we’re going to use our dem keyword and we’re going to name the variable response and we’re going to declare it as an integer and then i’m going to press enter and this is how you assign the user input from a message box results to a variable our next line is going to do just that we’re going to type response equals remember the equal sign is the assignment operator and then we’re going to type msg box we want to use our line continuation character here we’re going to do a space and then an underscore and press enter and remember if we didn’t do that and we just press enter we’d get an error because it’s expecting the rest of the message box arguments the rest of its syntax rather on the same line unless we tell it to continue to on the next line so that’s what we’ve done here and then we’re going to tab again and we’re going to do an open paren double quotes do you want to run the get new inventory procedure question mark closing double quote comma so that’s our prompt argument and your arguments separated by commas now we want another line continuation so we’re going to do a space and an underscore and enter we’re ready for what combination of buttons we want in the message box as well as which icon so we’re going to type we’re going to use the constant names vb yes no plus vb question comma and for our title bar argument our title argument it’s going to be in double quotes run get new inventory and i’m going to put a question mark at the end of that and close the quotes and now we’re ready to our closing parentheses now we’re going to press enter and we’re going to shift tab to get back to the margin so so far we’ve declared a variable response as an integer and we’re saying response equals whatever the user choices are in the message box well we have to tell it what to do based on a user choice so now we’re going to type if and then response equals vb yes then and now i’m going to use my delete key to get the get new inventory line on that same line if the response equals yes so if there’s going to be a yes and a no button in the message box if the response equals yes then run the procedure and we’re not telling it what to do if they say no in the message box so if they say no it’s not going to do anything in other words it’s not going to run the procedure go ahead and compile your project make sure there’s no errors there and let’s go ahead and save so now we’re ready to test this messagebox function and i’m going to just do alt f11 to switch back over to excel or any way you want to get there is fine and we’re going to click on the new vehicle sheet tab and let’s just say no at this point right so this time when we click on it instead of just running the procedure it gives us our message box let’s say no on the message box and it doesn’t bring in any of the new vehicle information go back to your inventory sheet tab click on new vehicles again and now you’ll see your title bar run get new inventory you see it has the question mark icon in the message box and it has yes and no buttons so we’re gonna click yes this time and it ran the procedure and we’re gonna select everything by doing control a and pressing delete and then just clicking cell a1 on new vehicle sheet again and go back to your inventory sheet now we’re going to switch back over to visual basic we’re going to use the input box function in our next example so we want to in visual basic editor we want to go to our new vehicles module and we’re going to modify this get new vehicles sub procedure the scenario here is that it defaults to opening that received vehicles file right and copying and pasting the information from it so suppose that that file changes over time maybe this month it’s called received vehicles maybe next month it’s called something else we want to give the users the end user the ability to put in what the actual file name is most of the time it will be received vehicles so we’re going to use that as a default setting that the user can override as necessary so the first thing we’re going to do is we’re going to go ahead and update the comment line so i’m going to just select that first comment line that says get new vehicles macro i’m going to leave the exclamation point there though so it will retain its status as a comment line and i’m going to type prompts the user for the name of a file comma opens the file comma selects the data and the second comment line the copy and paste data we’re going to just say copy and paste data into the current workbook so it’s going to be a more accurate description than what it was before underneath i’m going to press enter a couple of times and now i’m ready to declare two procedure level variables they’re both going to be strings so we’re going to do dim file location comma file as string so our two string variables and now i’m gonna click in front of workbooks dot open file name and press enter a few times and then i’m gonna up arrow so i have a blank space after our variable declarations and i’m gonna type file location equals this workbook dot path the directory path to this particular workbook this vehicle’s workbook so we’re assigning that path to the variable file location i’m going to press enter and now we’re going to say file equals and we’re going to type input box open paren double quotes what is the name of the new vehicles file question mark double quote comma and we want our line continuation character here so space and underscore and enter now we’re going to tab in one time and now we’re ready for the title argument so that is the prompt argument what is the name of the new vehicles file now we’re ready for the title argument and it’s going to be in double quotes new vehicles file name question mark close your quote comma line continuation so your space underscore enter and our last argument here for input box is the default argument so the actual text box in the input box will be populated with and we’re going to put it in double quotes received vehicles and you have to have the extension dot xlsx close your quotes closing paren enter we’re almost done with this one and we’re going to do shift tab just to get to the same margin as file location and file and we’re going to type file equals file location the ampersand for our concatenation character and then in double quotes a backslash another ampersand and file so we’re saying that the file location is the path on your directory path to this workbook the vehicle’s workbook and the file variable is going to be the result of the user’s input box choice if they keep the default it will be received vehicles.xlsx if they over type that it’d be whatever they over type it with and then we’re saying we want to combine the file location and the file with a backslash in between the file location and the file name and that is then going to be what the variable file represents and this is assuming that the received vehicles file or whatever file has the new inventory in it is in the same directory path as this workbook we have one other change to make to the existing code that was here so i’m going to go underneath my file equal file location concatenated line and i’m going to just delete the blank lines that are there and now we’re going to change that workbooks.open file name line so what i’m going to do is after the equal sign at the end of that line i’m gonna type file and then we’re gonna delete the continuation character notice how we get that red line underneath because we don’t have we’re not telling it to continue on the next line and we’re going to delete that whole path there because now we’re saying open the file based on the variable file so file is now the file location path and whatever file is in not name is in the input box whether it’s received vehicles or whether the end user types in something else so we don’t need the rest of that stuff that we had there go ahead and compile your project and save so now we’re going to be ready to test this and i will say we’ve given now the end user the ability to say no or yes that they want to run the get new inventory procedure and now the additional use of being able to dictate which file to bring the data into from i’m going to just go over to my excel and i’m on the inventory sheet tab i’m going to click on new vehicles and there’s our message box and we’re going to say yes that we do want to run the get new inventory procedure and now we see our input box we point out the title argument new vehicles file name question mark right here is our prompt what is the name of the new vehicle’s file and then we have our default argument where it populates it with receive vehicles.xlsx and it can be overwritten by the end user we’re gonna click ok to accept the default and it runs the procedure and of course we are going to select everything and delete it actually go back to your inventory sheet tab the last part of this lesson is getting used to object variables so they’re used to make your code more concise they help you avoid typing lengthy object references and when you’re declaring object variables the scope statements you use with regular variables are applicable so your dem private public keywords are the same object variables are declared with object types instead of data types so we have the syntax there you could use dim public private static the name of the variable as the object type so examples would be public sheet as worksheet dim range as range when you assign values to object variables you have to use the set keyword so your basic syntax would be set variable name equal object name set sheet equal worksheets year-to-date sales set range equal activesheet. a1 through f12 once you assign an object to an object variable the object can be referenced by its variable name now we’re going to do exercises obviously using object variables and we’re going to be using the sales fiscal year dot excel sx excel workbook in your directory it was a file from your video description so in this excel file we have multiple sheet tabs if i just right click on your tab scrolling arrows you’ll see going from june 1st 2016 to august 26 2016. each sheet is representing sales on that day so you have your vins your year make model classification color dealer costs msrp selling price and the sales person each sheet has different amounts of data so different amounts of rows of data depending on the sales on that particular date we’re going to use object variables and we’re going to create a sub procedure that will sum the column column i the selling price column and place the result in the cell two rows below the last populated cell in that column so for example on the 26th of august sheet we want the selling price sum to be two rows underneath the last selling price in column i and we’re going to use object variables to set that up let’s go ahead and switch over to the visual basic editor and make sure you’re in the right project if you still have your vehicles file open you may not see it here if you don’t see your file your sales fiscal year file listed over here sometimes you have to close the visual basic editor like mine’s been open the whole time so i’m going to close it and then go back into it just a little trick sometimes it doesn’t refresh and now i can see projects for sales fiscal year which has a lot of microsoft excel objects because of all the sheets i can collapse that and i still have my vehicles project there as well collapse that what we’re want to do in here is start this code where we’re gonna declare object variables so we’re gonna expand our sales fiscal year project and you can collapse your microsoft excel objects folder right click on your sales fiscal year project in project explorer hover over insert and choose module and in module 1 we’re going to start a sub procedure we can just this one’s not going to be very long we can just type it in so we’re going to type sub and we’re naming it add totals and i’m going to press enter twice and then i’m going to tab and i’m going to declare my object variables so we’re going to use the dim keyword and the variable name is going to be last cell as a range so as an object not a data type so we’re dimming last so we’re declaring last cell as a range enter and we’re going to dim total formula as a string and enter so two object variable declarations i’m going to enter again and then tab we’re going to set so we have to use the set keyword when assigning a value to an object variable last cell equals and then range and in parentheses and double quotes we’re going to type i2 so cell reference i2 close your quotes close your parentheses type the dot notation and then end and now when you type an open parenthesis you’ll have a list that pops up and we’re looking for the entry that says excel down that’s an excel constant and we’re going to close the parentheses so that line is saying starting in cell i2 go all the way to the end of that column until you find the last populated cell we’re going to press enter and we’re going to type last cell dot select right so the last populated cell is now selected in column i press enter and we’re going to do active cell dot offset you remember our offset before in parentheses we’re gonna do two close the parentheses so we’re saying the last populated cell is currently selected and we want to go down two rows dot select and select that blank cell two rows down from the last populated cell now we have to tell it what the object variable total formula is going to be so we’re going to do total formula equals in double quotes equal sum open paren i to colon close your double quotes space and an ampersand we’ll get this one typed in and i’ll explain it and then a space last cell dot address which will be on your list open paren false false closing paren space ampersand and then in double quotes a closing paren you’re like what okay so basically it’s saying we have that last cell right selected the last cell object variable is set to the last populated cell so it’s saying give the total formula give me the sum from cell i2 through the last cell address wherever that last populated cell is it could be i24 could be i26 whatever it is and then it wants to know if that last cell address is absolute and we’re saying false it’s not absolute by row it’s not absolute by column and then we just need to enclose it in a parenthesis a literal parenthesis so we have that in double quotes as well and now we just have to assign it so we’re going to go down and we’re gonna type active cell dot formula equals total formula declared to object variables we set both of them well last cell we we said it’s from i to the last populated cell starting in cell i2 and then select that last populated cell offset it by two rows and populate the total formula result in that cell that’s two rows underneath the last populated cell in column i that’s what you just did and we have our in sub statement there and you’re going to go ahead and compile your project and save so when we get to the save part right it lets us know that this is a macro free workbook we could lose our code here so we’re gonna do no on that message box and you’re gonna save it same file name as macro enabled we are going to test this sub procedure in a different way than we’ve seen our procedures run before so normally we’ve been running our procedures and the entire block runs we want to see kind of like the behind the scenes step-by-step version of what happens when we test this add total sub procedure with our object variables so i’ve arranged my windows i have my visual basic editor on one side of my screen and i have the excel sales fiscal year now macro enabled workbook on the other side of my screen so take a moment and get your screens arranged that way and then in the excel portion of your screen you’re gonna do alt f8 to bring up your macro dialog box now i still have my vehicles file open so you’ll see the macros that are in that file the code blocks that are in that file but you also see our add totals code here and so what you’re going to do is you’re going to just click once on add totals and over on the right you’re going to click on step into so now in your visual basic editor you’ll see that the name of the sub procedure is highlighted in yellow and there’s a yellow arrow in the margin so at this point if we were running the procedure it would be at this step it would just be highlighting the sub line of the procedure there’s no change in our excel window at all we used step into from the macro dialog box the shortcut key for step into once it started is just the f8 key on your keyboard so now we’re going to press f8 so it skipped the lines our object variable declarations it skipped those lines and it went to the first line of code so it’s saying set last cell equals range i2 and xl down so we want the last cell to be the last populated cell in column i but notice there’s still no change on your excel workbook at this point press f8 again and now it’s on the last cell select line again you’re not seeing any change in excel let’s f8 again now you’re seeing a change in excel in excel it has now selected the last populated cell in column i so when this active cell dot offset line is yellow highlighted you’ll see the step before it you’re now seeing the results of last cell dot select press f8 again so now you’re seeing the results of active cell offset by two rows so now it’s selected the cell two rows underneath the last populated cell in column i we’re going to f8 again no change in excel because we told it what the total formula is right it’s the sum of from i to the last populated cell in column i at this point we haven’t told it where to put that result so go ahead and press f8 again and you’ll get the result now activecell.formula equals the result of the totalformula object variable so you can see how this can be useful when you have varying amounts of data on different sheets but you want the sum to be two rows underneath the last populated cell in a particular column we’re going to press f8 one more time to finish the procedure so now all your yellow shading is gone in visual basic and on that one sheet the 26th of august sheet we do have the sum of column i’s selling prices in this lesson we did a deeper dive into foundational vba language elements and we started by getting an understanding of variables and you learned that variables store data in your computer’s memory when procedures are executed and the data may or may not end up on disk some data resides in objects like worksheet ranges and other data is stored in the variables that you create and so you learned about the naming conventions when you declare variables how to declare them you learned about the data types that are supported in vba and the importance of assigning data types to the variables you declare so that it uses the least amount of memory on your computer you learned about the scope of variables meaning where they can be accessed from as well as two methods of declaring them which is implicit and explicit and we have the option explicit statement at the top of all of our modules so it forces us to explicitly declare our variables which is the preferred method because implicit declarations can often lead to code errors and so we moved on to covering some intrinsic functions and we used the left mid and right functions to extract data from the then string we learned how to make our code more concise by using the with end with structure it decreases the amount of typing that you have to do and we did that when we used the offset property to put the extracted data into the right cells we moved on to using the messagebox function to give the end user more control over whether a procedure runs or not you learned about visual basic constants which are used to control which buttons display in the message box as well as which icon displays in the message box and then we moved on to input box which gave the end user the ability to change to a different file to get that data brought into the main vehicles file and you saw that it has similar arguments to the message box function but it also has a default argument which we populate it with the name of the file and the end user can overwrite that and then we ended up with declaring object variables and we did that so that we can configure a sum function on a sheet that shows two rows below the last populated cell in a particular column and this is useful when you have sheets with varying lengths of data on it to be able to set up object variables and get the result in the same position relative to the last populated cell in a column so lesson five is about controlling program executions we’re going to start by learning about control of flow structures as well as boolean expressions you’ll learn about conditional branching looping constructs in this lesson as well we’re going to be using our regular vehicles macro enabled sales fiscal year macro enabled files as well as two text files in the video description one is called inventory append and the other is called model to this point we’ve worked with code blocks either the ones that we created via macro recordings or by writing sub and function procedures that progress line by line through the code this is known as a sequential structure there will be situations where a sequential structure is not what you need for your project and we actually got to visually see a sequential structure where we did our object variables and we stepped into the code seeing line by line how it works in the background in vba you use control of flow structures in your code to make decisions such as which statements to skip testing conditions to determine what the code should do next and to execute some statements multiple times you’ve seen a small example of that when we did our message box function where we modified that event procedure with an if then construct so if they did the yes button in the message box it would run the code if they did the no button it would do nothing so you’ve had a small example of that already so here you’re seeing the common control of flow structures you have sequential which we’ve already discussed you have unconditional branching and you’ve seen that already you’re just not aware of it yet and that’s a statement directs the flow of execution to another location in the program without condition so when we created a calling procedure that is unconditional branching you’re going to learn about conditional branching the code to be executed is based on the outcome of an expression that evaluates to true or false a boolean expression and that’s also known as a decision structure and it is used to implement conditional branching and then we have our looping structure which a block of code is executed repeatedly as long as a certain condition exists within the conditional branching and looping structures there are constructs that you use to carry out the job of the structure so we’re going to focus on our conditional branching right now we’ll revisit this slide later to go over our looping structures but within your conditional branching there are two different constructs there’s if then and select case so if then statement does something if something is true your select case statement does any of several things depending on something’s value and we’re going to focus right now on our if then constructs and you also need to know a little bit about boolean expressions here so let’s do that first so boolean expression evaluates to true or false they usually contain two expressions on either side of a comparison operator if the expression evaluates to true the condition is met and the structure passes control to the code to be executed so we have an example here sheets dot count less than three if the count of sheets in the workbook is less than three the expression is true if the sheet count is greater than or equal to 3 the expression is false boolean expression expressions are of the integer data type so they’re stored as 0 for false and negative 1 for true but now we’re going to just briefly go over these comparison operators the ones that i like to know about when i tackle a new programming language is how is not equal to represent it because it varies according to a different programming language so in here it’s less than and equal to symbols together in vba also at the bottom of the slide you use the is keyword to compare object variables and you use the like keyword to compare string expressions in visual basic then you have the logical operators and so you can test for more than one condition by joining boolean expressions with a logical operator we have the table here we have and or not an exclusive or when you’re using the and operator each expression must evaluate to true for the entire condition to be true when you’re using or only one of the expressions must evaluate to true for the condition to be true the not logical operator says the expression must evaluate to false for the condition to be true and then you have exclusive or which returns true if the expressions are different so i have a couple of examples of joined expressions here year greater than 2017 and make equals chevrolet both of those conditions have to be true because it’s using the and keyword in order for the expression to evaluate to true selling price less than or equal to fifteen thousand or list price greater than fifteen thousand only one of those statements has to be true in order for the expression to be true because it’s using the or logical operator the if then construct has four variations that can be used in visual basic for applications so we’ve already seen if then if the condition evaluates to true it executes the code after the then statement if the condition evaluates to false it does nothing the next variation is if then end if it’s the same as if then but it closes the if block with the end if statement and i’ll just let you know now most of the time it needs to be closed with that end if statement or you’ll get an error then you have the if then else end if variation if the condition evaluates to true it will execute the code after the then statement if the condition evaluates to false it will execute the code after the else statement this is the one that’s most similar to the if function in excel in the if function you give it a condition and you tell it what to do if the condition is true and what to do if the condition is false and then we have if then else if end if and by the way you can also have if then else if else end if and this is used to test multiple conditions and it can take an action on any that evaluate to true and again the else statement can be used if all conditions evaluate to false so if condition is true let’s say if condition one is true then it will execute the code after the then statement else if condition two is true right or condition three condition four condition five so the ability to test multiple conditions and say what to do if any of them are true there is another conditional branching structure which we’ll talk about before we use and that’s the select case statement but for right now we’re going to go ahead and use our if then constructs i’m back in the visual basic editor and i’m in the code window for our sheet 3 new vehicles so that event procedure which we already modified to add our if then statement we’re actually going to put in a if then end if statement in here imagine if there’s something already populating cell a1 on your new vehicle sheet if that’s the case if the sheet is already populated you don’t want it to have the message box asking if they want to run the get new inventory procedure because the sheet is already populated only if that cell is empty do we want it to bring up the message box offering the end user the choice to run the procedure so we’re going to create an if statement and let’s click at the end of our dim response as integer line and press enter and i’m actually going to press enter twice and then i’m going to do my tab key and we’re going to start typing this if then end if construct so i’m going to type if and then active sheet dot range and then in parentheses and double quotes a1 for cell a1 and you want to close your quotes and close your parentheses dot value equals and we’re gonna have a set of double quotes which means it’s empty so two double quotes no space in between and then we’re gonna type the then keyword if cell a1 on the new vehicle sheet is empty then right we want it to do response equals message box do you want to run the get new inventory procedure so all of the stuff that we have there and now what we need to do click after that if response equals vbs line press enter and tab and type end if now the other thing we’re going to do is we’re going to click in front of that if response equals vbs line and we’re going to press tab twice we have an if construct nested within an if then end if construct it will only bring up that message box do you want to run the get new inventory procedure if cell a1 on new vehicles is empty let’s go ahead and compile and then save and switch over to excel go to your new vehicle sheet say no you don’t want to run the procedure and just type anything in cell a1 can be number text anything now go back to your inventory sheet and back to new vehicles and you’ll notice that the message box does not pop up because cell a1 is not empty so now you can click on cell a1 and delete that information go back to inventory back to new vehicles and because the sheet is not populated at least so a1 is not populated it displays the message box and we’re going to say no on that message box so now we’re going to create a function procedure and we’re going to do it in our new vehicles module for our vehicles macro enabled file and we’re going to create a function procedure with two arguments this is going to evaluate the character in the then that represents the model year and then mark up the cost based on whether the vehicle is from the current or previous year so the then character is the 11th character in the then so we’re going to use an intrinsic function here within an if then else end if structure so we’re giving it something to do based on two different things right what to do if our condition is true and what to do if it’s false so the 11th character of the then is either populated with an a or a b the a means it’s the previous year in which case it will get a 10 markup the b means it’s the current year and it will get a 15 markup so i’m going to guide you through this now so i’m in mod new vehicles and i did control end to get to the bottom of the module and i’m going to type the name of the function that we’re using here so it’s going to be function and it’s going to be called get msrp and in parentheses we’re going to give it two parameters dealer cost and then num and press enter twice so now you’ll have your function and end function statements and this is where we’re going to now set up the if construct using the mid function so i’m going to tab and i’m going to type if mid open paren then num comma 11 1 so if the 11th character of the then number close your paren equals and then double quotes b then enter and tab get msrp equals dealer cost times 1.15 and then we can put a comment at the end of that line so i’m going to do a single quote and afterwards i’m going to type vehicle is current model year and then press enter so only the comment portion of that line turned green anything after the apostrophe or single quote turns green and it’s just explaining what that math is on that line and that the character b represents the current model year okay so now we have that we’re going to do a shift tab to get back to the same margin as if and we’re going to type else enter tab and we’re going to type get msrp equals dealer cost asterisk for multiplication 1.1 which is 10 percent we’re gonna do a comment a line comment there so your apostrophe and then vehicle is previous model year enter shift tab and you need to type an end if statement here and then i’m going to press enter again so i have that blank line between end if and end function now we’re going to go ahead and compile and save and we’re going to call this function from another procedure so we’re not going to test it quite yet what we’re going to do is we’re going to go to the upper right corner where it says get msrp in your procedure list we’re going to do the drop down arrow there and we’re going to select the get new inventory procedure just to navigate to that procedure in the get new inventory procedure we’re going to declare two local variables so right underneath the comment line i’m gonna at the end of the comment line i’m gonna press enter twice and i’m gonna just declare these two local variables so we’re gonna dim dealer cost as single data type and then the next line we’re gonna dim then number as string data type so we have our variables declared click at the end of the add formatting line and press enter and you’re going to type range and then in parentheses and double quotes a2 dot select so we wanted to select cell a2 and so a2 on the inventory sheet is where the first vin number resides so we want that cell selected and then we’re going to assign the then number variable that cell as its value so the next line down we’re going to do then number equals active cell dot value and enter and now we want to assign the dealer cost value in sell g2 on that sheet to the variable dealer cost so on this line we’re going to type dealer cost equals active cell dot offset so we have to offset it by six columns no rows so it’ll go to g2 where the first dealer costs would be so we’re going to do a comma because we’re not using the row offset and then a 6 close your paren dot value so we’re assigning the value of cell g2 to the dealer cost variable and then we’re going to call on the next line down we’re gonna call the get msrp function and put its result in cell h2 so that line is going to be active cell dot offset in parentheses comma 7 which takes us to h2 and we’re going to do dot value so the value of cell h2 is going to equal and this is how we call the function procedure by its name and its parameters get msrp and then in parentheses dealer cost comma then number let’s go ahead and compile in our get new inventory and save and we’re going to switch over to excel so now we’re going to test this get msrp function by initiating our calling procedure so we’re going to go to the new vehicle sheet and we’re going to say yes that we want to run the procedure we’re going to use the default file name and you’ll notice that the msrp column is not wide enough now right and that is an easy fix so let’s select everything on this sheet and delete it and switch back over to the visual basic editor if you look at our get new inventory sub procedure the ad formatting procedure is being called before we do the get msrp section of this so we just need to move add formatting to right above the end sub statement so i’m going to just select it and cut it and then i’m going to click at the end of the active cell offset line press enter and then i’m going to ctrl v to paste it and get rid of the extra space by doing shift tab in front of it we had add formatting in the wrong position so now to add the formatting at the end after the msrp is already calculated and so now i’m going to compile and save again and switch back over to excel go back to the inventory sheet tab back to new vehicles yes run the procedure keep the default and now you’ll see that the msrp column is populated and formatted accordingly so the column width has been adjusted and everything and again it’s either 10 or 15 percent depending on whether the 11th character is a b or an a in the venn now we can clear the sheet again the new vehicle sheet and we’re going to create another function procedure that will get the year in the appropriate column on the sheet we can just go back to the inventory sheet after you clear it and then switch back over to the visual basic editor window i’m still in my new vehicles module i’m going to click at the end of the end function statement at the bottom for our get msrp function i’m going to press enter twice and we’re going to type function and this one we’re going to name get year and we’re going to give it one parameter and that’s going to be then num press enter a couple of times in this one we want to declare a local variable it’s going to be named year marker with a string data type so i’m going to just do dem year marker as string we’re going to set the value of the year marker variable to the 11th character of the then remember that’s the a or b either indicates the current year or previous year type in year marker equals and then we’re going to use the mid function mid open paren then num comma 11 1 the 11th character the vin number enter and now we’re going to use an if then else end if construct here as well so i’m going to tab over mid and then then num and you can copy and paste this if you want 11 1 equals and then in double quotes a then enter tab get year equals 2018 and then i’m gonna do a shift tab so i can get my else statement at the same margin as the if statement so else enter and then tab get year equals 2019 enter shift tab and end if and i’m going to press enter again so i get that blank line between end if and end function now we have to tell the get new inventory procedure where to place the result of the get year function so in your get new inventory procedure i’m clicking at the end of the line that starts with dealer cost press enter and you’re going to type active cell dot offset and then in parentheses comma 1 dot value equals get year and you have to put in the argument so it’s going to be uh get year we just use vin number and then you can go ahead and compile your get new inventory compile get year if you haven’t it compiles everything in the module actually so you don’t have to compile one and then save and then go ahead and switch over to excel let’s switch back to excel and test our work so at this point we should be getting the msrp and the year extracted from the then let’s go ahead and test this so i’m going to just go back to the new vehicles tab i’m going to run the procedure accept the defaults let it click and were and we have our year in column b and our msrp in column h again we’re going to select everything and delete it go back to your inventory sheet and switch back over to the visual basic editor now we’re going to create another function procedure to extract the classification from the then the classification is the 17th character of the then the last character of the then and depending on what its numeric value is it would either be a classification of a car a truck a van minivan or an suv so we’re going to put that function at the bottom of our new vehicles module and we’re going to just type function get classification is what we’re naming it and we’re going to give it then num as a parameter press enter we’re going to do our function level or procedure level variable declaration so we’re going to do dim class marker is what we’ll name this variable as string enter twice now we have to tell it which character of the then is the classification code we’re going to do that by saying class marker equals we’re going to use the right intrinsic function and then in parentheses then num comma 1. just extract the last character on the right of the vin number which is the 17th character representing the classification now we’re ready to do an if then else if end if construct because we’re going to actually be testing four different things so we’re going to have our test that we do on the if line and then we’re going to have three else if lines so it tests three other things we’ll start that i’m gonna press enter twice and then i’m gonna tab i’m gonna type if class marker equals one then enter and tab get classification equals and then double quotes car enter shift tab now we’re ready for our first of the three else if statements we’re going to do else if is one word initial capital letters on each one in visual basic so else if class marker equals two then enter tab get classification equals and then double quotes truck enter shift tab your next else if else if class marker equals three then enter tab get classification equals and then quotes van slash minivan and do your last else if so if the class marker is four then the classification is suv and you can see my elsa statement for the suv i’m going to press enter and shift tab and then i have to type my end if and you want to make sure you have press enter so you get the blank line between end if and end function now we’re going to navigate and again i’m using the procedure list i want to go back to get new inventory procedure and so we’ve been adding these active cell offset lines to put the year and the msrp in their correct cells right we have one there for dealer cost as well and we want to make this code more concise so we’re going to create a with end with block because we have other things that we’re going to be extracting as well so it’ll make this code more concise i’m going to click at the end of the dealer costs equals line and press enter and i’m going to type with active cell and then on the next line down i’m going to double click active cell before the dot offset and delete it just leaving the dot offset do the same thing on the next line go to the end of the last.offset line press enter and type end with so now you’re gonna go back and click after the dot offset comma one line press enter and we can add the offset here for the classification so we’re going to do dot offset and this one’s going to be comma 4 dot value equals get classification the name of our function and then we’re using then number as the argument here so this way we have the offsets in order so far one four and seven and that makes it easier to troubleshoot now i’m going to press enter at the end of that line just to get the spacing and then i have to delete and shift tab again so now we have our width block set up i’m going to select from with down to end with and press my tab key so that that width end width structure is indented now we can compile and save and switch over to excel and we’re going to test this so at this point we should have the year the classification and the msrp populate when we test this so go ahead and switch over start your procedure except the default and now we have the year the classification and the msrp extracted from the then and we can switch back over to visual basic editor we’ve just used the if then else if end if construct and there is a variation on that a different construct that mimics its use and it’s called the select case in select statement so it also tests for multiple conditions a lot of people think that select case is easier to read than the if then else if end if construct and also easier to troubleshoot so the if then else if end if construct has limitations it can only test like seven conditions but with select case you’re unlimited in the number of conditions that it can test so i have a slide in here giving you the syntax but we’re gonna just go ahead and use it before we set up our first select case construct to extract the color from the vin number i’m going to have you switch back over to excel and select everything on the new vehicle sheet delete it and then go back to the inventory sheet and then come back into visual basic editor i’m at the bottom of the new vehicles module underneath the get classification function and i am going to type function and we’re going to call it get color and we’re going to use then num as a parameter press enter twice we’re going to do a variable declaration here so dim we’re going to name it color marker as string and enter twice we need to tell it which character of the then number represents the color and it’s the 12th character of the vin it’s only one character so we’re going to use the mid function here color marker equals mid and then in parentheses then num comma 12 comma 1. so extract the 12th character of the then number that represents the color gonna press enter twice and then tab now we’re ready for our select case construct so we’re going to type select case and then color marker press enter and tab case 0 enter tab get color equals and then double quotes black so if the 12th number of the then is the 12th character of the then is a 0 that represents the color black press enter and we’re going to shift tab just till we get to the case margin and we’re going to type case 1 enter tab get color equals white and double quotes and press enter shift tab now i’m going to fill out the rest of the cases and the rest of this select case statement and then you’ll be able to just copy it from my screen now you can pause the video and complete your select case statement don’t forget the in select at the bottom if you need to make sure that that is there as well so you have your other cases there go ahead and get those populated and once you have that function get color completed we need to go back to the get new inventory procedure and we need to add the appropriate offset in our width and width block for the color and so it’s an offset of five columns so i’m going to click at the end of the get classification offset line and type another offset with a comma 5 dot value and that one’s going to equal get color and it’s using then number as an argument so we have that all set up now we’ll test the color in just a moment but first we’re going to create another function procedure and we’re not going to have to type this one from scratch because i have a text file that you’re going to access that’s in the video description that we’ll use for this one so in the meantime just go ahead and compile and save i’m going to do control and the end key to get to the very bottom of the new vehicles module and after that and make sure you’re after the end function statement that’s down there and you’re going to go to the insert menu and choose file in your files for video description or whatever your working directory is where you pulled in these text files you’re going to open the text files folder and we’re going to double click the get model text file so now if you look at the bottom of your screen it brings in this whole function and so saving you some typing here it’s using a select case statement here i’m going to just format it a little bit so i want a blank line after function another blank line after the variable declaration and then i want to have my yeah we’re assigning it we’re telling it what numbers from the vin number represent the model by using the mid function so it’s actually two characters the third and fourth characters of the then number represent the model so i’m going to put an enter after the model marker equals midline then i’m going to select everything from select case to end select and i’m going to tab to indent it now my ocd gets the better of me here i’m also going to tab in my cases and i can select multiple cases so we don’t have to spend time getting them indented properly and everything but my ocd is just going crazy right now because i’m not doing that but this is what happens when you bring it in from a text file i’m just going to go to the bottom and put an enter in front of in function so we have that space there and so you could see it’s two numbers starting with the third character of the then if it’s 16 it gives you the model as katera if it’s 17 it’s seville so on and so forth and now what we have to do is we have to make reference to this in the get new inventory procedure so that the result is in the right cell so i’m going to go back to get new inventory procedure using my procedure drop down and we’re going to add an offset here the offset for the model is three columns from the active cell so i’m going to click at the end of my offset comma 1 line and do dot offset it’s going to be comma 3 dot value equals get model with an argument of then number and we’re going to compile and save now we have one more that we’re going to do by typing it ourselves and then we’ll test these three so the last one we’re doing here if you look at the very bottom of my new vehicles module i have the framework of the function get make already set up and you need to copy that onto your screen recreate that onto your screen and then for the select case and select statement i’m going to put up a powerpoint slide and have you kind of work through it on your own get your function your variable declaration and the fact that the make marker represents the second character of the then in and once you get that in you’ll use the following powerpoint as your guide to build your select case statement and when you’re done building it you can go ahead and and pause this video while you build your select case statement you’ll be able to see my completed block of code and so you can see my completed get make function and now the only thing we have to do is get its offset reference and by the way the make is offset by two columns and we need to put that in our get new inventory procedure so i’m gonna switch to that procedure and put them in numerical order so i’m clicking at the end of the offset comma 1 pressing enter and i’m going to do offset comma 2 dot value equals get make and with an argument of then and now we can compile and save and we can switch over to excel so we’re just gonna get our procedure our calling procedure running by clicking on the tab you know how to do this go ahead and yes select the default of received vehicles and now we should have everything extracted in row 2 the year the make the model the classification the color dealer cost was already there and we have our msrp which is a calculation either 10 or 15 percent markup depending on the year well done everybody you can clear that sheet and return to the inventory sheet tab so we just used our conditional branching constructs all variations of the if then construct and the select case construct now we’re going to get into our looping constructs we have the 4-2 next loop which executes a series of statements a specified number of times we have a for each next loop which is used on collections and it loops through each object in the collection and then you have your do while and do until loops the do while loop statement does something if something else is true and the do until loop will do something until something becomes true we’re going to get started with our do loops so they’re used to execute a block of code repeatedly as we’ve been setting up our function procedures we’ve been seeing that it’s extracting the pertinent information from the vin number but it’s only populating the second row whereas we have other venlum numbers on the sheet and so we’re going to use these looping constructs to populate the rest of the sheet now there are two variations of the do loop do while and do until so the do while loop runs until as long as the condition is true and do until will run when a condition becomes true each of your do loops have two different syntaxes both of the constructs test a conditional value but the differences between the two control how they handle the tested condition here’s the two different syntaxes for do while you can start with do while and give it the condition and if that condition is true it will run the statement block or you can have it run the statement block before testing the condition which is the second syntax there so the first syntax will execute the statement block zero or more times depending on whether the condition is true the second will execute the statement block at least once because it’s not going to test the condition until it has executed the statement block and the same holds true for do until you can have it execute zero or more times by testing for the condition up front or you can have it execute the statement block at least once because it tests the condition at the end and then we have our four loops so four two next and four each next four two next executes a series of statements a specified number of times before each next loop is used on collections and it will loop through each object in the collection until there are no more objects so they do the same thing just in a different way so we’re going to switch over to the visual basic editor and what we’re going to do is we’re going to modify our get new inventory sub procedure by adding a do while loop to it the end result of this is that when we run the procedure in excel it is going to populate for all of the vin numbers on the sheet so all of the years makes models color classification all of that will be populated for all of the then numbers we’re going to start the modification look for the line in your get new inventory sub procedure that says then number equals active cell value click at the end of that line and press enter and we’re going to indent so i’m going to press my tab key and we’re gonna do do while two separate words then number and we’re gonna say not equal to so that’s the less than or great and greater than signs together do while then number is not equal to and we’re gonna put two double quotes to represent a blank so it’s gonna run this loop as long as the then number is not empty that’s what we’re saying to do there it will stop running this loop when it finds an empty vin number and now what we’re going to do we’re going to go down to add formatting line click in front of it press enter and up arrow and you have to give the loop keyword here so we’re going to just type loop and actually indent the word loop so it’s at the same margin as do while so it’s going to run this loop as long as the then number not equal to empty so not empty and then we need to add a couple of other things here under our offset comma 7 line click at the end of that line and press enter and we’re going to do an offset of one row so we’re going to do dot offset and then in parentheses one dot select and then underneath that after your offset one line press enter do shift tab and you’re gonna type then number equals active cell dot value so what does that do so we have our offset so as it’s extracting things from our function procedures it’s putting them in the right cells so after it does that we’re saying go down one row so right now the active cell right is range a2 which we assign to the then number variable so the first then number is in cell a2 and that’s what we’re assigning to the then number variable and now we’re saying go down one row so it’ll be on a3 the next vin number and it’s assigning that cell’s value to the then number variable and then it will keep looping until it doesn’t find any more than numbers we’re going to go ahead and compile and save and we’re ready to switch to excel to test it so start your procedure and of course select the default file name and now that you you can see that it populated for every vin number on the sheet we did that do while loop which says do continue doing this stuff right by extracting and putting it in the right offset columns continue doing this stuff until you have no more than numbers and it did just that so now the sheet is populated we’re going to perform a few more tasks in this file and one of the things that we want to do is i have another text file with and procedure in it called inventory append and what it will do is once you run the procedure in here and you get the sheet populated your new vehicle sheet populated it’s going to select everything from cell a2 through h11 so it’s purposely going to ignore the headings it’s going to select from a2 to h11 and it is going to cut that selection and then it’s going to paste it on the bottom of the inventory sheet so right now our inventory sheet goes through row 105 and anytime we bring in new vehicles we want them appended at the bottom of the inventory sheet so that’s one thing that we’re going to set up and then the second thing that we’re going to set up is we’re going to write a sub procedure that will then delete the data on new vehicles we’ve been deleting it manually this whole time and then we’ll add a line of code to call the procedure that deletes the data let’s first start by deleting the data off of new vehicles as we’ve been doing typically go back to your inventory sheet and then switch back over to the visual basic editor now we’re still working in the new vehicles module i want to get to the very bottom of that module and this is where we’re going to use a text file to get the inventory append code so we’re gonna go to the insert menu file and in your text files from the video description you’re gonna double click inventory append so when we look at that sub procedure right it’s using a an object variable dim last cell as range and then we have dem response as integer and we’re assigning the response to the outcome of a message box that says append the new inventory now it will have a yes no button and its title bar says append inventory if the user selects the yes button then it’s going to set the last cell to equal starting with h2 all the way down to the last populated cell in column h and then starting with a2 so basically it’s going to select the range a2 through h whatever the last row in column h that’s populated in and then it’s going to cut that selection switch to the inventory worksheet and it’s going to go to the bottom it’s going to find the last populated cell in column a and then it’s going to offset by one row so it’s going to go to the first blank cell in column a and start pasting the data from the new vehicles sheet tab and then it’s just going to select cell a1 and save the workbook that’s what that is going to do now we’re not going to test it right now we’re gonna test it in a moment we’re gonna create another sub procedure this one is short and quick so i didn’t have a text file for it click at the end of that in sub statement for your inventory append procedure press enter and you’re going to type sub clear sheet and press enter twice so we’re creating the sub procedure that’s going to tell it to clear the new vehicles sheet anything that’s on it so we’re going to just do an indent here and we’re going to type worksheets remember how to reference from a collection and then in quotes new vehicles close your quote close your paren dot select so go and select that worksheet and then we’re going to do cells dot select which will select all of the cells on the sheet kind of like us doing control a and then we’re going to do selection dot clear so clear everything in those cells and then we’re going to end with range and then parentheses and double quotes a1 dot select we want it to end up on cell a1 so that’s our clear sheet sub procedure so we’re gonna call clearsheet from within inventory append in inventory append we’re gonna click in front of activeworkbook.save and press enter and up arrow and we’re going to just type clear sheet to call that procedure so we want it to clear the new in the new vehicle sheet before the workbook is saved and last but not least we’re going to call the inventory append sub procedure from our get new inventory procedure so i’m going to go to my procedure drop down make my way back to get new inventory and we’re just going to add the call line here click at the end of the ad formatting line which is right above in sub press enter and we’re going to type inventory append to call that procedure and that procedure is going to call the clear sheet procedure now we’re ready to compile and save and switch over to excel so now we’re going to test to see if our append functionality works well by activating our new vehicle sheet go ahead and start your procedure use the default it will pop up and ask you if you want to append the new inventory now you’re going to select yes it clears the new vehicle sheet and when you switch back over to the inventory sheet remember we were at row 105 before and now we’re at row 115 because it appended the information from new vehicles onto the sheet you can go ahead and save your file we’re going to be using the sales fiscal year macro enabled file that we used earlier and in that file we’re going to use both of the four loops i’m gonna go ahead and close this vehicles file and i already had sales fiscal year file open i’m gonna just bring it back up and maximize it and i’m gonna actually switch over to visual basic editor here and make sure that i’m seeing this project because again sometimes if you have multiple files open you switch over it doesn’t update i want to make sure that i have the sales fiscal year project in project explorer then i go back to excel so this is the file earlier we had it do a sum function and place its result two rows down from the last populated cell in column i we did that earlier now we’re going to use our for loops because we have several sheet tabs of sales data on it and you’ll see how the for each next loop and the four two next loop are similar to each other we’re going to get the same result we’re just using two different loops so what we’re gonna do now is we’re gonna start with the four two next construct to repeatedly call that add totals procedures so all the worksheets have the selling price column totaled and i’m going to just switch over to the visual basic editor for that the project explorer window i’m going to collapse microsoft excel objects so that i don’t have all of those sheet instances showing up so we see or i’m looking at the module 1 code window and we see our add total sub procedure i’m going to click at the end of the end sub statement and we’re going to create another sub procedure and the first time we do it we’re going to use the 4 2 next construct so that’s when you have it run the loop a specific number of times and we’re going to create a sub procedure and we’re going to call it all totals and press enter twice and then we’re going to tab and we’re going to declare by using dim just a small letter i as an integer and press enter twice and then i’m going to tab again so my for loop is indented and for this one we’re going to tell it what i equals so we’re going to say 4 i equals one two worksheets dot count i equals one to however many worksheets are in the file and we’re gonna press enter after that line and tab we’re going to type worksheets and then in parentheses i dot select enter add totals enter shift tab so you’re at the same margin as your for statement and you’re going to type next i and then enter so you have a space between it and your n sub statement so we declared i as an integer and i represents worksheets one two three four five so starting with one i equals one to the total count of worksheets in the file we’re gonna select the first sheet and once the first worksheet is selected we’re calling our add total procedure it’s going to run on that first sheet then it’s going to go to the next i the next sheet run that procedure and it’s going to keep doing that until there are no more sheets to go to go ahead and compile and save and we’ll switch over to excel and test this out so we already have this sum configured on the 26th of august sheet and that’s fine we’re going to do alt f8 since we don’t have this attached to an event procedure and we are going to select all totals not add totals but all totals that’s where we put our four to next loop so i’m gonna just double click it so at some point during the execution of the program you will get this runtime error 1004 it says application defined or object defined error i will explain why this happened in just a moment but what we want to do is we want to click the end button in that error message and it takes us to the last cell well it takes us to a cell on the july 4th sheet tab if we do control home you can see that july 4th well it’s a holiday no sales happened on that day and that’s why we got that run time era so we’re going to fix that by adding some code so let’s go back over to visual basic editor the issue that caused the error is in the add totals procedure not the all totals one that’s calling ad totals in the add totals procedure we have to tell it that if cell i2 right is blank or if cell i2 is not equal to zero so if it’s if it’s unpopulated if it’s populated with anything other than a zero then run the procedure if it’s not populated with anything any number right then we want it to print the text no sales in cell a3 so we’re going to set that up you’re going to click after your dim total formula as string line and press enter twice and then tab and we’re going to use an if statement for this so if range and then in parentheses and double quotes i2 and we’re going to use our not equal less than greater than symbol 0 then if cell i2 is not equal to 0 then go ahead and run this code select everything from set down to active formula and tab it over click at the end of the activecell.formula equal total formula line press enter and shift tab and we’re going to type our else statement to go with if enter and we’re going to tab and we’re going to type range and then parentheses and double quotes a3 dot value equals and then double quotes no sales then we’re going to type enter shift tab and end if so your completed sub procedure add totals should look like my screen if the sheet is blank essentially right it’s going to put no sales in cell a3 if the sheet is not blank if there are values in column i then it’s going to calculate the sum and put it two rows below the last populated cell in that column that’s what we just set up there and we’ll test this soon go ahead and compile and save so in our all totals sub procedure we use the for to next loop now i’m going to show you the difference and it’s going to end up being the same end result between 4 2 next and 4 each next so 4 2 next repeats specific number of times in our example it repeats on every worksheet in the workbook for each next is used on collections so the easiest way to show you this is we’re going to use a for each next construct to duplicate the work that we have in the all totals procedure that we created with a 4 2 next construct so the first thing we’re going to do is select your entire all totals sub procedure and one of the buttons we added to the toolbar was comment block click on that comment block button and it basically puts the apostrophe before each line thereby commenting out that entire sub procedure at the end of its end sub statement press enter twice and we’re going to create another sub procedure named all totals you can’t have two with the same name so that’s one reason why we commented out our original one and for this one we’re going to use the for each next loop so we’re gonna just type sub all totals enter twice we’re gonna tab in and we’re gonna dim sheet as worksheet where creating like an object variable right every sheet is going to be declared as a worksheet here and now we’re going to press enter twice and tab and we’re going to type for each sheet in worksheets and that’s the worksheets collection right so all of the worksheets in the workbook for each sheet in the worksheets and we’re going to press enter and we’re going to tab again and we’re going to type sheet dot select enter add totals enter and then we’re going to shift tab and type next sheet the difference between this one and this one first one we did that we commented out the first one runs a definite number of times it runs from the first sheet until it runs out of worksheets this one we’re using the sheets as a collection object so for each sheet in the worksheets collection it’s going to select the sheet and then it’s going to call the add totals procedure and then it’s going to go to the next sheet in the collection and so on and so forth until it runs out of sheets so after your next sheet you should have the blank line and then you’re in sub statement so since we’re calling the add totals procedure which we modified so we wouldn’t get that runtime error we’ll see the results of our modification as well when we run this new all totals procedure go ahead and compile and save and we’re ready to switch to excel and test this out so i’m gonna just go back i’m gonna right click on my tab scrolling arrows in the lower left corner and i’m gonna go back to the first sheet which is 26th of august and that’s the one that we calculated the sum of the selling price before and now i’m going to do alt f8 to bring up the macros box and we’re going to double click all totals and so you saw your machine kind of click and were right it left me on june 1st and we see that we have the total of the selling price and it’s two rows beneath the last populated cell in column i i’m going to right click on my tab scrolling arrows and navigate to the 4th of july and that was one sheet that caused an error before because there were no sales on that sheet and so now you can see in cell a3 on the 4th of july sheet that it actually has no sales so we diverted it from having that runtime error go ahead and save your file in this lesson we went over control of flow structures and we utilized pretty much all of them so we worked with our looping structures we worked with our decision structures and so we started with our um just a general understanding of the structures of our controller flow structures and their variations you learned about boolean expressions and how to combine them with comparison and logical operators we went into conditional branching and that’s when we used our if constructs and our select case constructs and then we finished by using our looping constructs we used our do loops and then we did both variations of the four loops the four two next structure and the four each next structure thank you for attending excel 2019 visual basic for applications video course hi everyone i’m trish connor cato welcome to the excel 2019 visual basic for applications video course this course is for beginning users looking to automate repetitive and recurring tasks in microsoft excel vba is microsoft’s programming language and it’s built into the office applications our focus during this course is on excel specifically you’ll be equipped with the basics to start writing your own vba code modify the code behind macros you’ve already recorded and have an understanding of how vba lends itself to creating efficiency in your daily tasks we move into creating a form and programming its controls during this lesson you will learn about form properties events and methods and learn how to add controls to the forum and modify their properties you’ll ultimately launch a form with code the next lesson will take you through the steps necessary to create pivot tables programmatically and visual basic for applications if you’re enjoying these videos please like and subscribe if you want to earn certificates and digital badges please become a member of our patreon the link is in our video description if you have any questions you want answered by one of our instructors please join our off-site community the link is in the description as well as always if this course has exercise files you’ll find them in the video description below now we’re going to get started with lesson six working with forms and controls we have several topics to cover in this lesson you’re going to start learning about the userform object and then its properties events and methods there’s a toolbox we’ll be using to add controls to the user form we’ll go over what kind of controls will be able to access from the toolbox we’ll be adding controls to the form and modifying the control properties formatting the controls and then we’re going to apply code to the controls to determine what their use is going to be finally you’ll learn how to launch the form via code we’re going to be using our sales fiscal year file as well as accessing another text file named coding controls during this lesson so far in this course you’ve created message boxes and input boxes you’ve learned that message boxes display messages and accepts input from the user via buttons in our case it was ok and cancel buttons an action is then taken on that input via coding input boxes display messages to the user but also allow the user to type in one input or have it default just like a message box input action is taken on the input box via coding the userform objects allow for multiple inputs which can then be coded to perform specific actions these inputs can be text check boxes or drop down lists for example and they’re known as controls user forms have properties events and methods that can be accessed these next few slides are for your reference after you’ve completed the course i will be guiding you through this as we do exercise so i have a slide with a description of form properties that can be accessed the next one are form events so for example the click event and whatever action is attached to it will occur when the left mouse button is clicked went over the form and the next slide is about form methods you have cut copy paste hide move so on and so forth and again i will be walking you through these during the exercises in this lesson the one that i do want to cover with you now are form control prefixes we’ve used lowercase mod as a prefix for a module and so if you’re looking at them in a list you’ll see them all begin with mod we have prefixes for form controls and i’ll guide you through these as we use them but for example chk would be a check box cbo is a combo box and we’ll be utilizing these throughout the lesson each form control has its own set of properties and they differ depending on the type of control but this slide has a list of common control properties that most controls have so you have like a height property a width property that type of thing and again the slide deck is in the video description so you’ll have access to these reference slides we’re ready to get hands-on now with the userform object before we insert a userform object into our sales fiscal year excel file let’s talk about the different types of modules again we did a brief review early in the course your standard code is stored in modules like in this project we have module one we could have renamed it we didn’t we’ve also in a different file created event procedures and if you expand your microsoft excel objects folder in the project explorer window you’ll see one for each sheet and all the way at the bottom of all of the sheets you have one called this workbook and in our vehicles macro enabled file we did an event procedure based off of the new vehicles sheet tab which was known as sheet 3 in the system your sheet modules and this workbook module are where you store event procedure codes and i’m going to just go back up and collapse the excel objects folder so i don’t have to look at all of those sheets so we have our regular module where you store your function procedures your sub procedures and then you have your event procedure modules your worksheets and this workbook now we also talked about early in the course a class module the modules we’ve been using like module one that’s a standard module class modules we’re not going to use in this course however those are used to create your own objects and so now we’re going to create a user form and that actually sets up a forms folder and no matter how many forms you create in this particular file they will all go into that forms folder so it’s almost like another module just for form user form objects and you’ll see that now as we go to insert our user form so we’re going to just go up to the insert menu and choose user form and now a couple of things happened you have the blank grid a framework for your user form object on your screen and attached to it is a tool box which you’ll use to access the controls that you’re going to put on the form now i’ll give you a heads up here sometimes if you have double monitors your toolbox may show up on another monitor and it could be behind some other open windows so if you need it you may have to search it out if i click on a blank area here try to deselect this user form it’ll disappear but then it’ll reappear when i click back on the user form typically and we can always get it back by using the view menu now i’m going to close my toolbox for a minute it has an x in its upper right hand corner so that i can see in the project explorer window that i now have a forms folder with one form in it which it names by default userform1 now we’re going to use the properties window to change some of the properties for our user form object and again if your properties window is not showing on your left hand pane you can go to your view menu and select it or you can press f4 to bring it up we are gonna give the form a name using the appropriate prefix we’re gonna give it a caption which will show in the title bar of the form and we’re going to give it a height and width measurement so in the properties window we’re going to start with the name property we’re going to double click name in parentheses and we’re going to type lowercase frm capital g generate capital r reports so that’s the system name of the form frm generate reports the next property we’re going to do is the caption property and again that shows in the title bar and we’re going to type just in plain english and as you’re typing it you can look at the title bar and see it populating generate sales reports and i’m pressing enter after i change a property we’re going to double click height and we’re going to make it 300 and we’re going to scroll down if necessary double click with and we’re going to change that value to 400 and by the way the height and width values would change if we manually resize the form by dragging its sizing handles in the next exercises we’re going to add controls to the form and set properties for those controls so the first thing we need to do is display our toolbox again and we can get that from the view menu because we closed it by using its x so we’re going to just go to view toolbox and the tool box shows up again and we can move it so you can see it clearly and if you look at the controls in the box as you hover over them so the first one is your mouse pointer it’s the select objects control the next one is a label third one is a text box you have a combo box list box so on and so forth so we’ll be using several of those controls placing them on our form and you’ll learn also how to size and align your controls a little bit later in these exercises so let’s get started we’re going to add start date and end date label controls to the form so in my tool box i’m going to look for the label control it’s the capital letter a and i’m gonna click on it on the toolbox and now if i move my mouse over the form grid it looks like a crosshair i can click and hold and draw the label control or i’m going to just click in the lower left corner of the form and it places the label control there for me and so now with that label control selected we’re going to change some of its properties so typically you don’t name labels unless they’re going to be some kind of code attached to them so we’re not going to use the name property we want to look at the auto size property so the auto size property is set to false if we double click auto size it will change it to true and we want it to be true and then the caption property is the text that shows on the label so i’m going to double click caption and i’m going to type end date in plain english followed by a colon and press enter and now you see the end date text populating the label and then you notice how it wrapped end date within that label control we don’t want it to do word wrap so the last property is word wrap and it’s set to true we’re going to double click it to set it to false so it doesn’t wrap the words in the label and i’m going to just manually move so i want my mouse pointer to look like a four-headed arrow on that end date label and i’m going to just drag it down just a little bit we also want a start date label so instead of starting from scratch i’m going to just right click on the end date label and i’m going to choose copy and then i’m going to right click in a blank area of my form grid and choose paste so now i’m going to move the copy of the end date label above the existing end date label and now it’s just a matter of changing some of its properties a couple of things we didn’t give the label a name so we don’t have a label name here our other property auto size is set to true already because we copied it and word wrap is set to false and it’s the caption property we’re gonna change so i’m gonna double click caption and i want it to say start date in plain english with the colon and press enter so copying it actually saves you time because it copies some of the pertinent property information as well now we’re going to add two text box controls we’ll do the first one and then copy it and modify the properties for the second one we’re going to find in the tool box our text box control and it’s the one that has the lowercase a b to the right of your label going to select it and again when my mouse is on top of the form grid it looks like a crosshair and i’m going to click to the right of the end date label and let it place the text box there i’m going to move mine up just a little bit so it’s more in line like that and with that text box control selected we are going to give it a name so in the properties window we’re going to double click name we’re going to use lowercase t x t as the prefix for a text box and we’re going to type capital e and capital d date so txt end date and the other property that we’re going to change for the text box is its width property and we’re going to make the width 50. and then we’re going to copy that text box paste it on the grid and move it down so it’s to the right of the start date label and on the copy we’re going to just change the name of it to txt start date and notice the name property didn’t come over with the copy because you can’t have the same name for controls on a form object so txt capital t capital s start capital d date is what we’re naming that text box when this form is completed and totally coded it will generate sales reports based on user choices in the form and as such we want to add two buttons to the form we want to add a display button and a cancel button so we’re going to use the command button control in your tool box the command button control is in the second row it’s the second one on my screen in the second row and it looks like a lowercase a b as well when you hover over it of course the screen tip will let you know it is command button so we’re going to go ahead and select it in the toolbox and we’re going to place a command button like in the upper right hand corner of the form in the properties pane we’re going to name it using cmd as the prefix for a command button capital d display so cmd display is the name and the caption we’re going to go down to the caption property and that’s the text that shows on the button and it’s just going to be display in plain english and the last property we’re going to change is the default property default property is currently set to false we’re going to double click it to make it true so the default property when it comes to a command button is you can press enter to make that button happen instead of having to click on it that’s what the default property does and you can only have one default property on a button on your object your userforum object so we have cmd display and we gave it a caption of display and we changed the default property to true now we’re going to copy that display button paste it on the grid and drag the paste it version underneath your original display button and again don’t worry about alignment we’ll fix that later so on the copy notice the name didn’t carry over right we’re going to name this one c md capital c cancel we’re going to give we’re going to change the cancel property here from false to true and that means you can use the escape key on your keyboard to make that button happen and so we set cancel to true the caption property we’re going to change it to cancel and the default property we need to change to false because you can only have one default command button and that is the display button if you click on a blank area of your grid you’ll see the display button has like that dark border around it whenever you see a button like that in a dialog box it means you can press your enter key to make that button happen this would be a good time for us to go ahead and save right from the toolbar before we continue adding controls to this form now we’re going to add a combo box control to our form so the combo find the combo box control in your tool box and select it and we’re going to put it in the like the lower right hand corner of the form in the properties pane we’re going to change its name to prefix of cbo and then capital m month we’re going to use its list rows property and that just says how many rows will be in the drop down list so we’re going to change list rows to 12 and then the match required property we’re going to double click that to change it from false to true in visual basic controls a combo box by default says no match is required which means that the end user can type in their own entries and use them from the list we don’t want that to happen we want them to pull just from the list that we’re going to populate later so we have our combo box in the lower right hand corner and now we’re going to click in a blank area of the grid and you can copy your start date or end date label because we’re going to want another label and we’re going to paste it onto the grid and then we’re going to move that label to the left of the combo box i’m going to just move mine down a little bit and again we’ll do some alignment stuff in a little while so now we just have to change the label properties now we’re going to use this label later and code some stuff for it so we want to give it a name so we’re going to name this lbl prefix for a label month capital m month and we’re going to give it a caption of 4 which month question mark and then i need to move my label over because it auto expand it so it’s not overhanging my combo box so your form should look similar to mine at this point now we’re gonna add two frame controls to the form and we’ll add the first one of course copy it to create the second one but the frame control is utilized to group related other controls together so we’re going to start by adding our first frame control on my toolbox the frame control is the first one in the second row it has an x y at the top of it we’re gonna click that and i’m gonna click like in the upper left corner of the form grid and now in order to make space for the other frame i’m going to move this frame over as far left as i can where i can actually see the borders of it and then i’m going to decrease its width manually by just clicking on the right center sizing handle so my mouse looks like a double-headed arrow and dragging it backwards about that much and so we’re going to give the frame a name and it’s going to be fra is the prefix for frame control capital p period and we’re also going to give it a caption of period and the caption is what shows up the upper left hand corner of the frame now we’re going to copy that frame paste it onto your grid and drag the pasted frame to the right of your period frame and for this one we’re going to change the name property to fra sales and we’re going to give it a caption of sales so the next thing we’re going to do is we’re gonna add three option button controls into each frame we’re gonna find the option button in the tool box and it looks like the little circle with a dot in the middle of it the next to the last one in my first row and i’m gonna select the option button and now i’m gonna click inside the period frame and then i’m gonna copy that option button and i’m going to paste it twice inside the period frame so you’ll have three option buttons inside your period frame and if you click on the top one you’ll see in the name property it’s option button one second one is two second one is three you kind of want to have them in the right order for tab order purposes a little bit later and again we’ll deal with the alignment a little bit later and i’m going to show you how to get three option buttons in the sales frame now too another efficiency tip here what we can do inside the period frame just click in a blank area inside the period frame and do control a and it selects all three option buttons right and then you can just do control c to copy them and then right click inside your sales frame and paste let’s do the properties for these option buttons so the first one inside the period frame should say option button one as its name property its name property is going to be opt as the prefix capital m month and we’re going to give it a caption of month and you can see the caption shows instead of option button one the second option button in the period frame which name is currently option button 2 we’re going to change it to opt all with a caption of all the last option button option button three in the period frame its name is going to be opt other with a caption of other so we have month all and other option buttons in the period frame let’s go to the sales frame so the first one in the sales frame since we copied it it’s now option button four and we’re going to give that a name of opt sales person with a caption of salesperson and i’m making that caption plain english two words and then the next one in the sales frame option button five that one is going to be opt model with a caption of model and last but not least option button six its name is going to be opt classification with a caption of classification so now we’re ready to do some formatting of our form controls and we’ll start with alignment and grouping we’re going to start by aligning the option buttons in the period frame so just click in the period frame and do ctrl a like we did before to select the option buttons and we can go up to the format tab the format menu hover over a line and we’re going to click on lefts so those three option buttons are aligned by their left edge let’s do the same thing in the sales frame also align those three option buttons by their lefts now we want to align our two frames by their tops so i’m going to select the period frame hold down my control key and select the sales frame that’s one way of getting them both selected i’m going to go back to format menu align and this time we’re going to choose tops and we can click away and see they’re perfectly aligned by their top edges now now we want to group the options buttons in each frame so that if we move any one of them all of them will move they’ll retain their alignment and everything so i’m going to just click in the period frame and do control a to select all three option buttons i’m gonna go to the format menu and i’m gonna click on group and now you’ll see there’s one border around all three option buttons instead of three separate borders they’re grouped together now do the same in your sales frame now i’m going to show you how to use a selection net also known as a selection marquee has a lot of different names to select different objects so we want to align the period frame and the start date and end date labels by the left edges so i’m going to click slightly above and to the left of the period frame click and hold and drag down until your start and end date labels are within that little guideline so now when you let go it selected the period frame and the start and end date labels that’s called a selection net and we’re going to go to format align lefts let’s use a selection net to select our display and cancel buttons as well as our combo box and let’s align those by their left edges as well at this point we haven’t coded any of our form controls yet but we want to test our form make sure it displays properly and specifically we want to test the tab order on the form just make sure your form is selected and you can use the run button on the toolbar run sub user form button or you can just press f5 to run the form and the form should pop up on your screen it’s on top of some other module so we want to test the tab order on the form now when i bring up the form notice that it’s flashing in the end date field that’s where it’s starting if i press the tab key on my keyboard it then goes to start date if i press tab again it looks like it has the display button and then the cancel button and then the combo box then it goes into the period frame and it’s on month then all then other then it goes to the sales frame and it’s on salesperson then model then classification the frames the tab order is perfect because we made sure that the option button copies were in the right order so option button one two three four 5 6. but we can see that the rest of the tab order on this form is not the way it should be so we’re going to go ahead and fix that go ahead and close the x button in the upper right hand corner of your form and it should take you back to your form design view if you will if not you can double click frm generate reports in your forms folder in the project explorer window so we need to adjust the tab order here so we’re going to go to the view menu and on the view menu you’re going to select tab order and i’ll move this box here so we can see it a little bit better the labels don’t have to be included in the tab order because we don’t want to tab to any labels in there at this point so the tab order that we want is that it start period frame and then go to the sales frame so they’re at the bottom of my tab order list which is why it went there last i’m going to click and hold on fra period and drag down to select fra sales and with both of them selected on the right side i’m going to use the move up button until they’re in the first and second position then i’m going to click on txt start date move that up so it’s in the third position and put txt end date in the fourth position we want our combo box cbo month to be underneath the end date text box and then we want our command and display buttons underneath cbo month and again we’re not concerned about the labels because labels are not input controls we can click ok and then we’re going to do f5 so we can test the tab order on our form notice that the month in the period frame is already selected when we do tab it’s going to go to all and then other then into the sales frame sales person model and classification after that it jumps down to the start date text box then to the end date text box then to the combo box finally the display button and the cancel button we can close the form again by using the x in the upper right hand corner when we code the controls on our forms we’re going to be doing them in what are known as built-in class modules these modules contain procedures that are used to respond to events for a form or maybe a worksheet or that performs tasks in support of the form or worksheet so we’re going to be populating our combo box for starter by using code so what we’re going to do is we’re going to right click on the form anywhere in the blank area of the grid and this is only one way of doing this and we’re going to choose view code so now if you look up at the top right gives you the file that we’re in but it says frm generate reports code that is a built-in class module this is the code just for that particular form the first thing we’re going to do is explore the object list where it says it defaults to user form right and notice the user form default procedure is the click event we’ll do the drop down next to to the right of user form and you’ll see all of the controls that we’ve placed on that form and this is a good example of when using the prefix is handy your command buttons are grouped together your frames are grouped together your option buttons are grouped together as are your text boxes so you don’t have to keep looking through a list for something not knowing what the actual control is so that’s a good example of why you want to use those prefixes here we’re going to leave it on the user form object now i mentioned that it defaults to the click procedure but we want our code to be based on its initialize procedure so to the right of click in your procedure list you’re going to select initialize and just like when we did an event procedure earlier we don’t need to keep the framework for private sub user form click we’re going to just delete that and leave our private sub user form initialize in sub statement the initialize procedure happens when the form is loaded into memory so when the form is run that’s when this procedure will happen at the end of the private sub line we’re going to press enter twice and we’re going to do a with end with statement so i’m going to tab over and i’m going to type with and then cbo month so that’s the combo box the month combo box i’m going to press enter tab i’m going to do dot and the list pops up we want to use the add item method so dot add item space and then double quotes jan for january now you can copy that add item line we need 12 of them january through december and we’re just using the three character abbreviation for the months with no period and once you have your 12 add item lines we’re gonna shift tab and we have to have our end with statement and you can go ahead and compile and save and in your project explorer window you’re going to double click frm generate reports we’re going to press f5 to run it and we just want to test our drop down so go to your for which month drop down and you should see january through december there we added those items to the combo box and we can close generate sales reports form and we’re going to change one property for that combo box so select the combo box on your form grid and we’re going to go down to its text property and that’s like the default property so we want it to default to january so we’re going to just type j a n there and enter and now if we i have to select my form first and f5 we’ll see that the for which month combo box is now defaulting to january and we can close it another way to access the code window for the form is just by double clicking on the form grid and that will take you to your built-in class module and it’s built in because a form is a built-in object here in excel vba so unlike a regular class module where you’re actually creating objects that are not included in the application this is a built-in class and so we’re in the code window and we’re going to hide controls based on when another control is selected so for example if month is selected in the period frame we want to hide the start date and end date labels and text boxes and we have several event procedures to code so we’re going to insert a text file and then review the code for your understanding first we’re going to declare some variables and we’re going to click at the top after option explicit and press enter and we’re going to do public sales comma period as string and press enter so we’re declaring variables up in the declaration section and we’re making them public so that means they’re available to any modules here and then we’re going to click underneath our end with statement we’ll click at the end of it and press enter and we’re going to type cbo month that’s our combo box name dot visible which is a property equals false which shows up on your list right underneath that we’re gonna type lbl month dot visible that’s its label equals false so right now it’s telling it not to show the combo box or the label but we’re not done yet so we’re going to click at the end of n sub and press enter and then we’re going to go to our insert menu and choose file and we want to grab that coding controls text file so we can just double click it and boy did it help us with a lot of typing look at all the stuff that’s in here we’ll go over with all of this code that we didn’t have to type means we declared two string variables sales and period the first thing that came in from the text file is private sub cmd cancel click so when the cancel button on the form is clicked it’s going to unload the form from memory and me is just a shortcut for the current object in this case the form so that’s one thing that came in from the text file coding that cancel button and then we have our opt all button when that option button is selected when it’s clicked or accessed it’s going to set the period variable to all when the classification option button is clicked it’s going to set the sales variable to equal classification when the model option button is clicked it’s going to assign model to the sales variable so we need to do a fix here because i just noticed that model doesn’t have double quotes on it coming from the text file and it needs to or we would get an error message and you might want to make a note if you want to avoid that later to just go into the text file and change it in there so the next sub procedure is opt month when it changes if that opt month button is clicked right and you see this next sub procedure it’s going to set the period to equal month if opt month equals true then we want the combo box and the label to be visible or else we want them to be hidden unless they need to select a month they don’t need to have the label or the combo box showing up on the form and then we have we’ll go to our private sub opt other this one has a change event and this one has a click event so when it’s clicked the other option button it will set the period to other and if it’s other then we want the start date and end date text boxes to be enabled so they’re accessible if they select other in that frame or else we want them to be disabled so they’ll still be visible but the end user won’t be able to access them and then the last but not least if they select the sales person option button in the sales frame it’s going to set sales variable to equal sales person and you want to go ahead and compile and save let’s go test some of this so i’m going to just double click my form in the forms folder in project explorer to get back over to it and the first thing we’re going to do is in the properties pane we’re going to disable the start date and end date text boxes so i’m going to click in the start date text box and i’m going to double click the enabled property to change it from true to false and i’m going to do the same with the end date text box and now i’m going to go ahead and press f5 to run the form so make sure you’re just on the grid and you don’t have any control selected and then f5 will be successful for you and so the first thing i want you to do is try to click in the start date and end date text boxes and you cannot in the period frame select the month option and you’ll notice that the combo box and its label will now become visible and accessible on the form if you select the all option button in the period frame your start date and end date text boxes are not available to you because we want it to run all the reports for all of the dates and then if you select the other option button now you have the ability to get into the start date and end date text boxes so in the background on my screen you see that opt other change is what’s causing that so if they select opt other if they select the other option button it’s going to assign the period valuable the value of other and it’s going to enable the start date and end date text boxes and now we’re going to use the x in the upper right hand corner to close the form again and the last thing we’re going to do instead of us having to go to the forms folder and double click the form and then f5 to run it we want to launch it programmatically so we’re going to do that now we’re going to go over to our project explorer window we can right click on the modules folder hover over insert and choose module and we’re going to rename module 2 in its properties window we’re going to name it mod reports and in mod reports we’re going to type a very short sub procedure so we’re going to type sub we’re going to name it show form press enter twice and we’re going to tab over we’re going to type the name of our form including its prefix frm generate reports the dot notation and then we want the show method we just created a sub procedure that will show the form when this procedure runs and now we can compile and save and we could just execute the procedure by pressing f5 anywhere within it it brings up the form and because we brought it in from a text file we coded the cancel button we can actually use the cancel button to unload the form from memory and close it in this lesson we learned about and used the user form object we changed some form properties and we went over some properties events and methods for form controls we accessed the toolbox to be able to get to our form controls and we added controls to the form and modified their properties and then we did some formatting of form controls in terms of alignment and grouping and we moved on to creating code for form controls in a built-in class module and we used a lot of code from a text file that was in the files in the video description we ultimately ended up launching the form via code and we will be revisiting using the form in a later lesson in lesson seven we will be working with the pivot table object and visual basic so the first thing we’re going to do is create a pivot table in excel and then we’re going to create a pivot table in visual basic for applications when end users use the form that we created in the previous lesson it is going to generate pivot table reports based on the user’s choices on the form after we get our pivot tables done we’re going to finalize our form and then you’ll learn how to add code to a button in excel for ease of use pivot tables allow you to summarize data from a worksheet or an external data source and create reports you can decide how to summarize the data and the data to be analyzed and after you create a pivot table you can pivot the data to look at it in different ways for different analysis when you’re creating a pivot table in vba two separate objects are used the pivot table object which is the pivot table in the workbook and the pivot cache object which is a memory location that’s created and it holds the source data the pivot table is created from when you’re doing this in visual basic the pivot cache object needs to exist before a pivot table is created so you use what’s known as the create method of the pivot caches collection object to create that pivot cache in vba and i have on this slide it’s syntax the one required argument is source type and then you have two optional argument source data and version the source type argument has five options in the form of excel constants so we saw visual basic constants earlier they’re preceded by vb like when we were working with the message box right these are excel constants which are preceded by xl so you have consolidation database external pivot table and scenario process wise once the pivot cache is created the create pivot table method of the pivot cache object will be accessed to create the pivot table and it has four arguments as listed on this slide table destination table name read data and default version and the final three the only one that’s required is the table destination argument and again this is background information for your future review if you need to refresh on anything i will be guiding you through this when we get started the pivot cache and pivot table can be created in the same procedure and the fields that are going to populate the pivot table have to be set up separately within what’s known as the pivot fields collection yes this sounds complicated until you get used to it when it comes to pivot fields collection it’s a member of the pivot table object and it contains the columns of data from the data source the pivot fields orientation property is used to populate the pivot table report field names are assigned to the values in each column based on the column headings an excel constants are used here as well your if you’re used to pivot tables you know you have row labels column labels you have report filter you have values so the excel row field would be for your row labels excel column field for your column labels excel page field is used for the report filter an excel data field is used for the values you have an extra constant here excel hidden which is used to hide a field and then at the bottom i have the syntax of the orientation property for your future reference so we’re going to start in our sales fiscal year file by recording two macros to create the pivot table so i’m on the 26th of august sheet tab and i’m going to just click anywhere within my data there and we’re going to start a macro recording so i’m going to use the mac no macros currently recording button down in my status bar that we used earlier i’m going to click on that and we’re going to name this macro create pivot table and then we’re going to just click ok now just make sure you’re anywhere within your data and except for on that sum of the selling price we’re going to be anywhere within the data go to the insert tab of the ribbon and the first button is pivot table i’m going to click the upper half of the button in the create pivot table dialog box you’ll see that it has selected all of your data we were just anywhere within our range and it will select everything until it finds a blank and that’s the choice we wanted to use select a table or range and then the next choice you make is choose where you want the pivot table report to be placed it defaults to a new worksheet which is typically how they’re used and so we can just click ok so we’re on a new sheet we have the framework of our pivot table on the worksheet and to the right we have our pivot table fields list this is where we need to stop this recording remember it’s a two-step process even when you’re recording it as a macro in excel the first step is to create the framework of the pivot table and we’ve done that so i’m going to go down to my status bar and select stop recording now we need to record a macro that will select the fields that we want in our pivot table report so i’m going to go back to my status bar and start another macro recording and this one i’m going to name select fields and click ok in your field list on the right you’re going to drag your year field to the filters box underneath and notice your pivot table report is already starting to shape up we’re going to drag classification to columns and we see our pivot table we have our column labels and it’s showing the classifications car suv truck minivan we’re going to drag well we could put a check box in front of make and it will automatically put it in the rows box and we’re going to put a if we scroll down we’re going to put a check mark in front of selling price and it’s automatically going to put that in the values box so any text space field will automatically go into rows and any numeric field will automatically go into values and the default aggregate that’s used is the sum function so now in our pivot table we can see our row labels are the makes of the vehicles our column labels are the classification and we’re getting the selling price for each combination there now we’re ready to stop our macro our second macro from recording so you could stop the recording and let’s switch over to visual basic editor and in project explorer i’m going to collapse that microsoft excel objects folder and now you’ll notice we have mod reports module 1 and module 2. we’re going to double click module 2 and that’s where it put the code for the two macros we recorded and we’re going to rename module 2 so using its properties we’re gonna name it mod sheet pivot so this is the code that was created when we did our create pivot table macro right it’s adding you can see it’s referencing the pivot caches object right and we’re using the source type of excel database and you have all of this code that was generated by your two separate macro recordings and then we had to record a separate macro for selecting the fields and that’s where you’ll see those excel constants for page field column field row field so on and so forth so if you create a pivot table while recording a macro in excel you have to record two macros one to set up the framework of the pivot table and the second one to populate the pivot table report with the appropriate fields now we’re going to start creating our pivot table in visual basic editor and so we’re going to start by creating the pivot cache and pivot table objects which can be in the same procedure as you’ll see but before we do that switch back over to excel and delete the sheet that has your pivot table report on it and then we’re going to insert a new sheet a new worksheet and we’re going to name it reports and the sheet tabs in your excel file should look like mine on the screen so i’ve made the report sheet the first one and i deleted the other sheet where we recorded our macro and created the pivot table and now we can switch back over to the visual basic editor in your project explorer window switch to mod reports where we have just that one small sub procedure that shows the form we’re going to click after the in sub statement here and you’re going to type the sub procedure that i will display on my screen momentarily i’ve changed my font size to 18 so you can create that sub procedure that we’re naming create pivot based on what’s on my screen we’ll talk about it after you get it typed in in this sub procedure we are declaring two object variables destination and range data both with the range object type we’re setting the destination variable to equal that reports worksheet cell a1 that we just created in excel and we’re setting the range data object variable to equal the range a1 through j1 all the way down to the last populated cell in column j after that we’re accessing the pivot caches object so activeworkbook.pivotcaches.create and i’m using the line continuation character there space and underscore and this time in the parentheses we’re using a different syntax and we’re doing this here because you’ll probably come across it in code that you inherit so we’re actually naming the arguments and separating them from their values by using a colon and an equal sign so the first argument for the pivot caches is the source type and for an excel spreadsheet the data on an excel spreadsheet you use the excel constant of excel database the next argument is the source data and that is going to be the range data so a1 through the last populated cell in column j and then we’re doing another line continuation character at the end of that line and now we’re moving on to the create pivot table method of the pivot cache object and that line starts with dot create pivot table and then we’re giving it a destination for the table which is what we populated as the destination object variable so the report sheet cell a1 is where we’re going to start the pivot table framework and then we’re naming the pivot table sales pivot let’s go ahead and compile and save our work and we’ll switch to excel we need to run that sub procedure our create pivot procedure on a sheet that’s populated with data so i’m going to go to my 26th of august sheet tab and i’m going to just be anywhere within my data and i’m going to do alt f8 to bring up the macros dialog box and we want to double click create pivot it doesn’t initially look like anything happened but we told it to put the framework of the pivot table on the reports sheet tab so let’s go to reports and we’ll see the framework of our pivot table so now that we have the framework of our pivot table we’re going to switch back over to the visual basic editor because we have to create our fields collection regardless of whether you’re creating a pivot table by recording a macro or by using visual basic for applications it’s going to be a two-step process we’re going to be still working in mod reports and we’re going to go up to the top and click after option explicit we need to declare some variable names up here so we’re going to type public and after we click after option explicit i pressed enter we’re going to use the public keyword page name comma row name comma column name comma data name as string so four string variables we declared in the declaration section and you can press enter so now we’re gonna go to the bottom of our create pivot sub procedure click at the end of the end sub statement and press enter and we’re going to create another procedure sub procedure here so we’re going to type sub and the name of it is set fields and press enter a couple of times well we’re going to declare an object variable here within the procedure so we’re going to do dim and then i’m just calling it pvt table as pivot table and pivot table will show up on your list underneath that we’re going to use the set statement remember we have to use set for our object variables set pvt table and then equal worksheets and in parentheses and double quotes reports dot pivot tables and in parentheses we need to put what we named the pivot table which is in quotes it’s sales pivot and then we’re going to close those parentheses we’re going to press enter twice and we’re going to do a with end with block so we’re going to indent and we’re going to type with pvt table enter and tab we’re going to do dot pivot fields which will show up on your list and then in parentheses page name dot orientation equals xl page field so we’re referencing that constant and just a reminder the excel page field constant refers to the field that’s going to go into the report filter box we’re going to press enter and we’re going to do dot pivot fields again this time in the parentheses we’re going to type row name dot orientation and this one is going to equal excel row field so the field that’s going to go into the rows box for the pivot table enter again we have two more of these lines that we have to do so dot pivot fields and use the list as necessary to decrease your typing and in parentheses for this one we’re going to do column name dot orientation and this one equals xl column field and last but not least we’re going to do dot pivot fields in parentheses data name and that’s for the values dot orientation equal excel data field we’re going to press enter and shift tab and we’re going to type in our end with statement and enter again so now what we’re going to do is we’re going to finish up this sub procedure we have four more lines to type and i’m going to shift tab to out dent so i’m at the same margin as our dim and set lines and we’re going to type active workbook dot sheets and then in parentheses and double quotes reports dot activate and i’ll scroll down so you can see this a little bit better our next line is pvt table like our object variable name dot pivot select then we’re going to type a space in a set of double quotes comma and from the list that pops up we’re going to select excel data only another excel constant so the data field is the values field and we want to we’re typing this line to say select all of the values and we’re going to press enter and then we’re going to tell it how to format it so selection dot number format equals and in double quotes we’re going to type a dollar sign pound sign comma two more pound signs and a zero and then close your double quotes the number format and i have it highlighted on my screen that we’re using so it’s going to start it with a dollar sign and the pound represents any digit that may be in that position you have your thousand separator is the comma and then we have two more pound signs so digit placeholders if they’re in that position it will put them there if not it will skip it and we’re saying that we’re not going to have any decimal places on our numbers here if we wanted decimal places after the ending zero we would we could do a dot and then zero zero which means that it would have two decimal places the zero that’s sitting there instead of the pound signs or as they’re now known hashtags that would represent a leading zero for a number if it’s less than one so that’s the number format and you’ll see it once we finish this up and now we have one more line to finish this set field sub procedure and we’re going to just type range and in parentheses and double quotes e1 dot select this is going to set the fields whether they’re filter fields row fields column fields or your values fields for the pivot table that we created because the variables will not populate until we actually run the form again we’re going to be able to test this our sub procedure for setting the fields in just a little while we have some more tasks that we’re going to complete that i have under the heading finalizing the form what we’re going to do here is we’re going to create code that will generate pivot table reports based on the selections the user chooses in the form so in other words we’re going to distribute user responses to the correct procedures specifically we’re going to create code that will perform these steps when the user activates the display button on the form we want it to hide the form and whatever option is selected in the period frame will be evaluated determining the month or the start date and end date of the pivot table report the sales option that is selected in the sales frame will also be evaluated and at this point the variables containing the field names will be populated then the source data will be pulled from the workbook and placed on a new sheet and then the data will be moved to a new workbook and the pivot table will be created so we’re going to get started on these finalizing the form steps and i’m still in visual basic editor and in the project explorer window i’m going to expand forms folder and double-click our generate reports form to get back to it and then i’m going to double click in a blank area of our form to get back to our built-in class module which has all the code that we’ve created for this so far so we want to select the framework for the click event for your display command button so where it says user form at the very top of the module in the procedure list we’re going to do the drop down and we’re going to select cmd display so now we have private sub cmd display click event waiting for us because click is the default procedure for a command button i’m going to click after the opening and closing parentheses and press enter a couple of times and we’re going to tab and we’re going to type me dot hide and hide is on the list and in this instance as we saw previously when we used me it’s referring to the form when we click the display button it’s going to hide the form that’s one thing that we need to happen so now we’re going to declare some variables up top in the declaration section and we already have public sales and period as string click after period type a comma and type month so we have sales period and month as string variables press enter at the end of the as string line and we’re going to type public start date comma end date as date and press enter now we’re going to navigate to the end of this module and we’re going to create another sub procedure there that’s going to code the options selected in the period frame on the form and we’re going to use a select case construct here so at the very bottom of the module we’re going to type sub we’re going to name it get dates press enter a couple of times and then tab and i’ll scroll down so you can see my whole construct down there and we’re going to type select case period enter and then tab case and then in double quotes month enter tab month equals cbo month and we’ll type all of this in and then i’ll go over it and review it with you after i press enter after cbo month i’m going to shift tab so i get back to the case margin and i’m going to type case and then double quotes all enter tab start date equals get first date enter end date equals get last date enter shift tab case and then double quotes other so we have month all and other in our period frame enter and we’re going to do start date equals txt start date enter end date equals txt end date enter shift tab twice and you’re going to type end select and then i’m going to press enter again so i get that blank line between n select and end sub so let me break this down for you we’re doing a select case statement which is like an if then else if end if statement so we have three cases here right based on the period so case month means the month equals whatever month is selected in the combo box when they select all in that period frame the start date is going to equal the results of a function procedure that we don’t have in here yet called get first date and then the end date is going to equal the result of a function procedure that we also don’t have in here yet called get last date and then if they select other in the period frame the start date is going to be the start date that the end user puts in the start date text box and the end date will be the end date that the end user puts in the end date text box so that’s what we’ve created here in this get date sub procedure now the good news is the two procedures that we don’t have in here yet get first date and get last date we’re gonna bring in from a text file so we don’t have to type it and then we’ll review it so i’m going to click at the end of the end sub statement and press enter beneath our get date sub procedure and we’re going to go to insert menu file and this particular file that we want is going to be well we have get first date we’ll bring in the get last date first so we’re going to do get last date double click that file and then go to the end of that function after the end function statement be on the next blank line go back to insert file and we’re gonna insert get first date and so now let’s review these get last state and get first date functions we’ll start with get last date so we’re doing object variables here dim sheet as worksheet and then we’re just doing regular variables last date and test date we’re declaring those as dates so we’re starting with last date equals zero and we’re using a for each next construct so this is going to go through the worksheets for each sheet in worksheets the test state equals and it says see date and then in parentheses sheet.name so the name of the worksheets in this file are dates and see date is a conversion function that it’s going to convert the text date on the sheet tab into an actual date so let’s say it’s on the 26th of august 2016 sheet right it’s gonna convert the text on the sheet tab to a date format and assign it to the test date variable and then it says if test date is greater than the last date then the last date equals the test date and that’s in an if in if then end if construct which is nested in our for each next structure then it’s going to go to the next sheet and it’s going to repeat the process until there’s no more sheets and then it will determine what the last date is and so the result of the function get last date will be the last date that’s in the file and then get first date is similar right where we have our declarations and then it starts first date equals 99.99 well actually five nines and for each sheet it’s going to convert the sheet name date to a date and if the test date is less than the first date then the first date equals the test date and then it ends that if block with end if goes to the next sheet repeats the process until there are no more sheets now notice this one came in and the last line is red and if it’s not when you go to compile it’s going to be red because we declared first state and it’s all mushed together but in the text file it came in as two separate words so i’m going to just mush it together in that line and now we can compile and save so those two function procedures will determine the earliest date and the latest date in the workbook for the period frame at this point we have three more procedures that we’re going to need to do we’re only going to type one of them we’ll bring in the other two well actually we have four procedures we’re going to type one of them and bring in the remaining three from text files so we’re at the bottom of this module and we’re going to create a sub procedure under our get first state function procedure and i’m going to just type sub and i’m going to type get sales by grouping and press enter twice so this procedure is going to code the options in the sales frame on the form so it’s kind of like telling it if they select sales person in the sales frame what fields need to be in that pivot table report and so on and so forth so we’re going to do a select case statement for this i’m going to tab over type select case sales press enter and then tab case and then double quotes it’s going to be salesperson and on the form made that two words and then we’re going to press enter and tab so no page name which is the filter for the pivot table equals and then double quotes sales person and i’m going to check whether that needs to be separated there sometimes it’s what you called it on the form and then other times it’s the way it shows as a column header so i will definitely double check that before we test these procedures and then we’re going to do enter and we’re going to do row name equals and quotes year enter column name equals make and then our data name for our values in the pivot table report is going to equal selling price and i believe these are the headings on the spreadsheet we have a few more finishing touches we need to do in order to complete this process so we want to navigate to mod reports and go to the bottom of the module under our set fields sub procedure and we’re going to use a text file to bring in three other procedures so we’re going to go up to insert file and this time we want to consolidate data text file i did this as a text file because it actually contains three different procedures so we have a sub procedure named consolidate data then we have another sub procedure telling it where to start grabbing the cells and we have another sub procedure for finishing the report and just to kind of go over them briefly for you what these are doing so the consolidate data sub procedure will create a temporary worksheet in the file and name it reports and that will hold your pivot table report based on the option the user selects in the period frame it will collect the data from the worksheets this procedure calls a function that directs it to select the pertinent cells from each worksheet and if you look through it you can see the code blocks for that and they have select case statements and they’re using grab cells to grab some cells when it references grab cells it’s calling the sub procedure right underneath it named grab cells it’s passed an argument that is the beginning row number of the cells to be selected and it uses an if construct to grab all the cells on each worksheet that are applicable to the choices made in the form and then last but certainly not least we have a sub procedure named finish report and that moves the collected data from the reports worksheet into an existing workbook in the same directory named reports it then deletes the report worksheet in the sales fiscal year file and creates the pivot table in the reports workbook i should mention this by now we have created across different files multiple modules we also have an built-in class module for our form so you have lots of different blocks of code and what you want to do is as you’re working in visual basic you want to start saving your code blocks that actually work so after they’re tested and i have a code repository i just copy and paste my sub and function procedures into a word document because a lot of times you can reuse the same code over and over again you might have to just change a file name or something like that but why build it from the ground when you already know you have code that has worked before so i’ll make that suggestion here because especially some of these text files you’re getting really great code blocks to use in future vba projects we have just a few more finishing touches before we’ll test everything and this time we want to go to our built-in class module for our form so i’m going to just double click frm generate reports in the forms folder and then i’m going to double click a blank area of the form to get into that module we want to locate the click event for the display command button at the toward the top of mine i have private sub cmd display underscore click and currently it only has me hide in that sub procedure click at the end of me hide and press enter and now we’re going to use this to call other procedures we are going to call our get dates procedure enter get sales by grouping procedure enter consolidate data and we’re going to pass it up an argument of month so we can just put month after it consolidate data month and the finish report procedure and then we’re going to type unload me so when the the display button is clicked on the form it’s going to hide the form and it’s going to call those procedures get dates get sales by grouping consolidate data finish report and then it’s going to unload the form from memory now we have a modification we need to make in mod reports so we’re going to go back to mod reports and i’m going to use the procedure list to navigate to the set fields procedure we need to make a small modification there so when we created this set field sub procedure we did a number format but then when we created the get sales by grouping sub procedure for the selection in the sales frame if they select model we made color the data name so we made color to value field we don’t want the colors to be displayed with like a currency format really because it’s just going to be a count of color here we need to change this set fields procedure so it doesn’t put a numeric currency format on a color field if that’s what’s selected in the sales frame to adjust that if it is an actual value like a selling price value we do want it formatted in a currency format but if it’s account of models we don’t so we’re going to address that by using an if function so click at the end of the line that says activeworkbook.sheets reports dot activate and press enter and you’re gonna go ahead and tab and we’re gonna type if and then the name of our form frm generate reports dot sales and we’re going to use our not equal to so less than greater than and then in double quotes we’re going to type model if what they select in the sales frame on our form is not equal to model we wanted to go ahead and give it the currency format so we’re going to type then after model and then we’re going to come down to the line that has selection dot number format click at the end of that line and press enter and you’re going to tab and you’re going to type end if so it’s only going to apply a currency format if the selection in the sales frame is not model otherwise it won’t apply if it is model it won’t apply the currency format it’ll just be the number and we’re going to make a minor modification to our create pivot procedure so i’m going to use my procedure list to navigate to that one and then here in the set range data line we’re going to change the j1 range to i1 so when it consolidates all the data it’s only filling the column i we don’t need it to say j there so just another minor change and now we’re gonna go ahead and compile and save so two things we’re gonna do before we test this i promise that i would double check our sub procedure get sales by grouping it’s part of your built-in class module for your form to determine whether the salesperson case should be one word or two words it actually should be one word there so i’m gonna adjust that and i’m going to compile and save and then i’m gonna have you switch over to excel and delete the sheet tab that you created that you named reports which has the framework of the pivot table on it so just delete that sheet tab because it’s going to happen for us automatically when we test this and once you do that come back over to visual basic editor and we’re going to double click our form in the forms folder and then we’re going to press f5 to run this form we are going to select month in the period frame and then go down to the bottom right to your combo box and select july and in the sales frame we’re going to select sales person and then you’re going to go ahead and click your display button it’s going to click and were for a little bit on your screen and finally when it’s done now i’m getting a not responding message but that’ll clear we’ll see that a message box will pop up that says microsoft excel will permanently delete this sheet do you want to continue now notice it created that reports sheet tab for us and it just gathered all the information for the pivot table report so we’re going to tell it to delete this sheet and when i switch back over to excel you’ll notice that you’re in a whole different file this reports file has been sitting in the same directory as our sales fiscal year file and it was a file that was in the video description and what it did is first thing we’re going to look at is consolidate sheet tab so all the stuff that it gathered together for the selections in the form it put on the consolidate sheet tab and then it created the reports sheet tab where your actual pivot table report is showing so if we click on that pivot table report and you look at your fields list the sales person is being used as the filter field we have make in columns year in rows and the sum of the selling price in values and we’re going to close this reports file without saving the changes and you should still be in sales fiscal year and it doesn’t have a report sheet tab so we’re going to test this again using different selections on the form let’s do alt f11 to get back to our form and then we’re going to make sure it’s selected and press f5 to run it and this time we’ll we’ll still select month for and select july but this time in the sales frame we’re going to select model and now we’re going to choose display so again the clicking and wearing where it’s running all those procedures and gathering the data and you will ultimately get the message asking if you want to permanently delete this report sheet in sales fiscal year and we’re going to say delete and then when you switch back over to excel it is in that reports file and again if you look at the consolidate sheet it has all the data that was consolidated and then we go to the report sheet and this is where we put in that if statement because when we select model we said we don’t want the count of the models to be formatted as currency and you can see here or the count yeah of the model colors we don’t want them to be formatted as currency so they’re not they’re just the count of the colors per model and we can close the reports file without saving the changes so now we’re going to set up a way for the end user to display the form and make their choices without having to go into the code window so we’re going to add a button to the quick access toolbar that will show the form for the end user and the way we’re going to do that is we’re going to go up to the quick access toolbar and currently mine just has save on it and to the right of the save icon is a drop down arrow and when you select the drop down arrow you have a list of commands but toward the bottom you’re going to select more commands and it opens up the customize the quick access toolbar excel options window now on the right it defaults to customize quick access toolbar for all documents that’s the default well we want this button to only show in this document so we’re going to do the drop down next to for all documents and we’re going to choose for sales fiscal year and then what we’re going to do on the left side we’re going to access the drop down where it says choose commands from popular commands and when we do that drop down we see popular commands commands not in the ribbon all commands and macros we’re going to click on macros scroll down in this list until you see the show form macro we’re going to select it and then we’re going to click the add button so on the right you should just have show form sitting there for this particular document on the bottom right so you notice all of these macros have that same symbol right we’re going to change the symbol so with show form selected on the right underneath on the right you’re going to click on the modify button pick a symbol of your choice from the list of symbols that are showing there that you would like to have on the quick access toolbar for this so i always like to do different ones than the default ones i think for this one i’m going to just pick i’ll just pick the red circle no i’ll do the colorful butterfly just for fun so i’m going to click on the butterfly and click ok and now you’ll see the icon in front of show form and at the bottom you’re going to click ok so now you have that icon whichever one you selected on your quick access toolbar and when i click that icon it actually brings up the form so this is how the end users will be able to access the form and we can do cancel on our form and you’re going to go ahead and save your file to recap lesson 7 we started by recording two separate macros in excel to create a pivot table first the framework of the pivot table and then to create the fields that we want to use to populate the pivot table so two separate macro recordings then we went into visual basic for applications and we created a pivot table programmatically we had to create the pivot cache object first and then we could tell it to create the pivot table and we can do that in the same procedure but we had to do a separate procedure to set the fields for the pivot table just like we had to create create two separate macro recordings one for the framework of the pivot table and one to set the fields after that we spent some time finalizing our form by adding more code and we use some text files for some of the code that we added we then reviewed some of those text files and their procedures therein so you learned about the consolidate data procedure grab cells function and the finish report procedure and what they do in terms of the workflow here and then we modified our click event procedure for the display command button by calling all of the other procedures that we created or we created via text file and we added a line that said unload the form from memory once all of the other procedures have run we saw when we tested everything and we tested it a couple of times that it gathers all the data and puts it on a reports sheet tab in the sales fiscal year file and then it copies and pastes that data into a reports file in the same directory on its consolidate tab and then it creates the pivot table on another tab in the reports file and the pivot table displays the choices that were made on the form and we ended up adding code to a button on the quick access toolbar in excel and i selected the butterfly icon and that’s the way the user will launch the form to make their selections to get their pivot table reports created thank you for attending excel 2019 visual basic for applications video course hi everyone i’m trish connor cato welcome to the excel 2019 visual basic for applications video course this course is for beginning users looking to automate repetitive and recurring tasks in microsoft excel vba is microsoft’s programming language and it’s built into the office applications our focus during this course is on excel specifically you’ll be equipped with the basics to start writing your own vba code modify the code behind macros you’ve already recorded and have an understanding of how vba lends itself to creating efficiency in your daily tasks the course ends with you learning how to deal with code errors known as debugging and how to write error handling code if you’re enjoying these videos please like and subscribe if you want to earn certificates and digital badges please become a member of our patreon the link is in our video description if you have any questions you want answered by one of our instructors please join our off-site community the link is in the description as well as always if this course has exercise files you’ll find them in the video description below in the last lesson of this video course we’ll be focusing on debugging code we’ve already experienced some coding errors also referred to as bugs during this course as a matter of fact if we haven’t we could consider ourselves lucky as errors and coding go hand in hand typos will happen syntax may be overlooked math errors may occur and there are many more things that can cause code errors during program execution this lesson will introduce you to the three types of errors that can occur during execution and the reasons why they occur the process of tracing and correcting code errors is known as debugging the visual basic editor has a debug toolbar that can be used for this purpose we’ll also cover some tips for minimizing errors and what you can do if you cannot resolve them and you’ll see in this lesson why the structure of your code is important during the process of debugging code is easier to review when it’s organized in a logical structure so specifically we will be covering the following topics the types of coding eras and their causes using the debug toolbar to investigate errors and we’ll be setting breakpoints stepping through code using break mode during run mode and determining the value of expressions then we’ll move on to handling errors where you’ll gain an understanding of error handling and learning about vba’s error trapping options we’re going to get into trapping errors with the on error statement which includes understanding the error object writing an error handling routine and working with inline error handling as mentioned you’ll get tips for minimizing errors and tips on what to do if you cannot resolve them and finally you’ll be introduced to the object browser window and we’ll review more detail about that when we get there we’re going to be using our sales fiscal year file in this lesson there are only three types of eras that you may have in your visual basic for applications code so the first type is known as a logic error and these are the most difficult errors to locate and visual basic will not help you find them they’re usually caused by typos and logic errors will not stop your code execution instead you will have an unexpected outcome for example you may have used a minus sign instead of a plus sign and an expression so it will calculate the expression but you’ll get an unexpected outcome because of the wrong operator that’s being used then there are runtime errors a runtime error happens when a line of code cannot be executed the procedure is halted and a message box will display that defines the error there is a help button in the message box that can be used to view the help topic associated with that specific type of runtime era there are many types of runtime errors they’re caused by if you divide by zero that can’t be done if you reference a non-existent workbook or worksheet or other object and referencing an excel cell that contains an error are a few examples of things that can cause a runtime error and last but not least you have syntax errors now these are detected by the line editor and the compiler so as you’re typing code when you get to the end of a line and you press enter if there is a syntax error in that line the line will turn red and examples that can cause this are incomplete expressions and missing arguments and then syntax errors are also detected by the compiler so all along we’ve been compiling and then saving and the compiler checks all lines of code in each procedure and all declarations within the project a variable declaration is required if we have that option explicit statement at the top of a module the compiler will check that all variables are declared and that all objects have correct references to properties methods and events it also checks constructs to ensure the correct required statements are present so when you have a with block you need to have the end with statement when you have an if block you need to have end if the compiler will display a message box that describes the error if found so i mentioned using the debug toolbar in the visual basic editor to investigate errors the tools that are on that toolbar can be categorized as follows tools that help you manually execute the program tools that suspend the execution of the code and tools that assist in determining the values of expressions so there’s an illustration of the debug toolbar and its tools so the first set of tools would be the ones that could help you suspend the code and then you have a set of tools that can help you manually execute the program and that would start with like toggle breakpoint all the way through step out and then the last group of tools the window tools i call them are tools that assist in determining the values of expressions so this slide is for your future reference it’s just a further description of the debugging tools and their shortcut keys if any and a description a comprehensive description of each tool now most debugging is done when the application is suspended and that’s known as break mode an application is in break mode when a runtime error occurs a breakpoint is manually inserted into the code or a stop statement is entered within the code some of the tools for debugging can be utilized in design mode and or at run time in addition to when the application is in break mode so for example the step into tool can be run in break mode and design mode the immediate window can be run in brake mode design mode or at run time and the watch window can be run in brake mode and run time now before we do this next exercise i just want to review and i increase the size of the font for three of the tools on the debugging toolbar and those are the step tools so we used stepped into earlier in the course and we saw that that executed code one statement at a time one line at a time there’s also the ability to step over code and that would execute code one procedure or one statement at a time and then you have your step out option which can overlook a called procedure and execute the remaining lines of the calling procedure so you’ll get more experience with step into and you’ll get new experience with step out in this next lesson so we’re going to start by creating a syntax error and remember these would be detected by the line editor when you get to the end of the line and you press enter or by compiling your project which we’ve been doing all along and when you compile it compiles everything in the module we’re going to force this to happen i’m in the visual basic editor for sales fiscal year and then module one in the add totals procedure and what i’m going to do is i’m going to delete the end if statement and then i’m going to go up and compile the project now it gives me a compile error and it specifically tells me block if without end if so i can click ok and i’m going to put my end if statement back in and then i’m going to compile again and i don’t get the error let’s do another one in the if line we’re going to change the not equal to symbol to an exclamation point put an exclamation point there and now click out of that line and when you click out of that line the compile error comes up it says expect it then or go to and the entire line turns red we’re going to click ok and now go up and compile the project and this time you get a compiled error that says syntax error so this one’s a little bit more specific it’s letting you know there’s some kind of syntax error in that line and this is typical when you’re clicking out of the line it’s the same as pressing enter at the end of it and the line editor kicks in when you compile then the compiler kicks in this message is more specific i’m going to click ok and i’m going to change the exclamation point back to our not equal symbol and then i’m going to compile so now i’m in mod reports and i used my procedure list to get to the consolidate data procedure that’s one that we brought in from a text file and we’re going to go to the view menu hover over toolbars and click on debug so the debug toolbar comes up on the screen now we’re looking for a specific line of code and before we find it i’m going to decrease the width of the project explorer and properties panes on the left because we’re going to end up viewing this procedure side by side with the excel workbook after we set our manual break point so we’re going to scroll down in the procedure it says select case frm generate reports dot period when you find that line you can be anywhere within it and on the debug toolbar if you hover over the hand icon you’ll see that it says toggle breakpoint and it gives you the shortcut key which is f9 i’m going to just click the hand and it turns that line maroon and it puts a maroon oval in the gray bar to the left of the line that is indicative of a manual break point when you set a manual break point and you execute the code it will execute it up until the break point and then it goes into what’s known as break mode as you’ll see in a moment so i’m gonna arrange this so that my editor window is on the right side of my screen and i have my excel file on the left side of my screen and in the excel file i’m going to go ahead and start this procedure by running the show form procedure from the quick access toolbar so it’s going to bring up the form and in the period frame i’m going to select month and then choose august from the combo list and i’m going to select sales person in the sales frame and click display so if you notice on your excel screen the reports sheet has been created but it’s not populated and if you look at your editor screen now that line that where we set the manual breakpoint has yellow shading and a yellow arrow in the gray border to the left of it and so it ran all the code up until it gets to that line and now it’s in what’s called break mode now that we’re in break mode we can use our step tools i’m going to just display my debug toolbar again and your step tools are to the right of the hand so there’s your step into that does line by line you have step over which goes procedure by procedure or statement by statement and then you have step out that would skip any called procedures or just execute the rest of the code as one block so the first thing we’re going to do is step into and it goes down to the next line and we’ll do step over at this point that’s still within that for each block we’re going to step over again it goes down to compare which is another statement we’re going to step over again and it goes to the next statement and now go ahead and click on step out and it runs the rest of the code and you can see that it’s going through your excel workbook and ultimately you’ll get the pop-up asking if you want to permanently delete the report sheet in the sales fiscal year i’m going to go ahead and click delete and it opened the reports file and gave me my pivot table we’re going to go ahead and close the reports file and don’t save the changes and i’m going to just maximize the visual basic editor window again i’m going to expand my project explorer window so that i can get back to mod reports and notice it didn’t remove our break point so i’m going to click in that line and consolidate data procedure and go click the hand again to get rid of the break point and typically after using these processes i go ahead and click the reset button on the debug toolbar just to make sure there’s nothing lingering in memory you can go ahead and save so now i’m going to challenge you and give you an on your own exercise in the same consolidate data procedure i’m going to have you set the breakpoint again at the same line select case frm generate reports dot period and then i want you to execute the show form procedure until the program enters break mode so go ahead and pause the video and do those things at this point and i have my windows side by side again the program has halted execution at the point where it created the report sheet and now we can look at a couple of the window debug tools so with my debug toolbar to the right of your step tools are your window tools so the first one we’re going to select is the locals window and it opens in a pane on the lower half of the editor window and what it’s showing you is the current value of any variables if you look at mod reports under expression it has a plus sign when you expand it you’ll see your public variables and their values at this point it also on the right tells you the type of variable so the locals window will show you that when you’re in break mode and i just collapsed mod reports again and then what i’m going to do is i’m going to go ahead and press f8 so it’s at my break line i’m going to press f8 so it steps in to the code and i’m going to f8 until i get down to the on error resume next statement so now there’s a in the expression window the value of compare the compare expression is reports if i hover over compare in the code window you can see that it’s letting me know the value of that variable right in the code window when it’s in break mode in that compare line in the code window i’m going to have you select the function c date which is a conversion function right converts the date on the sheet tab the date the text string of the date on the sheet tab to an actual date so we’re starting with the letter c in c date and we’re going to highlight it until we get to the first closing parentheses after compare so just the function and its argument in parentheses is selected on your debug window the next to the last icon is quick watch another window so when we have that expression selected it gives us the context so it lets us know the vba project mod reports consolidate data procedure the expression itself and then its value is a type mismatch because there’s text on the sheet tab and then we’re converting it to a date so quick watch gives you different information than can show in your locals window and we’re going to close the quick watch window and you can use the x to close the locals window and now what you can do is you can go ahead step out of your code and i deleted the report sheet and i’m going to close the reports workbook without saving the changes and i’ll just maximize my editor window again we’re going to start forcing some runtime errors to happen and it is best practice to write error trapping code to try to avoid runtime errors you might not be able to avoid all of them but it will be helpful to avoid as many as possible error trapping options are set in the options dialog box in the editor where we set the required variable declaration earlier and changed our font size to review those options before we get into error handling they’re listed on this slide so there’s three options you can break on all errors so that means even if you’ve written error handling code a break in execution will occur if a runtime error is encountered so it really disables any error handling code that you’ve written break in class module the execution will break and an error message will display when an unhandled error occurs within a class module this option is only useful for debugging and then you have break on unhandled errors the execution will break and an error message will display when any unhandled error occurs and again we’ll review those options as we go over our next set of exercises there are some methods to error handling in visual basic for applications an on error statement is used to enable what’s called an error trap if an error is generated after this statement is executed the error handler becomes active and passes controlled to the code on the on error statement that it’s is specified and there are two types of on error statements on error go to and on error resume next i have the syntax so for on error go to then there’s a corresponding line label and then on error resumed x once an on error statement traps an error the error can be handled in one of three ways you could write an error handler this is a routine that is pointed to in the on error go to statement line label the line label statements address one or more types of errors for the procedure another method is ignoring the error and that’s what happens when you use the on error resume next statement to trap the error and handle it by moving to the next line of code and then you have inline error handling and that’s also on error resume next you can use it to trap the error you enter code in the procedure to check for errors after any statements that are expected to generate them you’ll see in the upcoming exercise that the error object can be used to examine information about an error that has just occurred the error object has a global scope and has properties and methods that are useful for finding out information about the current era clearing error information and generating errors the properties contain information about the error that just occurred in the current procedure so you have a number property and it’s the identification number of the most recent era and numbers represent different types of errors you have a description property which describes the error and corresponds to the error number and then you have a source property which is a name that identifies the component module and or procedure that generated the error and all three of those properties have data types as listed on this slide the error object only has two methods clear and raise clear resets all the error objects properties to zero or zero length strings this method is used automatically when any on error statement is encountered and then you have the raise method which generates a runtime error and it can specify the number of an error defined by vba excel or another application such as word and you’re like what is she talking about well it’ll start making sense when we start doing it which is going to be right now we’re going to start by causing a situation that will lead to a run time era so i’m in my working directory and what we’re going to do is we’re going to rename the excel file called reports we’re going to just name it reports with the number two and now i’m going to bring up my sales fiscal year file in excel i’m going to start the show form procedure from the quick access toolbar i’m going to select all for period and model in the sales frame and click display eventually you’ll get the runtime error has an error number 1004 sorry we couldn’t find my path reports.xlsx is it possible it was moved renamed or deleted and we’re gonna click the debug button on that message so it takes us over to mod reports to the sub procedure finish report and the error is being caused when it tries to execute that workbook dot open file name line because it’s looking for a file named reports now i’m gonna go up to the standard toolbar and i’m gonna click the reset button i’m going to go then go back to mod reports and notice that it cleared that break in the code for us so now before we write error handling code i want to show you the options that are available for you we saw them on the slide so i’m going to go up to the tools menu and choose options and when i get it in there at top i’m going to go to the general tab and on the right side you have your error trapping options so remember break on all errors really means ignore any error handling code that you would write your other choices are breaking class module or break on unhandled errors i usually use break on unhandled can’t really say usually it just depends on what kind of project i’m working on and i’m going to click ok to get out of there so now we’re going to modify this finish report sub procedure by using the on error go to statement so we’re going to click at the end of our variable declaration line dim sheet as worksheet press enter a couple of times and then you’re going to type on error go to and go to is one word here and then error handler in this example error handler is what we’re calling our line statement so on arrow go to error handler we’re going to go down and click at the end of the set fields called procedure and press enter and on this line we’re going to type exit sub and i’ll explain it after we get the rest of this in we’re going to press enter a couple of times and then we’re going to type error handler what we named our line label followed by a colon enter and we’re going to do a select case statement here so let’s select case and we’re going to do air dot and the list pops up and we’re going to select number so that’s a property of the air object so select case error num number enter tab and then we’re going to say case 1004 that’s the number of the runtime error we got so case 1004 enter tab message box and in parentheses and quotes the reports workbook is not available period close your quotes close the paren enter we’re going to out dent and we’re going to do case else enter tab message box again and this one is going to say error number we’re going to do a concatenated statement here colon space double quote our ampersand for concatenation air dot number again ampersand we’re going to do v b l f which is line feed we’re gonna do an ampersand and we’re gonna do our line continuation character of space underscore enter tab in double quotes error description colon space double quote space ampersand and air dot description so another property of the error object there and we’re going to close the parentheses we’re going to enter and out den until we get to the same margin as select case and we need our end select statement there and now we’ll break down what we just did so using on era go to what we’ve done is we said if there’s an error when this procedure runs go to our line so error handler is the line what we what we named it so if there is an error it’s going to go down and before it gets to that line it’s going to exit the sub procedure now this is only if there’s an error we don’t want it to try to keep running the sub procedure we wanted to exit the sub procedure and go to the error handler so we did a select case statement if the error number is 1004 it’s going to show a message box saying the reports workbook is not available if it’s a different error number it’s going to show a message box that gives the error number and then on the next line the error description both are pulled from the error object so that’s how you can trap this error go ahead and compile and save before we test this error handling code we need to switch back over to excel and delete the reports sheet tab confirm your deletion and now what we’re going to do is go ahead and launch the show form procedure again i’m going to select the same selections all model and display and this time instead of getting a runtime error we get our pop-up because it was era number 1004 the reports workbook is not available you can go ahead and click ok on that message box now this time we’re going to leave the reports sheet here and what i’d like you to do is go back to your working directory and rename reports to back to reports and then come back over here to your sales fiscal year file now that we have the file renamed we’re going to set up a situation where we will use inline error handling by using the on error resume next statement in your file go ahead and launch the show form again and this time i’m going to select month and choose july and i’ll just do salesperson in the sales frame and display we’re getting runtime era another 1004 that name is already taken try a different one and we’re going to select debug so it brings us to the consolidate data sub procedure where activesheet.net equals reports well remember when we’re running this procedure it has been creating the report sheet for us it’s already there so we’re getting this runtime error because you can’t have two sheet names with the same name reports we’re going to go ahead and use our reset button on the toolbar and i’m going to make my way back to mod reports and i’m still in the consolidate data procedure and after our variable declarations we are going to press enter after dim sheet as worksheet a couple of times and we’re going to type on error resume next and then we’re going to go down to the line that says activesheet.name equals report click at the end of it and press enter a couple of times and tab and we’re going to type an if statement here so if and then air dot number equals 1004 then enter and tab active sheet dot delete sheets on the next line and then parentheses double quotes reports dot cells dot select enter selection dot clear enter air dot clear that’s the clear method of the error object so clear out the error enter and then i’m going to shift tab to out dent and type my end if statement and you want to go ahead and compile and save so because the report sheet was already there when it ran this it created a new sheet so if i go look at excel i have this empty sheet three and so what this is saying and that’s the active sheet if after it goes to activesheet.name equals report and it gets that error it’s going to say active sheet delete which is that generic sheet and then it’s going to select the report sheet and all of its cells and clear everything off of that sheet and then it’s going to clear the era as well so that’s what this one is going to do let’s switch over to excel and the first thing we’re going to do is get rid of that extra sheet before the report sheet just delete it and go ahead and launch your form and we’ll do month july again here and i think i’m going to do model and display so now it’s letting us know that it’s going to delete this sheet now i’m on sheet 4 and we’re going to select delete to confirm it and then it’s going to go through the process and you’ll get your second delete prompt to delete the reports sheet and now you have your reports workbook open with the pivot table that one covers the case of if you forget to delete the report sheet from sales fiscal year we are trapping the era and resuming the rest of the code you can close the reports workbook without saving the changes so i promised you some tips for minimizing errors and also some tips on what to do if you can’t resolve an error i’m going to just stop talking and let you review this slide hopefully some of these tips will help you avoid errors and some of what to do if you can’t resolve them these are from my personal experience oftentimes if i ask someone else to look at my code or i’m explaining the issue i’m having with it the explanation will become clear to me during that process or someone else might look at it and instantly see what’s causing the era the object browser allows you to browse through all available objects in your project and see their properties methods and events in addition you can see the procedures and constants that are available from object libraries in your project you can also get online help as you browse in the object browser so you’ve already noticed some icons in the editor environment particularly in the list that are displayed and you’ll see those icons in the object browser window as well so i’ve given you a table here with the icons and what they represent within the visual basic editor i can go to the view menu and choose object browser its shortcut key is f2 and so it opens kind of like in its own window and notice at the top it says all libraries if you do the drop down there you could just see the excel library or the microsoft forms library or office or vba or vba project i’m going to select vba project and so this is our project and what it’s showing on the left side under classes these are the objects that are in our vba project so it’s showing all those worksheets and it’s showing our form if i click on frm generate reports then it shows you things so these are properties events methods it’s our objects our controls like month and period and sales those are our frames so you’re seeing everything that’s in your project as i continue to scroll down i see the click event for the cancel button and the display button so you’re seeing events properties all of those things and methods that make everything kind of work together and some of those properties we didn’t use on the objects on our form like we didn’t use the print form property but it’s available because it’s in the vba project library so if i click on cmd display click on the right hand side and i look almost at the bottom of the screen it just lets me know that it’s a private sub procedure and it’s a member of the form generate reports that we created and you can feel free to explore the object browser if there’s anything in there that you want more information on you can click on it and then you’ll have your help icon up here in the upper right so you can explore help topics from in here as well and to close the object browser i’m going to use the second close window the smaller one in the upper right hand corner of the screen to close the object browser our last topic in this course concerns how to protect your code so if you have end users using this excel file and they have the developer tab or they know how to switch over to visual basic for applications editor you may not want people to be able to access your code so you can password protect it it’s kind of a two-step process so you’re gonna go in the visual basic editor you’re gonna go to the tools menu and you’ll notice on the list you have an option for vba project properties let’s click it there are two tabs you’re on the general tab you’re gonna go to the protection tab and you’re gonna check the box that says lock project for viewing and then you have to give it a password and confirm it for training purposes i’m going to just use the word train and all lowercase and i’m going to click ok and then i’m going to save now you’re going to have to close both visual basic and your excel file for this to take effect so go ahead and close both of these windows and then reopen your sales fiscal year macro enabled file once you have your file reopened you can alt f11 to get back into the visual basic editor if you expand your sales fiscal year vba project you’ll see that it prompts you for your password and those who do not have the password will not be able to see the objects forms and modules and access them so again once you set your password you need to save and enclose vba and excel and reopen the file for that password protection to take effect to recap this lesson we started by going over the different types of coding eras and their causes you learned how to use the debug toolbar to investigate errors we set breakpoints we used our step debugging tools we entered break mode during run mode and we used the locals window and quick watch to determine the value of expressions and variables when it comes to handling errors we got an overview of error handling and vba’s error trapping options and then we moved on to trapping errors with the on error statement we learned about the error object and its methods and properties we wrote an error handling routine by using on error go to with a line handler and we also worked with inline error handling um actually sorry i got the mat opposite the error handling routine was the on error resume next and the inline error handling was on era go to we reviewed some tips for minimizing errors and what to do if you can’t get them resolved we did a quick tour of the object browser when you’re new to vba that can be very helpful so you can learn about different properties and methods that are available for different objects and then we end it with password protecting your code thank you for attending excel 2019 visual basic for applications video course thanks for watching don’t forget we also offer live classes and office applications professional development and private training visit learned.com for more details please remember to like and subscribe and let us know your thoughts in the comments thank you for choosing learn it [Music] you

    By Amjad Izhar
    Contact: amjad.izhar@gmail.com
    https://amjadizhar.blog

  • Building a Library App with Next.js, PostgreSQL, and More

    Building a Library App with Next.js, PostgreSQL, and More

    This text details the creation of a full-stack web application for a university library. The application features user authentication, book browsing, and borrowing functionality. The backend uses PostgreSQL with Neon for a serverless database and Drizzle ORM for efficient data management. Frontend technologies include Next.js, Shadcn UI, and Tailwind CSS. Additional services integrated are Upstash for caching and workflows, ImageKit for asset management, and Resend for email delivery. The development process is described step-by-step, highlighting best practices and problem-solving.

    University Library App Study Guide

    Quiz

    Instructions: Answer the following questions in 2-3 sentences each.

    1. What is the purpose of using Tailwind CSS in this application?
    2. Explain the role of shaten/ui in the app’s development.
    3. What is Neon and how is it utilized in this project?
    4. What is an ORM, and why is Drizzle chosen for this application?
    5. What is the function of Upstash Redis in the app’s architecture?
    6. Describe the purpose of Upstash Workflows within this project?
    7. Why is rate limiting implemented in the authentication process, and how does Upstash facilitate this?
    8. How are emails sent using Resend, and why is this tool chosen?
    9. Explain the functionality of the Imagekit service in this application.
    10. Describe the purpose of the borrowing functionality and the database interaction associated with it.

    Quiz Answer Key

    1. Tailwind CSS provides a way to style the application with full flexibility, using pre-defined utility classes, similar to writing regular CSS, but more quickly and efficiently. It enables a consistent look and feel across all components.
    2. shaten/ui is a library that provides pre-built components, like buttons or forms, that can be easily customized using Tailwind CSS. These components allow for quicker development and standardization of the app’s interface.
    3. Neon is a serverless PostgreSQL database that provides instant provisioning and easy integration with the project’s stack. It simplifies the process of using a PostgreSQL database by removing the need for complicated configurations.
    4. An ORM (Object-Relational Mapping) is a tool that allows developers to interact with databases using objects, rather than writing SQL queries. Drizzle was chosen because it is designed for modern TypeScript developers, offering type safety and easy use.
    5. Upstash Redis provides low-latency data storage and retrieval, which is ideal for tasks like caching, session management, and real-time data needs. In the app, it is used to fetch books quickly and implement rate limiting.
    6. Upstash Workflows enables the automation of multi-step tasks, such as onboarding new users or managing data processing. In this app, it is used to automatically send emails, check user inactivity, and manage book borrowing deadlines.
    7. Rate limiting prevents DDOS attacks by restricting the number of requests a user can make in a given timeframe. Upstash Redis is used to keep track of requests and enforce the limit.
    8. Emails are sent using Resend, a tool that allows for customized email templates using React components. It is used in this application for sending welcome emails and reminders to users who have been inactive.
    9. Imagekit is a tool that enables the optimization and transformation of images and videos, providing a central hub for efficiently managing assets. It allows for faster load times and easy management of visual content.
    10. The borrowing functionality allows users to borrow a book, which initiates a database mutation for tracking purposes. This also uses a newly created “borrow records” table which tracks which users borrowed which books, when they borrowed them and when their return date is.

    Essay Questions

    Instructions: Answer each question in a multi-paragraph essay format.

    1. Discuss the importance of using a modern tech stack when developing web applications. How does the specific stack used in this library app contribute to its scalability, maintainability, and performance?
    2. Analyze the role of serverless technologies in the development of the University Library app. How does the use of Neon, Upstash, and Vercel contribute to the app’s overall architecture and operational efficiency?
    3. Compare and contrast using an ORM such as Drizzle with using native SQL for database interactions. What are the advantages and disadvantages of each approach for this specific project?
    4. Explain the importance of both client-side and server-side components in Next.js applications. How does the architecture of the University Library app utilize these components and balance the benefits of server-side rendering with client interactivity?
    5. Describe the processes for implementing both authentication and authorization in this project. How are server actions used to manage user data and maintain data security?

    Glossary of Key Terms

    API (Application Programming Interface): A set of rules and protocols that allows different software applications to communicate with each other.

    bcrypt: A password hashing function used to securely store passwords in a database.

    Caching: The process of storing frequently accessed data in a temporary storage location to improve retrieval speed.

    CSS (Cascading Style Sheets): A style sheet language used for describing the look and formatting of a document written in a markup language.

    DDOS (Distributed Denial of Service) Attack: A cyberattack in which the perpetrator seeks to make a machine or network resource unavailable to its intended users by temporarily or indefinitely disrupting services.

    Drizzle: An open-source ORM (Object-Relational Mapping) designed for modern TypeScript developers.

    ESLint: A tool for identifying and reporting patterns found in ECMAScript/JavaScript code.

    Imagekit: A free tool for quickly optimizing and transforming videos and images.

    JWT (JSON Web Token): A standard for securely transmitting information between parties as a JSON object.

    Neon: A serverless PostgreSQL database service.

    Next.js: A React framework for building web applications, enabling server-side rendering and other performance optimizations.

    ORM (Object-Relational Mapping): A technique that lets you query and manipulate data from a database using an object-oriented paradigm.

    Prettier: A code formatter used to ensure consistent code style and readability.

    Rate Limiting: A technique used to limit the number of requests a user can make within a specific time frame.

    Redis: An open source, in-memory data structure store, used as a database, cache, message broker, and streaming engine.

    Resend: A service that provides APIs for sending transactional emails.

    Shaten UI: A library of customizable components that can be easily integrated into a Tailwind CSS project.

    SQL (Structured Query Language): A domain-specific language used in programming and designed for managing data held in a relational database management system.

    Tailwind CSS: A utility-first CSS framework that allows for rapid styling of web applications.

    TypeScript: A superset of JavaScript that adds static typing to the language.

    Upstash: A serverless data platform offering a variety of services including Redis, Workflows and Vectors.

    Vercel: A cloud platform for frontend developers that allows for serverless deployment of web applications.

    University Library Application Development

    Okay, here is a detailed briefing document summarizing the provided source:

    Briefing Document: University Library Application Development

    Overview:

    This document summarizes the development process of a University Library application, focusing on the technologies, features, and key decisions involved in its creation. The project emphasizes building a scalable, production-ready application using industry-standard, open-source tools. The approach includes detailed explanations and demonstrations, aiming to teach not just replication of the specific application, but the broader use of these technologies for future projects.

    Key Themes & Technologies:

    1. Modern Frontend Development:
    • Next.js: Chosen as the core framework for the application, offering features like server-side rendering and an app router for a smoother user experience.
    • “Next JS will now automatically install all of the dev dependencies needed for us to run our project very easily”
    • TypeScript: Used to ensure a well-structured and maintainable codebase, with a commitment to explaining its usage for newcomers.
    • “I’ll later explain the many benefits you’re getting by using typescript and and don’t worry if you haven’t used tab script before”
    • Tailwind CSS: Selected for styling applications due to its flexibility and utility-first approach.
    • “It allows you to have full flexibility of how your applications are going to look like it’s just like you’re writing Reg CSS you have all the properties at your disposal but you can use them in a quicker way by simply using a set of predefined utility classes”
    • Shadcn UI: A component library that provides pre-built components styled with Tailwind CSS, enhancing the visual consistency and standardization of the application.
    • “a library that allows you to copy some of the components but then use the full power of Tailwind CSS to style them to your liking”
    • Prettier and ESLint: Utilized to maintain code cleanliness and enforce best practices, ensuring a scalable and well-maintained codebase.
    • “we want our codebase to be scalable well structured and maintained”
    1. Robust Backend & Database:
    • PostgreSQL: Chosen as the database for its advanced capabilities and open-source nature, managed with Neon for ease of use.
    • Neon: Provides a serverless PostgreSQL database with features like instant provisioning and integration with Next.js, simplifying the setup and scaling process.
    • “It allows you to use open- Source postgress databases with many features that make it such a breeze to use you get instant provisioning no waiting no config and it configures directly with your stack”
    • Drizzle ORM: Implemented to make database architecture scalable and production-ready by simplifying database interactions with its type-safe and easy-to-use design.
    • “an object relational mapping tool which will allow you to make your database architecture that much more scalable and drizzle is definitely the way to go nowadays”
    1. Asset Management & Optimization:
    • ImageKit: A free tool used for optimizing and managing images and videos within the application, ensuring efficient media handling.
    • “It is a free tool allowing you to quickly optimize and transform your videos and images and just have a central Hub where you can efficiently manage all of the assets for your project”
    1. Advanced Features for Production Readiness:
    • Upstash Redis: Used for low-latency data storage and retrieval, beneficial for caching, session management, and real-time applications.
    • “a service that offers low latency data storage and retrieval perfect for caching session management and real-time applications”
    • Upstash Workflows: Employed to manage and automate multi-step tasks such as onboarding, data processing, email notifications, and user activity tracking.
    • “allowing you to manage and automate multi-step tasks great for things like onboarding or handling data processing workflow flows”
    • Rate Limiting: Implemented using Upstash to prevent denial-of-service attacks and ensure fair usage of the application.
    1. User Experience and Authentication:
    • Next-Auth (Oauth): Used for handling user authentication, employing a credentials provider for custom email/password login logic.
    • “import next OD we get a lot of things out of it like the signin functionality sign out off and more and we can choose which providers to add”
    • Custom Email Templates: Resend is used for sending emails, allowing the use of React components for custom email templates, enhancing the design and customization options.
    • “you can completely write your email templates using react components that is not possible with simpler tools like email JS”

    Key Features Demonstrated:

    • User Authentication: Full sign-up and sign-in flows with validation, including image uploads.
    • “when you visit the website for the first time you’ll see the signin screen if you’re creating a new account you can go to the signup page where you’ll have to fill in a lot of information all of it fully validated we also have an image upload with completion percentage”
    • Automated Workflows: Onboarding processes such as welcome emails, inactivity checks, and notifications.
    • “the moment you’ve created an account our server triggered an onboarding workflow sending you a welcome email but that’s not the best part another part of the onboarding workflow is inactivity checks so if you don’t visit the website for the next 3 days you’ll get another automated email prompting you to check it out”
    • Book Management: Displaying detailed book information, including descriptions, author, copies, and videos, with filtering, searching, and pagination.
    • “there’s this library page where you can see a full list of books available in the library with pation boort and you can easily search for any book or filter it through your liking and if you click on any of these books you’ll go to its Details page where you can see complete information from Total and available copies description trailers summaries and more”
    • Borrowing System: Implementing a borrowing process with account approval for users, and managing book availability.
    • “if you click on borrow book you’ll see a destructive toast saying you can’t borrow a book until your account gets approved Yep this is what we’re doing we’re not letting just anyone visit the website and try to borrow a book instead we’ll allow admins to approve their account”
    • Rate Limiting: Preventing abuse and ensuring stable service availability.

    Important Ideas and Facts:

    • Emphasis on Industry Standards: The project is built using technologies and practices commonly found in production environments.
    • Practical Learning: The approach prioritizes understanding how to build scalable applications, not just replicating this specific project.
    • Serverless Architecture: The utilization of Neon and Upstash for serverless databases, simplifying infrastructure management.
    • Open Source Focus: All tools and technologies utilized are open-source, promoting accessibility and community contributions.
    • Importance of Rate Limiting: Protecting applications against malicious activity with Upstash Redis.
    • Power of Workflows: Automating tasks and user engagement with Upstash Workflows.
    • Customizable Email Templates: Using Resend to send emails with fully customizable design.

    Conclusion:

    This project demonstrates a comprehensive approach to building a production-ready application using modern technologies and best practices. The emphasis on scalability, automation, and user experience makes it a valuable learning experience for aspiring developers. The detailed explanations provided throughout the project aim to empower users to not only build this application, but also apply the knowledge to their own future projects.

    Building a Scalable University Library Application

    FAQ: Building a Scalable University Library Application

    1. What technologies are used to build this application?

    This application leverages a variety of modern, production-ready technologies. For styling, it uses Tailwind CSS for flexibility and utility classes, along with Shadcn UI for pre-built components that are customizable. The database is PostgreSQL, accessed through Neon, which provides a serverless experience. Drizzle ORM is employed for scalable database architecture, and ImageKit manages assets like images and videos. Finally, Upstash Redis is used for caching and workflows. The app is also built using Next.js, Typescript, and ESLint, Prettier.

    2. How does user onboarding work in this app?

    The application automates the onboarding process. When a user creates an account, a welcome email is sent. The system also includes inactivity checks, triggering automated emails if the user doesn’t visit the website for a few days, or a congratulations email if they are using the app. Account approval by an administrator is required before book borrowing is enabled, similar to university admission processes. This system leverages Upstash’s workflows.

    3. What are the benefits of using TypeScript in this project?

    TypeScript provides several benefits to this project, such as type checking which helps to catch errors early on in development, and improved code maintainability as the project gets larger. It also provides strong typing when defining the database schemas through drizzle, allowing for more reliable data models.

    4. Why is rate limiting important, and how is it implemented in this application?

    Rate limiting is crucial for preventing denial-of-service (DDOS) attacks. It restricts the number of requests a user or IP address can make within a specific time frame. In this application, rate limiting is implemented using Upstash Redis. When a user exceeds the limit, they are redirected to a “Too Fast” page.

    5. How are emails handled in this application, especially for onboarding and notifications?

    Email functionality is handled by Resend. The application uses Resend to send welcome emails upon signup and to notify users if they haven’t been active in a while. These emails are created with react component templates, allowing for fully customized designs. The email logic is set up with Upstash workflows.

    6. How are images and videos managed within this application?

    Images and videos are managed using ImageKit, which provides a centralized hub to efficiently optimize, transform, and manage assets. This includes features like progress tracking during uploads, file size validation, and rendering optimized assets on the front end of the application.

    7. How is the database set up and what role does Drizzle ORM play?

    The database is set up using Neon, a serverless Postgres service, which allows for easy provisioning and scaling without complex configurations. Drizzle ORM acts as an object-relational mapping tool, which enables interaction with the database using typesafe, clean, and easy-to-use code. Drizzle allows for database schemas to be defined with JavaScript rather than using raw SQL, which simplifies the development process. Drizzle is also used to generate and manage migrations for SQL databases.

    8. How is user authentication implemented, and is there a user role system?

    User authentication is implemented using NextAuth.js, with a custom credential provider for email and password. There isn’t the concept of social login with google and github implemented in this specific course. The application includes a basic user role system, with users having a “pending,” “approved,” or “rejected” status, and a role of either “user” or “admin”. Admin roles are required to create new book records in the database. Users also have an activity check, allowing the system to prompt them with emails if they are inactive after a specific period of time.

    Full-Stack Library Management System

    The sources describe the development of a full-stack library management system. The system consists of two interconnected applications: a public-facing app for users and an admin interface. The apps are built using a monorepo architecture. The development process emphasizes industry-standard practices and real-world application demands.

    Key aspects of the app development include:

    • Technology Stack:
    • Next.js with TypeScript for building web applications.
    • Tailwind CSS for styling, along with Shadcn UI for pre-built components.
    • PostgreSQL database, managed with Neon and Drizzle ORM for efficient database interactions.
    • Upstash for caching, rate limiting, and workflow automation using Redis.
    • ImageKit for real-time media processing and asset management.
    • Resend for email communications.
    • Oauth.js for authentication.
    • Public Facing App:
    • Open-source authentication with personalized onboarding flows and emails.
    • Homepage featuring a highlighted book and newly added books with 3D effects.
    • Library page with advanced filtering and pagination.
    • Book detail pages that track availability and show summaries, videos, and similar books.
    • Profile page to manage accounts, track borrowed books, and download receipts.
    • Admin Interface:
    • Analytics dashboard displaying statistics on new users and book borrows.
    • User management including all users and account requests pages where admins can approve or revoke access.
    • Book management pages with forms for adding and editing books and detail pages.
    • Borrow request management.
    • Key Features and Functionality:
    • Rate limiting to protect against DDOS attacks.
    • Caching optimizations for faster data retrieval.
    • Multimedia uploads and management.
    • Advanced error handling.
    • Automated workflows with custom notifications, such as onboarding emails, borrowing deadlines, and reminders.
    • Complex database queries using Drizzle ORM.
    • Image and video optimization using ImageKit.
    • Form validation using React Hook Form and Zod.
    • Server actions for secure server-side operations.
    • Database migrations for managing database schema changes.
    • Development Process:
    • The project started as a simple tutorial but evolved into a production-ready application.
    • The development was broken down into steps with explanations of concepts.
    • The tutorial includes not just the final code but the approach to building such an application, such as setting up the tech stack.
    • The process includes UI development, database setup, and integration of various tools and libraries.
    • Production Readiness:
    • The application uses a serverless PostgreSQL database.
    • The application includes rate limiting to prevent abuse.
    • The application uses automated workflows for email notifications.

    The sources provide a comprehensive overview of how to build a sophisticated, production-ready application using modern web development technologies and practices. The process is iterative, starting with UI components, then integrating with a database, and finally implementing advanced features like authentication, rate limiting, and automated workflows.

    Full-Stack Library Management System Database Interactions

    The sources detail extensive database interactions within the full-stack library management system, covering various aspects such as setup, schema design, querying, and data manipulation. Here’s a breakdown of the key database interactions:

    • Database Choice and Setup:
    • The system uses PostgreSQL as its primary database.
    • Neon is utilized to manage the PostgreSQL database in a serverless environment. Neon offers features like instant provisioning, autoscaling, database branching, and APIs.
    • The database connection string is configured using environment variables.
    • Object-Relational Mapping (ORM):
    • Drizzle ORM is used to interact with the database, chosen for its type safety and ease of use with TypeScript.
    • Drizzle simplifies database interactions and allows for more scalable database architecture.
    • Drizzle also provides a studio for exploring and manipulating data.
    • Schema Definition:
    • Database schemas are defined using Drizzle’s syntax in TypeScript, which is then translated into SQL.
    • The schema includes tables for users, books, and borrow records.
    • The users table includes fields for user authentication, personal information, and account status. It also includes enums for the user’s status and role.
    • The books table includes fields for book details, such as title, author, genre, rating, cover, description, and number of copies.
    • The borrow records table tracks which users borrowed which books, along with borrow and due dates.
    • Unique identifiers (uid) are used as primary keys.
    • The schemas use data types such as integer, text, varchar, uid, date, and timestamp.
    • Data Manipulation:
    • Drizzle’s methods like select, insert, update, and delete are used to perform database operations.
    • The application fetches data using queries that include conditions, limits, and ordering.
    • Data is inserted into tables using the insert method, which takes values to be added and returns the inserted record.
    • The update method modifies records based on specified conditions.
    • Database queries are type-safe, ensuring that data is correctly structured.
    • Data is often limited to specific numbers of records and filtered using the where clause.
    • Database Migrations:
    • Drizzle Kit is used to generate and apply database migrations.
    • Migrations are used to manage changes to the database schema over time.
    • Commands like drizzle kit generate and drizzle kit migrate are used to create SQL migration files and apply them to the database.
    • The migrations are stored in a dedicated folder.
    • Seeding Data:
    • A script is used to seed the database with initial data, such as dummy books.
    • The seeding process involves reading data from a JSON file and inserting it into the database using Drizzle.
    • The script handles uploading images to ImageKit and then inserting book information into the database using Drizzle.
    • The seeding process includes uploading the images and video of the books to image kit and using those URLs to populate the database.
    • Transaction Management:
    • The source doesn’t explicitly detail transaction management, but it does imply the use of transactions with Drizzle ORM for data integrity.
    • Specific Database Interactions:
    • User authentication involves querying the database for users based on email and password.
    • User data is updated when users log in or interact with the application.
    • Admin users are identified by querying the database to check their role.
    • Book borrowing involves checking book availability and then updating both the books and borrow records tables.

    These database interactions are crucial to the library management system’s operation. The use of Drizzle ORM, coupled with Neon and PostgreSQL provides a robust and scalable approach to data management. The system also uses a secondary database (Redis through Upstash) for caching, rate limiting, and workflows. This shows how multiple databases can be used together in a single system to enhance performance and efficiency.

    Library Management System Authentication

    User authentication in the library management system is a critical component, designed to ensure secure access and manage user roles effectively. Here’s a detailed overview of how authentication is handled, based on the sources:

    • Authentication Method:
    • The system uses email and password for authentication.
    • The implementation is based on OAuth.js (next-auth), a free and open-source library for handling authentication in Next.js applications.
    • The system also implements JSON Web Tokens (JWT) for session management.
    • Credentials Provider:
    • A custom credentials provider is set up to manage the authentication logic.
    • The provider handles user sign-up and sign-in processes.
    • It validates credentials by checking if an email and password are provided.
    • It fetches user data from the database, based on the provided email.
    • Password Handling:
    • User passwords are hashed before being stored in the database for security.
    • The bcryptjs library is used for password hashing and comparison.
    • Sign-up Process:
    • The sign-up process involves collecting user information, including full name, email, University ID, password, and a university ID card image.
    • The system performs full validation of the sign-up form.
    • New users are added to the database with a default status of “pending” and a role of “user”.
    • Upon successful sign-up, a welcome email is sent to the user using an automated workflow.
    • After creating a new user, the system also automatically signs the user in.
    • Sign-in Process:
    • The sign-in process involves validating the email and password against the stored user credentials.
    • The system uses the credentials provider to check for the validity of the password and retrieve user data.
    • If the credentials are valid, the user is signed in and a session is created.
    • Session Management:
    • The system uses JWT for session management, which is configured within the next-auth config file.
    • The JWT is populated with the user’s ID and name.
    • A session provider is used to manage user sessions across the application.
    • The session is populated with the currently logged-in user data, making it accessible to components.
    • User Roles:
    • Users can have different roles, such as “user” and “admin”, which determine their permissions.
    • The user’s role is stored in the database and checked when accessing certain parts of the application.
    • Admins have access to the admin dashboard and can manage users, books, and other aspects of the library system.
    • The system ensures that only admin users can access the admin dashboard.
    • Authentication Logic:
    • The authentication logic is implemented within the auth.ts file located in the root directory.
    • This file configures OAuth.js and specifies how to interact with the database.
    • Server Actions:
    • Server actions are used for secure server-side operations, such as signing up and signing in users.
    • These actions are executed on the server, ensuring that sensitive data and operations are protected.
    • Rate Limiting:
    • Rate limiting is implemented using Upstash Redis to protect against brute force attacks and DDOS.
    • The system limits the number of requests from a single IP address within a given time frame.
    • Users who exceed the rate limit are redirected to a “too fast” page.
    • Logout:
    • A logout function is implemented to terminate the user session.
    • The logout button is placed at the top right in the header.
    • Redirects:
    • The system includes redirects to ensure that users are properly directed to the sign-in page if they are not logged in.
    • Similarly, users who are logged in are redirected to the homepage from the sign-in page.
    • Admin users that try to access the admin interface are redirected to the public app, unless their role is set to “admin”.
    • User Activity Tracking:
    • The system tracks the last activity date of the user and stores it in the database.
    • This information is used to send emails to users that have been inactive for a period of time.
    • The system updates the user’s last activity date once per day to limit database mutations.

    This comprehensive approach to user authentication ensures that the library management system is secure, user-friendly, and well-equipped to manage different user roles and interactions effectively.

    Workflow Automation with Upstash Qstash and Resend

    Workflow automation is a key aspect of the library management system, designed to streamline various processes and enhance user engagement. The system uses Upstash Qstash workflows to manage these automated tasks. Here’s a breakdown of how workflow automation is implemented:

    • Workflow Management:
    • Upstash Qstash is used as a serverless platform for managing and automating workflows.
    • Qstash allows for the creation of durable, reliable, and performant serverless functions.
    • The workflows are designed to be resilient to failures and can pick up where they left off in case of temporary outages.
    • They support long-running executions, making them suitable for complex tasks such as data processing or sending email notifications.
    • Workflow Endpoints:
    • Workflow endpoints are defined as a set of steps, each containing a piece of business logic.
    • These endpoints are created within the Next.js API directory, typically under a /workflows route.
    • The routes contain the logic for triggering and managing workflow actions.
    • Workflow Client:
    • A workflow client is created to trigger the workflows.
    • This client uses the Upstash Qstash URL and token to connect to the Qstash service.
    • The client is used in the application’s server actions to start the defined workflows.
    • Onboarding Workflow:
    • The system implements a customer onboarding workflow as an example, which is triggered when a new user signs up.
    • The workflow includes steps such as:
    • Sending a welcome email to new users.
    • Waiting for a specified period of time (e.g., 3 days) before further actions.
    • Checking the user’s activity state periodically.
    • Sending different emails based on user activity status (active or non-active).
    • The onboarding workflow logic is defined within the /api/workflows/onboarding/route.ts file.
    • Email Notifications:
    • The workflows are integrated with Resend, an email API for developers, to send emails.
    • The emails are sent using the publishJson method provided by Qstash, which is integrated with Resend.
    • The workflow sends emails based on specific conditions, such as when a user signs up, has been inactive for 3 days, or is active.
    • Custom email content, including the subject and the message, is set using parameters passed to the sendEmail function.
    • The emails are sent from a custom domain that has been verified with Resend.
    • User Activity Checks:
    • The system checks for user activity by tracking the last activity date in the database.
    • The user’s activity state (active or non-active) is determined based on a custom function which checks if the time difference between the user’s last activity date and the current date is greater than a certain threshold.
    • If a user has not been active for a specified period (e.g., 3 days), an email notification is sent to prompt them to visit the website.
    • If the user has been active, they might receive a newsletter or a welcome back email.
    • The activity checks are done periodically, and appropriate actions are taken based on the state.
    • The user’s last activity date is updated only once per day to limit database mutations.
    • Workflow Triggering:
    • Workflows are triggered by calling the workflowClient.trigger method.
    • The trigger method includes the URL of the workflow endpoint, as well as any required parameters (e.g., email and full name of the user for the onboarding workflow).
    • The onboarding workflow is triggered immediately after a new user signs up through the auth.ts action file.
    • Customizable Workflows:
    • The workflow logic is highly customizable and can be tailored to specific application needs.
    • The email content, scheduling intervals, conditions, and user state checks can be modified as required.
    • Workflows can be used for many types of automations, including on-boarding, notifications, reminders, data processing, and more.
    • Code Implementation:
    • The core workflow logic is implemented within the lib/workflow.ts file, which contains the workflow client and the email sending logic.
    • The workflow endpoint logic is implemented in the /app/api/workflows/onboarding/route.ts file.
    • The lib/actions/auth.ts file contains the server action that triggers the workflow.

    This workflow automation system allows for a more dynamic and engaging user experience by providing timely notifications and ensuring that users are prompted to return to the platform when necessary. The combination of Qstash workflows with Resend emails provides a flexible and reliable solution for automating various business processes within the library management system.

    Production-Ready Library Management System

    The library management system is designed with several features that contribute to its production readiness, ensuring it can handle real-world demands and maintain a high level of performance and security. Here’s a breakdown of the key aspects:

    • Scalable Architecture:
    • The system is built using a monorepo architecture, which allows for the management of two interconnected applications (the public-facing app and the admin dashboard) within a single repository.
    • This structure promotes code sharing, consistency, and easier management of the entire application.
    • The use of Next.js as the framework enables the creation of high-quality web applications with the power of React components, making the app scalable and performant.
    • Modern Tech Stack:
    • The system utilizes a modern tech stack including Next.js, TypeScript, Tailwind CSS, Shadcn/ui, PostgreSQL (with Neon), Drizzle ORM, Upstash Redis, ImageKit, and Resend.
    • These are all industry-standard, open-source, and production-ready technologies.
    • TypeScript is used to ensure a scalable and maintainable code base.
    • Tailwind CSS and Shadcn/ui are used for efficient and flexible styling of the application.
    • Database Management:
    • PostgreSQL, powered by Neon, is used as the primary database, which allows for a serverless setup, auto-scaling, and database branching.
    • Drizzle ORM is used to interact with the database, making database operations faster and simpler.
    • The system employs database migrations, which are generated based on the schema defined in the code, to manage database changes effectively.
    • Data seeding is implemented to populate the database with initial sets of data for testing and development purposes.
    • Caching and Rate Limiting:
    • Upstash Redis is used for efficient caching, session management, and rate limiting.
    • Rate limiting is implemented to prevent DDOS attacks and brute force attempts by limiting the number of requests from a specific IP address within a given time frame.
    • The system redirects users to a “too fast” page if the rate limit is exceeded.
    • Media Management:
    • ImageKit is used for real-time media processing APIs, asset management, and optimizing images and videos.
    • ImageKit provides dynamic transformations, storage, and streaming capabilities, which are perfect for delivering media assets to any device.
    • Automated Workflows:
    • Upstash Qstash workflows are used to manage automated tasks like sending emails, checking user activity, and managing book borrowing notifications.
    • Workflows are used to implement user onboarding flows, which involve sending welcome emails and checking for user inactivity.
    • The system uses Resend for sending emails, allowing for custom email templates built with React components.
    • Authentication and Authorization:
    • The system uses OAuth.js for secure authentication, which manages sign-up, sign-in, and user sessions.
    • JSON Web Tokens (JWT) are used for session management.
    • User roles are used to define permissions, ensuring that only admins can access the admin dashboard.
    • Bcryptjs is used for password hashing and comparison, providing a more secure way to store passwords in the database.
    • Error Handling:
    • The system implements comprehensive error handling using try and catch blocks, console logs, and descriptive toast notifications for both users and developers.
    • The system uses loaders and performance optimization to handle errors gracefully without blocking other parts of the application.
    • Deployment:
    • The application is deployed using Vercel, ensuring scalability and reliability.
    • The system utilizes environment variables for configuration management, which are set up in both local and production environments.
    • The system separates development and production environments to avoid conflicts.
    • UI and UX Design:
    • The user interfaces are designed to be modern, polished, and easy to navigate, using Tailwind CSS and Shadcn/ui.
    • The system uses toast notifications to provide feedback to the user during different actions, including sign-up, sign-in, and form submissions.
    • The design is responsive and user-friendly, providing a consistent user experience across different devices.
    • The application uses loading states to show progress for actions like image uploads and book borrowing.
    • Code Quality and Practices:The codebase is well-structured, scalable, and maintained using Prettier and ESLint.
    • The system uses clear coding practices with meaningful variable names and comments.
    • The system promotes code reusability and creates reusable components, such as the file upload component, which can be used for different input types.

    These elements collectively ensure the library management system is not just a functional application, but a production-ready solution that adheres to industry standards and best practices. The system is designed to be scalable, secure, and easily maintainable, providing a solid foundation for future growth and feature additions.

    Build and Deploy a Fullstack App with Admin Dashboard | Next.js, PostgreSQL, Redis, Auth.js

    By Amjad Izhar
    Contact: amjad.izhar@gmail.com
    https://amjadizhar.blog

  • Ollama Course – Build AI Apps Locally

    Ollama Course – Build AI Apps Locally

    This course teaches users how to leverage the open-source tool, olama, to run large language models (LLMs) locally on their personal computers. The instructor, Paulo, covers olama’s setup, customization, REST API integration, and Python libraries. Several practical applications are demonstrated, including a grocery organizer, RAG system, and AI recruiter agency. The course emphasizes hands-on learning alongside theoretical concepts, requiring basic programming and AI knowledge. Key features highlighted include model management, a unified interface, and cost efficiency through local execution.

    Ollama Local LLM Applications Study Guide

    Quiz

    Instructions: Answer each question in 2-3 sentences.

    1. What is Ollama and what is its primary function?
    2. According to the course, why is it beneficial to run large language models locally?
    3. What are RAG systems and how do they relate to large language models?
    4. What are parameters in the context of large language models, and how do they impact performance?
    5. Describe the role of context length in a large language model.
    6. What does the term “quantization” refer to in relation to LLMs?
    7. What is a model file and how can it be used with Ollama?
    8. How can the Ollama REST API be utilized?
    9. What is the purpose of Langchain in building AI applications with Ollama?
    10. Briefly explain how Ollama agents can be leveraged to build more complex applications?

    Answer Key

    1. Ollama is an open-source tool designed to simplify the process of running large language models locally on your personal computer. Its main function is to manage the installation, execution, and customization of these models, making advanced AI accessible to a wider audience.
    2. Running large language models locally with Ollama offers benefits such as being free, providing more control over models, and ensuring better privacy since your data does not need to be sent to external servers. This approach allows you to experiment without relying on cloud-based services.
    3. RAG systems, or Retrieval Augmented Generation systems, combine document retrieval with large language models to enhance the models’ knowledge. They work by retrieving relevant information from a knowledge base to augment the prompt so that the LLM can provide responses grounded in your specific data.
    4. Parameters in large language models refer to the internal weights and biases the model learns during training. More parameters generally mean a more complex model with a greater capacity to understand and respond accurately, but also require more computational resources.
    5. Context length refers to the maximum number of tokens a large language model can process at once in a single input. A longer context length allows the model to handle larger documents, conversations, and can capture dependencies across text spans.
    6. Quantization is a technique used to reduce the size of a neural network model by reducing the precision of its weights. This leads to smaller models, faster processing, and lower memory usage.
    7. A model file is a configuration file used in Ollama to customize a large language model. It allows developers to modify parameters like temperature and system messages, tailoring the model to perform specific tasks.
    8. The Ollama REST API provides an interface to interact with Ollama models through HTTP requests. It allows developers to programmatically generate responses, manage models, and use them in applications without needing the command line interface.
    9. Langchain is a framework that simplifies building applications with large language models. It provides tools to load documents, generate embeddings, manage vector databases, and create chains of operations to manage the complexities of LLM applications.
    10. Ollama agents, similar to AI agents in general, are components that act autonomously to complete a specific task or a complex series of steps, often using large language models and other tools. They can be used to create complex workflows such as resume analysis or automated recruiting processes.

    Essay Questions

    Instructions: Answer each question in a well-structured essay format, citing relevant details from the course material.

    1. Discuss the benefits and drawbacks of running large language models locally compared to using cloud-based services. What trade-offs should developers consider when making this decision?
    2. Explain the process of building a RAG system using Ollama, emphasizing the roles of different components like embedding models, vector databases, and large language models. How does Langchain contribute to the development of these systems?
    3. Compare and contrast using the Ollama CLI, the REST API, and a UI-based interface for interacting with large language models. What scenarios are each most suited for and why?
    4. Describe how a model file can be used to customize a large language model within Ollama. Provide examples of how changes to settings like temperature and system messages can impact model output.
    5. Analyze how AI agents and autonomous systems can be used to build complex workflows with Ollama. Discuss the design considerations and benefits of adopting agent-based approaches for specialized tasks.

    Glossary

    Agent: In the context of AI, an agent refers to a software component that can operate autonomously to complete a specific task or series of tasks, often leveraging large language models.

    API (Application Programming Interface): A set of protocols, routines, and tools for building software applications. In this context, it refers to the REST API offered by Ollama for programmatic interaction with LLMs.

    CLI (Command Line Interface): A text-based interface for interacting with a computer program or operating system, in the case of Ollama, it provides direct access to the models through commands.

    Context Length: The maximum number of tokens an LLM can process at once in a single input. A longer context length allows the model to handle longer texts and capture dependencies more effectively.

    Embeddings: Numerical vector representations of text or other data that capture the semantic meaning and relationships between different pieces of data. Used to allow computers to perform computation on linguistic data.

    Extensibility: Refers to the ability to add custom models or extensions to Ollama.

    Hallucination: A phenomenon in LLMs where the model generates information that is factually incorrect or does not align with the provided context, often sounding confidently correct.

    Langchain: An open-source framework for developing applications with large language models. Provides a unified abstraction for loading documents, embedding, and managing vector databases.

    LLM (Large Language Model): A machine learning model trained on a vast amount of text data, capable of understanding and generating human-like text.

    Model File: A configuration file used in Ollama to customize LLMs. It allows developers to modify parameters like temperature and system messages, tailoring the model to specific tasks.

    Multi-Modal Model: A type of LLM that can understand and process multiple types of data, such as text and images.

    Ollama: An open-source tool that simplifies running large language models locally on a personal computer. It manages model downloads, execution, and customization, allowing advanced language processing without external services.

    Parameters: The internal weights and biases learned by a neural network during training. They determine how the model processes input data and generates output. More parameters generally indicate a more complex model.

    Quantization: A technique used to reduce the size and computational demands of a neural network model by reducing the precision of its weights.

    RAG (Retrieval Augmented Generation): A system that combines document retrieval with large language models. It enhances the model’s knowledge by retrieving relevant information from a knowledge base, and allowing the model to give informed responses.

    REST API (Representational State Transfer API): A way to interact with web services by sending HTTP requests, the REST API for Ollama allows interaction with LLMs without the command line.

    Vector Database (Vector Store): A database that stores data as vector embeddings, specifically designed to handle similarity search.

    Olama: Local LLM Development Course

    Okay, here’s a detailed briefing document summarizing the key themes and ideas from the provided text about the Olama tool and its associated course:

    Briefing Document: Olama – Local LLM Development

    Introduction:

    This document reviews a mini-course focused on using Olama, an open-source tool that enables the local running of large language models (LLMs) on personal computers. The course, created by Paulo deson, aims to teach developers and other interested individuals how to leverage Olama for building AI solutions without relying on paid cloud services. The course emphasizes a hands-on approach balanced with theoretical understanding.

    Main Themes and Key Ideas:

    • Olama: Local, Free LLMs: Olama is presented as a solution to the problem of accessing and using large language models, which often involves paid cloud services. It allows developers to download, run, and interact with various LLMs locally on their machines for free. “The idea here is very simple as you know right now if you want to run large language models or if you want to use a model large language model in this case just a model most likely you’ll have to use open Ai chbt and so forth and many others out there that are paid and the thing is with a Lama you don’t have to pay for anything it’s free and that’s the beauty.”
    • Simplified LLM Management: Olama simplifies the process of managing, installing, and executing different LLMs via a command-line interface (CLI). It abstracts away the technical complexities involved in setting up and running these models. “ama abstracts away the technicality so the technical complexity that are involved when we want to set up these models which makes Advanced language processing accessible to a broader audience such as developers researchers and hobbyists”
    • Local Control and Privacy: By running models locally, users maintain control over their data and ensure privacy, as data is not sent to external servers. This addresses the data privacy concerns associated with cloud-based LLM services. “in this case here when we run our own models locally uh we are making sure that our data doesn’t need to be sent to external servers”
    • Key Features of Olama:
    • Model Management: Easy download and switching between various LLMs.
    • Unified Interface: Consistent set of commands for interacting with models.
    • Extensibility: Support for adding custom models and extensions.
    • Performance Optimizations: Effective utilization of local hardware, including GPU acceleration.
    • Use Cases:
    • Development and Testing: Testing various LLMs to determine optimal performance for specific applications.
    • RAG (Retrieval Augmented Generation) Systems: Building RAG systems powered by local models for information retrieval and context-aware responses. “the idea is that we’re going to be able to build rag system so retrieval augmented generation systems that are powered solely by AMA models”
    • Privacy-focused Applications: Ensuring data privacy by running models on local hardware.
    • Course Audience: The course is targeted towards developers, AI engineers, open-minded learners, machine learning engineers, and data scientists who are interested in local LLM application development. It assumes a basic understanding of programming, particularly Python, as well as general knowledge of AI, machine learning, and LLMs. “this course is for developers AI Engineers open-minded Learners machine learning engineers and so forth as well as data scientists so if you are somebody who is willing to put in the work and wants to learn about AMA and build local llm applications then this course is for you”
    • Course Structure: The course includes a mix of theory and hands-on learning, with an emphasis on practical application. It begins with the fundamentals and then transitions to hands-on projects where students build AI solutions using Olama. “most of my courses I have this mixture of two things I have Theory so this is where we talk about the fundamental concepts the lingo and so forth and I have Hands-On because it’s all about actually doing things that way you actually understand and know how to get things done that’s the whole point”
    • Development Environment: Requires Python installed, a code editor (VS Code is recommended), and a willingness to learn. “in this case you know that this is all P about python which means you’ll have to have python installed and also you have to have some sort of a code editor”
    • Olama Installation and Usage: The course demonstrates how to install Olama on different operating systems (MacOS, Linux, Windows). It also shows how to download and run models, and how to interact with them through a command-line interface.
    • Understanding Model Parameters: The course touches upon important model parameters, such as parameters (3.2B, 1B), context length, embedding length, and quantization. It clarifies that a higher number of parameters improves accuracy, but increases the computational requirements. “when we talk about parameters talk about 3B or 2B or 10p or 7p and so forth these are numbers inside a neural network that it adjusts to learn how to turn inputs into correct outputs”
    • Olama Commands: The course introduces several key Olama commands like list, remove, pull, run, and the use of the model file for customizing models.
    • Rest API: The course demonstrates that behind the command line interface there is a rest API that you can interact with to get responses.
    • UI based Interface: The course introduces a third party tool called mistral which allows you to interact with AMA models through a UI.
    • Python Library: The course also explores the use of Olama through a Python library, which makes it easier to integrate Olama into applications. “we want to be able to create local large language model applications using AMA models and so for that we need a way for us to be able to use python”
    • Practical Applications:
    • Grocery List Organizer: Creating a tool that categorizes grocery items from a plain text list.
    • RAG Systems: Building a full RAG system using Langchain, allowing users to interact with their own documents. “we’re going to build rack systems with AMA so with AMA of course we can build more complex large language model applications”
    • AI Recruiter Agency: Developing an AI-powered recruitment tool for processing resumes and providing candidate recommendations using an agent-based system.

    Key Quotes:

    • “olama is an open-source tool that simplifies running large language models locally on your personal computer”
    • “the idea is that we’re going to be able to use AMA to customize our models meaning that we are able to use different flavors of models so we can test them around and all of that is actually going to be free”
    • “the idea is that ama sits at the center and allows us developers to pick different large language models depending on the situation depending on what we want to do”
    • “the main point here of of course is that we have this Model Management in one place we’re able to easily download and switch between different large language models”
    • “the idea is that you find something that will work for you”
    • “AMA as we know is a platform that allows you to run large language models locally which is really awesome”
    • “AMA model support these tasks here text generation code generation and multimodel applications”
    • “the power that we have right now is at all this is locally”
    • “we have our own box that we can pass in sensitive documents and all those things without worrying about prices”
    • “the great thing here is that it supports various models tailored for different tasks including text generation code generation and multimodel applications”
    • “we can now use sort of a a backend combination of the API rest API through the python Library the AMA python library”
    • “agents is a really good way to build complex applications”

    Conclusion:

    This course provides a comprehensive introduction to Olama, demonstrating its potential for local LLM development. By emphasizing hands-on experience and practical applications, the course equips developers with the knowledge and skills needed to create AI solutions that respect privacy and reduce costs. The course demonstrates the practical applications of Olama for tasks such as building a grocery list categorizer, creating RAG systems, and building a complex AI agent based application.

    Ollama: A Guide to Local LLMs

    Frequently Asked Questions about Ollama

    • What is Ollama and what problem does it solve? Ollama is an open-source tool designed to simplify the process of running large language models (LLMs) locally on your own hardware. It addresses the problem of needing to rely on paid cloud-based services like OpenAI or complex setup procedures when using LLMs. By abstracting away technical complexities, Ollama makes advanced language processing accessible to a broader audience such as developers, researchers, and hobbyists, providing a free and private alternative to cloud services.
    • Who is this course about Ollama for? This course is tailored for developers, AI engineers, open-minded learners, machine learning engineers, and data scientists who are willing to put in the work to learn about Ollama and build local LLM applications. It assumes a basic understanding of programming (especially Python) and some fundamental knowledge of AI, machine learning, and LLMs.
    • What are some key features of Ollama? Ollama has several key features including:
    • Model Management: Easily download and switch between different large language models.
    • Unified Interface: Interact with various models using one consistent set of commands through the command-line interface (CLI).
    • Extensibility: Supports adding custom models and extensions.
    • Performance Optimizations: Effectively utilize your hardware, including GPU acceleration where available.
    • What are parameters in the context of large language models? Parameters are the internal weights and biases that a model learns during training and determine how the model processes input data and generates output. The number of parameters (e.g., 3.2B) reflects the complexity and capacity of the model, with more parameters typically leading to better performance but also requiring more computational resources. Models like Llama are designed with efficiency in mind, performing well even at smaller scales.
    • What are use cases for Ollama? Ollama has a wide range of use cases, including:
    • Development and testing: Allows developers to test and switch between models when creating applications.
    • Building retrieval augmented generation (RAG) systems: Enables the creation of free, local rag systems.
    • Privacy-focused data processing: Keeps data locally, eliminating the need to send information to external servers.
    • Custom AI solutions: Allows building tailored large language model applications with free models and control over your data and environment.
    • How do you install and run models with Ollama? To install Ollama, you download the appropriate version for your operating system (MacOS, Linux, or Windows). Once installed, you can download and run specific models directly using the CLI, e.g., ollama run llama3:latest to get the latest llama 3 model. Models are managed through the CLI, which allows for downloading, removing, and listing available models. You can then interact with the models directly through the terminal shell.
    • Can Ollama models be customized, and how is that done? Yes, Ollama models can be customized by creating a model file, where you can specify model parameters, such as temperature, and system messages. You can create a new version of an existing model using the ollama create command, which uses your defined model file to implement the desired customization, allowing you to fine-tune your models for specific purposes.
    • Besides the CLI, how else can you interact with Ollama models? Ollama models can also be interacted with using the REST API, accessible at localhost:11434 when Ollama is running. The REST API allows you to generate responses, chat with models, or fetch metadata using tools like curl and JSON payloads in python. Additionally, user-friendly interfaces like the Mistral app allow you to interact with locally running Ollama models with a GUI, making it similar to using ChatGPT, and integrating with document knowledge bases via retrieval augmented generation (RAG). In addition, code libraries such as python, provide an abstracted way of interacting with the REST API, which will make building LLM applications using your own models locally even simpler.

    Olama: Local Large Language Model Toolkit

    Olama is a tool that simplifies running large language models locally on a personal computer [1, 2]. It is an open-source tool designed to make advanced language processing accessible to a broader audience, including developers, researchers, and hobbyists [2].

    Olama’s applications include:

    • Building local large language model applications: Olama allows users to customize models and build applications using them [1].
    • Creating retrieval augmented generation (RAG) systems: Olama enables the creation of RAG systems powered by its models [1].
    • Model management: Olama allows users to easily download and switch between different large language models [3].
    • Development and testing: Developers can test applications that integrate large language models without setting up different environments [3].
    • Education and research: Olama provides a platform for learning and experimentation without the barriers associated with cloud services [3].
    • Secure applications: Olama is suitable for industries where data privacy is critical, such as healthcare and finance, because models are run locally [4].
    • Customization: Olama allows for greater flexibility in customizing and fine-tuning models [5].

    Olama addresses the challenges of accessibility, privacy, and cost in the realm of large language models [4]. By enabling local execution, it makes AI technologies more practical for a range of applications [4].

    Specific real-world applications include:

    • Grocery list organizer: Olama can categorize and sort grocery items [1, 6].
    • AI recruiter agency: Olama can be used to build an AI-powered recruitment agency that extracts information from resumes, analyzes candidate profiles, matches candidates with suitable positions, screens candidates, and provides detailed recommendations [1, 7-9].

    Olama supports various models tailored for different tasks, including text generation, code generation, and multimodal applications [10]. Olama can be used through a command line interface (CLI), a user interface (UI), or a Python library [11].

    Key features of Olama include:

    • Model management: The ability to easily download and switch between models [3].
    • Unified interface: Interacting with models using a consistent set of commands [3].
    • Extensibility: The ability to add custom models and extensions [3].
    • Performance optimization: Utilization of local hardware, including GPU acceleration [3].
    • Cost-efficiency: Eliminating the need for cloud-based services and associated costs [5].
    • Reduced latency: Faster response times due to local execution [5].
    • Enhanced privacy and security: Data does not need to be sent to external servers [5].

    Olama uses a command line interface (CLI) to manage model installation and execution [12]. The tool abstracts away the technical complexity involved in setting up models, making it accessible to a wider audience [12].

    Local LLMs with Olama: Accessibility, Privacy, and Applications

    Local Large Language Models (LLMs) can be run on your personal computer using tools like Olama, an open-source tool that simplifies this process [1]. Olama is designed to make advanced language processing more accessible for developers, researchers, and hobbyists [2].

    Key aspects of local LLMs and their applications include:

    • Accessibility: Olama makes it easier for a broad range of users to utilize LLMs, without requiring specialized knowledge of machine learning frameworks [2].
    • Privacy and Security: Running models locally means that your data is not sent to external servers, which enhances privacy and security [3]. This can be especially important for applications dealing with sensitive information [4, 5].
    • Cost-Efficiency: Local LLMs eliminate the need for cloud-based services, which means you don’t have to pay for API calls or server usage [4].
    • Reduced Latency: Local execution of models reduces delays associated with network communications, leading to faster response times [4].
    • Customization: You have greater flexibility in customizing and fine-tuning models to suit specific needs without limitations from third-party services [4].
    • Model Management: Olama provides a central place to download, manage, and switch between different LLMs [6].

    Olama uses a command-line interface (CLI) to manage models, which abstracts away technical complexities [3]. Olama also has a REST API that can be used to interact with models [7].

    Applications of local LLMs using Olama include:

    • Building local LLM applications, with the ability to customize models [1].
    • Creating Retrieval Augmented Generation (RAG) systems [1]. RAG systems use documents or data to generate responses, thereby augmenting the knowledge of the LLM [3].
    • Development and testing of applications that integrate LLMs [6].
    • Education and research, providing a platform for learning and experimentation [5].
    • Secure applications in industries like healthcare and finance, where data privacy is crucial [5].
    • Creating tools that use function calling, which aids LLMs in performing more tasks [8].
    • Customizing models for specific purposes [4].

    Olama supports a variety of models tailored for different tasks including text generation, code generation, and multimodal applications [9].

    Examples of real-world applications include:

    • Grocery list organizers that can categorize and sort items [1, 10].
    • AI recruiter agencies that can extract information from resumes, analyze candidate profiles, match them to positions, screen them, and provide recommendations [1, 11, 12].

    In summary, local LLMs, especially when used with tools like Olama, provide a way to utilize large language models in a private, cost effective and flexible manner [2, 4]. They allow for the development of various applications across diverse fields by allowing people to use LLMs locally [4].

    Olama: Customizing Local LLMs

    Model customization is a key feature when using local large language models (LLMs) with tools like Olama [1]. Olama is designed to allow users greater flexibility in modifying and fine-tuning models to better suit their specific needs, without being limited by third-party services [1].

    Here’s a breakdown of how model customization works with Olama:

    • Flexibility: Local execution of models allows for greater flexibility in customizing models [1]. You can adjust models to meet specific requirements without the constraints imposed by third-party services [1].
    • Fine-tuning: Olama enables the fine-tuning of models to better suit specific needs [1].
    • Model Files: Model files allow for modification and customization of models. These files contain specific instructions and parameters for the model. For example, you can set the temperature of a model, which influences its creativity or directness, and add system messages to instruct the model on how to behave [2, 3].
    • Creating Custom Models: With Olama, you can create customized versions of models by specifying a base model and adding parameters through model files [3]. This process allows you to tailor a model’s behavior to your specific needs [3].
    • Extensibility: Olama supports adding custom models and extensions [4]. This allows you to integrate models or functionalities that are not available in the standard Olama library [4].
    • Parameters: You can customize a model by adjusting parameters like temperature which affects the creativity of the model [3]. The system message parameter, for example, can instruct the model to be succinct and informative [3].
    • Model Management: Olama provides a central place to manage different models which can be used interchangeably. You can easily download and switch between different large language models, allowing for testing and selection of the model that best suits your needs [4, 5].

    Practical examples of model customization include:

    • Adjusting model behavior: By using a model file, you can instruct a model to be more succinct and informative [3]. This is useful in a variety of applications where you need specific responses from the model [3].
    • Creating specialized models: You can use a base model and customize it to create a model designed for a specific purpose [3]. This is helpful when you need a model with a focused skill set for a specific task [3].
    • Testing and switching models: Olama makes it easy to switch between different models to determine which one performs best for a particular use case. You can test various models to find the one that works for you [4, 5].
    • Adapting to different tasks: You can switch between models tailored for various tasks including text generation, code generation, and multimodal applications. You can select the best model for the task you want to perform [6].

    By allowing this level of customization, Olama makes it possible to tailor LLMs to very specific applications. The ability to modify models, combined with local execution, provides a versatile way for developers and researchers to use the power of LLMs in various settings [1].

    Retrieval Augmented Generation Systems

    Retrieval Augmented Generation (RAG) systems are a way to enhance the capabilities of large language models (LLMs) by allowing them to access and use external data sources to generate responses [1, 2]. This approach helps to overcome some limitations of LLMs, such as their limited knowledge base and tendency to “hallucinate,” by providing them with relevant, up-to-date information from a custom knowledge base [2, 3].

    Here’s how RAG systems work:

    • Indexing:
    • Document Loading: Documents in various formats (e.g., PDF, text, URLs, databases) are loaded into the system [4].
    • Preprocessing: The loaded documents are parsed and preprocessed. This typically involves breaking the text into smaller, manageable chunks [2-4].
    • Embedding: These text chunks are converted into numerical representations called embeddings using an embedding model [2-5]. These embeddings capture the semantic meaning of the text, allowing for similarity comparisons [4, 6].
    • Vector Storage: The generated embeddings are stored in a vector database or vector store, which is designed for efficient storage and retrieval of these high-dimensional vectors [2-4, 7].
    • Retrieval and Generation:
    • Query Embedding: When a user asks a question (the query), that question is also converted into an embedding using the same embedding model [2, 4, 5].
    • Similarity Search: The query embedding is used to search the vector database for the most similar document embeddings [2, 5, 6]. This search retrieves the most relevant chunks of text related to the query [4, 5].
    • Context Integration: The retrieved document chunks and the original query are combined and passed to the LLM [2, 3, 5].
    • Response Generation: The LLM uses the provided context and the query to generate a coherent and informed response [2, 3, 5].

    Key components of RAG systems include [7]:

    • Large Language Model (LLM): The core component responsible for generating the final response [7]. It leverages its knowledge, reasoning capabilities and is good at predicting things, summarizing and brainstorming [3].
    • Document Corpus: The collection of documents that serve as the knowledge base for the system [7].
    • Embedding Model: Used to convert both the document chunks and the queries into vector embeddings [2-4].
    • Vector Database: A specialized database for storing and efficiently searching through the vector embeddings [2-4, 7].
    • Retrieval Mechanism: The process that identifies and retrieves the most relevant document chunks in relation to the query [7].
    • Prompt Engineering: Designing prompts that effectively instruct the LLM on how to utilize the provided context to generate answers [8, 9].

    Tools like LangChain can simplify the development of RAG systems [7]. LangChain provides abstractions for document loading, splitting, embedding, and integration with various LLMs and vector databases.

    Benefits of RAG systems:

    • Enhanced Accuracy: RAG systems provide LLMs with external context, which reduces the occurrence of generating responses that are not based on any supporting information [2, 3].
    • Up-to-Date Information: By using external knowledge bases, RAG systems can provide more current information than the LLM might have been trained on [3].
    • Customization: RAG systems can be tailored to specific domains or use cases by using domain-specific documents [2, 3].
    • Reduced Hallucination: The use of external data helps the LLM to avoid making up information [2, 3].
    • Improved Transparency: Since the LLM is grounded in retrieved data, it’s easier to trace the source of its answers [5].

    Olama can be used to build RAG systems with local LLMs [1, 2]. By enabling local execution of both LLMs and embedding models, Olama provides a cost-effective and private way to build RAG systems [1, 2, 10]. Olama also supports various models that can be used for both embeddings and language generation, allowing for flexibility in the development process [11].

    In summary, RAG systems combine the knowledge and reasoning capabilities of LLMs with the specificity of external data sources. These systems are useful when you need an LLM to reason about specific, custom or up-to-date information. This approach enhances the performance of LLMs in many different application scenarios [5, 7].

    AI-Powered Recruitment Agencies

    AI can be used to build recruitment agencies using tools like Olama and the swarm framework, which allows for the creation of AI agents that perform tasks delegated to them [1, 2]. This setup can automate many parts of the recruitment process, drawing on the power of large language models (LLMs) and AI [2].

    Here’s how AI recruitment systems work:

    • AI Agents: Specialized AI agents are created to perform different tasks in the recruitment process [2]. Each agent is designed with specific instructions and capabilities, and can delegate tasks to other agents [2-4].
    • Base Agent: All agents are built from a base agent, which has the core functionalities needed for the agent to work, such as the connection to the local LLM [3, 5].
    • Task Delegation: Agents delegate tasks to other agents, allowing for a structured and efficient workflow.
    • Local LLMs: Local LLMs, powered by tools like Olama, are used in the backend, eliminating the need for API calls and third party services [1, 3, 5].

    Key agents in an AI recruitment system include [4, 6-8]:

    • Extractor Agent: Extracts information from resumes, focusing on personal information, work experience, education, skills, and certifications [6, 7]. It converts the raw text into a structured format.
    • Matcher Agent: Matches candidate profiles with job positions based on skills, experience, location, and other criteria [7, 8]. It uses the extracted information from the resume and available job listings to find suitable matches.
    • Screener Agent: Screens candidates based on qualifications, alignment, experience, and other factors, generating a screening report [6].
    • Profile Enhancer Agent: Enhances candidate profiles based on the extracted information [8].
    • Recommender Agent: Generates final recommendations based on the analysis, extracted information and other factors [4].
    • Orchestrator Agent: Coordinates the entire recruitment workflow, delegates tasks to other agents, manages the flow of information, maintains context, and aggregates results from each stage [4, 9].

    Here are the steps in an AI recruitment system:

    • Resume Upload: A resume is uploaded to the system [2, 10].
    • Information Extraction: The extractor agent extracts information from the resume [6, 7, 10].
    • Analysis: The orchestrator sends the extracted information to the analyzer agent [9, 11].
    • Matching: The matcher agent compares the extracted resume information with available job listings to identify potential matches [7, 8].
    • Screening: The screener agent performs a screening of the candidate, generating a report [4, 6].
    • Recommendation: The recommender agent provides final recommendations [4].
    • Result Output: A comprehensive report is generated with a breakdown of skills, job matches, and recommendations.

    This system can provide:

    • Skill Analysis: A detailed analysis of a candidate’s skills, expertise, and experience [10, 11].
    • Job Matches: Identification of potential job matches based on skills and experience, along with match scores and location [10, 11].
    • Screening Results: A summary of the candidate’s qualifications and experience relevant to the job [10, 11].
    • Final Recommendations: Recommendations for the candidate to enhance their profile, including developing specific skills or gaining further education [10, 11].

    Key benefits of an AI recruitment system:

    • Efficiency: AI agents can process numerous resumes quickly and efficiently, saving recruiters time.
    • Automation: Many steps of the recruitment process are automated, reducing the need for manual tasks.
    • Cost Reduction: Local LLMs eliminate costs associated with API calls and cloud-based services [3, 5, 12].
    • Customization: The system can be customized to fit specific needs, including using different LLMs or embeddings models [4, 5, 13].
    • Context Maintenance: The system maintains context throughout the process ensuring that each agent has all of the necessary information.
    • Scalability: The system can be easily scaled to handle multiple resumes.

    In conclusion, AI recruitment systems powered by local LLMs and agent frameworks like swarm can streamline the hiring process by automating various tasks, providing comprehensive analysis of candidates, and reducing costs. The flexibility and customization of these systems, combined with the power of LLMs, make them a useful tool for modern recruitment agencies.

    Ollama Course – Build AI Apps Locally

    By Amjad Izhar
    Contact: amjad.izhar@gmail.com
    https://amjadizhar.blog

  • Islamic Law and Family Disputes

    Islamic Law and Family Disputes

    The text presents a discussion on Islamic law and societal norms regarding infertility, adoption, and gender roles. A retired judge and a legal expert debate the complexities of these issues, exploring the lack of legal recourse for women, the societal pressures on barren couples, and the challenges and ambiguities surrounding child adoption within an Islamic framework. The conversation highlights the deep-seated cultural biases against women and the need for legal reforms to address these imbalances. Ultimately, the discussion emphasizes the importance of compassion and fairness in dealing with these sensitive matters.

    Justice and Adoption in Islamic Law

    Answer each question in 2-3 sentences.

    1. According to the speaker, what is the primary cause of tension between men and women in the described context?
    2. What specific societal issue does the speaker highlight as deeply rooted and difficult to eradicate?
    3. What situation involving a young woman and her “class fellow” does the speaker recount as an example of honor killings?
    4. According to the speaker, what support system exists outside of the courts for women in local communities?
    5. What does the speaker suggest about the concept of a man marrying multiple times, and what pre-requisite should be considered?
    6. What issue regarding barren couples does the speaker raise, and what legal form does he think should exist?
    7. What legal barrier exists in the speaker’s country regarding adoption?
    8. What does the speaker suggest is the correct manner of giving assets to an adopted child?
    9. What specific practice of early Islamic law does the speaker cite and discuss in order to make a larger point about the rights and treatment of adopted children?
    10. What message does the speaker wish to convey to the public concerning adoption, particularly in regards to relatives?

    Quiz Answer Key

    1. The speaker attributes the tension between men and women to the belief that men have a right to command and women are meant to serve them. This stems from a deeply ingrained societal concept of male superiority.
    2. The speaker identifies the lack of justice for women as a significant issue. He describes it as “rust” deeply embedded in religion, society, and color, making it difficult to remove.
    3. The speaker recounts an incident where a man killed his sister for being seen with her classmate, emphasizing how easily an alleged offense can escalate to deadly violence in the name of “honor.”
    4. The speaker describes the existence of local councils that provide support to women, thus circumventing the need for women to pursue justice in the courts.
    5. The speaker suggests that if a man wishes to marry multiple wives, he should first seek the permission of his existing wife. This emphasizes that wives deserve consideration and respect.
    6. The speaker raises the issue of barren couples and the desire to have children. He argues there should be a legal process that allows for the creation of family bonds through legal means when biological children cannot be born.
    7. The speaker states that adoption is not legally recognized in his country. This legal barrier creates complications for those who wish to adopt children and provide them with formal familial ties.
    8. The speaker suggests that assets can be gifted during the person’s lifetime to an adopted child, but only up to one-third of the total. The remaining assets would go to a trust or to charity.
    9. The speaker discusses the story of how Prophet Muhammad’s adopted son, Zayd ibn Harithah, was not treated as a biological son under Islamic law, to highlight how deeply entrenched societal views on kinship can impact how we treat adopted children.
    10. The speaker advises against adopting children from close relatives, as it can cause conflict when the biological parents later decide they want their child back. He suggests adopting children that have no family to avoid this particular scenario.

    Essay Questions

    1. Analyze the speaker’s perspective on the societal structures and cultural norms that perpetuate injustice against women. How does the speaker’s argument emphasize the interconnection of cultural norms, religious interpretations, and societal behaviors in shaping gender roles?
    2. Discuss the speaker’s views on adoption in the context of their specific cultural and legal background. How do these views interact with the broader Islamic legal framework, and what alternative solutions does the speaker propose?
    3. Evaluate the speaker’s position on the legal and social status of adopted children. In what ways does he address their vulnerability within the existing system, and how does he suggest they should be treated as a child of the household?
    4. Analyze the connection between the speaker’s concerns about “honor killings” and the overarching theme of injustice in the passage. How does this example relate to the speaker’s broader points about gender roles and the power dynamics within families and society?
    5. Examine the overall message and purpose of the speaker’s statements. Who do they seem to be addressing, and what are they hoping to accomplish by making these points about injustice and social change?

    Glossary of Key Terms

    • Magri Tehzeeb: The speaker refers to this as a Western society. It can be interpreted as a contrast to the speaker’s Islamic society and how it relates to current events.
    • Jagirdars: A system of feudal land ownership, historically in India and Pakistan, where powerful landlords control land and resources, often at the expense of the people working the land.
    • Masalia (Council of): A reference to a local council or community board that operates outside of formal courts to resolve disputes, particularly for women and families.
    • Wuzu: Refers to the ritual ablution, or washing of the hands, arms, face, and feet in preparation for Muslim prayer.
    • Lipat: In this context, the speaker uses lipat to refer to the surface-level appearance of good behavior and morality.
    • Hiba: Refers to a gift or endowment made during one’s lifetime, as contrasted with inheritance after death.
    • Shariat: This refers to the Islamic law derived from the Quran and the teachings of Prophet Muhammad.
    • Jahar Din Haras: Refers to Zayd ibn Harithah, the adopted son of the Prophet Muhammad.
    • Ulema: Islamic scholars or religious leaders who have expertise in Islamic law and theology.
    • Haram: Prohibited or forbidden under Islamic law. In the context of this passage, it refers to the prohibition of adoption.

    Family, Gender, and Adoption in Islam

    Okay, here is a briefing document summarizing the key themes and ideas from the provided text:

    Briefing Document: Analysis of “Pasted Text”

    Date: October 26, 2023

    Subject: Review of Discussions on Family, Gender, and Adoption in an Islamic Context

    Introduction:

    This document analyzes a conversation, likely from a television or radio program, involving Justice Retired Nachana Javed Iqbal Sahib, Afzal Rehan Sahib, and an unnamed female moderator. The discussion revolves around complex issues related to family dynamics, gender roles, women’s rights, adoption, and societal norms within an Islamic framework, primarily in what appears to be a South Asian context.

    Key Themes and Issues:

    1. Gender Inequality and Male Dominance:
    • Entrenched Patriarchy: The conversation highlights a deeply rooted patriarchal system where men feel entitled to command and control women. One participant states, “…the male is found and it is 2 minutes and all the males means however much one understands himself, he has to understand that I am a man and she is a woman and it is my right to command.”
    • Domestic Servitude: There is a perception that a woman’s role is to serve the man, evidenced by the questions, “…is it my hand that should make rotis or pots, is it my hand that should wash my clothes, is it my hand that should spy…?”
    • Lack of Justice for Women: A strong point is made that “in our society there is no justice for women.”
    • Male Accountability for Violence: The speaker notes that in 90% of cases that come before the court, it is the man who is at fault for domestic disputes. This emphasizes a prevalent pattern of male responsibility for marital discord and violence against women.
    • ‘Honor Killings’: The discussion references the issue of “honor killings” and the societal context that can lead to such violence. One tragic example is given of a woman being killed by her brother after he wrongly assumes she was in an inappropriate situation.
    1. Marital Discord and Divorce:
    • Tension due to Infertility: The discussion mentions how childlessness can escalate marital tension, noting that in a specific case, “because of not having children, the tension between them increased even more.”
    • Second Marriages: The conversation touches upon men taking second wives and the need for the first wife’s consent. It is proposed that “if you want to get married then that is over, before that take permission from your wife.”
    • Societal Pressure and Marital Conflict: The negative effects of societal pressures on couples are discussed. A point is made that “if our society is allowed to break the concern for death a little, then many diseases are caused by it, there is blue pressure or there are many other diseases due to it” emphasizing that anxiety and stress about marital issues contribute to poor health.
    1. Adoption and its Complexities:
    • Lack of Legal Recognition: Adoption is noted as not being legally recognized in their country.
    • Inheritance Rights: A major point of concern is regarding the inheritance rights of adopted children, especially since under Islamic law, adopted children are not given the same rights as biological children. The conversation notes “they wanted that you were not their child at all, so can they get a share in the inheritance, can’t they get it, what will he become?”
    • Emotional and Social Challenges: The discussion touches upon the emotional impact on adopted children, noting that it is important to raise them with love. A participant shares, “I have brought it up in such a way that when people say that, oh, this is theirs, you have told me that this is such a human companion that my body is their property.”
    • Importance of a Will: It is stated that “if he does not make a will then he will not get anything.” A recommendation is made that those who adopt can give up to one third of their property to their adopted child.
    • Adopting from Relatives: A warning is given against adopting children from close relatives due to potential future conflicts. “If you want to adopt a child then never adopt a child from your dear relatives whom you are taking from your parents because his parents will also want a child from you some day and you will have to suffer a lot from him.”
    1. The Role of Islamic Teachings & Interpretation:
    • Misinterpretations of Islamic Doctrine: There’s a sense that certain actions and beliefs regarding gender roles are rooted in a misinterpretation of Islamic principles. It is noted that Islam does not teach prejudice based on race and that people should look at principles rather than rigid traditions.
    • Emphasis on Compassion & Justice: The discussion, while complex, attempts to align with principles of Islamic justice, compassion and fair treatment, especially for women and children.
    • Importance of Ijtihad/Independent Reasoning The conversation grapples with modern challenges by utilizing a mix of traditional Islamic teachings and attempting to apply reason to new situations.
    1. Call for Change & Reform:
    • Addressing Root Issues: The speaker laments that the problems of inequality cannot be solved with superficial or cosmetic fixes (“its rust is very deep, it will not go away by giving me and your hunk”).
    • Role of Community Leaders: The discussion also touches on the need for community leaders and councils to actively support women facing domestic abuse and injustices, noting “very good committees have been formed in the council of Masalia, this series has started and this has been happening since 1981.”

    Key Quotes:

    • “in our society there is no justice for women”
    • “the male is found and it is 2 minutes and all the males means however much one understands himself, he has to understand that I am a man and she is a woman and it is my right to command.”
    • “is it my hand that should make rotis or pots, is it my hand that should wash my clothes, is it my hand that should spy…?”
    • “if you want to get married then that is over, before that take permission from your wife.”
    • “If you want to adopt a child then never adopt a child from your dear relatives whom you are taking from your parents because his parents will also want a child from you some day and you will have to suffer a lot from him.”
    • “I have brought it up in such a way that when people say that, oh, this is theirs, you have told me that this is such a human companion that my body is their property.”
    • “its rust is very deep, it will not go away by giving me and your hunk”

    Conclusion:

    The conversation reveals a society grappling with deeply ingrained patriarchal norms, injustices faced by women, and complex issues surrounding adoption within an Islamic context. There is a clear call for reform, for a deeper understanding of Islamic teachings, and for a more just and compassionate society. The discussion highlights a need for legal, social, and emotional support systems, especially for women and adopted children.

    Islamic Law, Family, and Adoption

    FAQ on Islamic Law, Family Dynamics, and Adoption

    1. What are some common issues faced by women within the family structure, as discussed in the text?

    The text highlights several issues women face, including: domestic tension arising from the inability to have children, lack of justice in the patriarchal structure where men often assume a position of dominance and control (including expecting women to do domestic labor and serve them), instances of honor killings (where women are killed for perceived dishonorable actions), and unequal treatment in inheritance matters. The text also points to the lack of social and legal support for women, who are often subject to judgment and scrutiny, even in cases where they are victims of violence or injustice.

    2. The text suggests that “rust” is very deep in society in relation to gender issues. What does this imply and what does it mean for solutions?

    The “rust” refers to deeply ingrained societal attitudes, biases, and traditions that perpetuate inequality and injustice against women. It implies that the problem is not just about individual actions but stems from systematic beliefs and practices related to gender roles that are difficult to change through simple fixes. The speaker says it “will not go away by giving me and your hunk” indicating that simple acts or surface level changes will not solve the deeply ingrained issue. The text suggests that addressing these issues requires comprehensive and prolonged efforts at multiple levels including legal, religious, educational, and social reform, as well as a fundamental shift in societal consciousness.

    3. The text brings up the issue of ‘honor killings’. How does this relate to the broader discussion of women’s rights and societal problems?

    Honor killings, as depicted in the text, are a extreme manifestation of the patriarchal control over women’s lives. The fact that a woman can be killed by her family for perceived transgressions that they deem ‘dishonorable’ highlights the lack of autonomy and safety women often experience. The speaker shares a story of a woman killed by her brother for simply speaking with a male classmate. It underscores the urgent need for changes in societal attitudes and legal systems that protect women from such extreme forms of violence and allows for men to exert control over women.

    4. What is the text’s stance on men’s views of their roles versus women’s roles within families?

    The text criticizes the prevalent patriarchal view that men have an inherent right to command and be served by women, with the expectation that women should be responsible for all domestic labor. The text highlights that such a view is not only unjust, but also harmful to family relationships. The speaker makes a point that some men see their role as the one to perform “wudu” on his own, indicating they believe they can handle more. While it’s not clear what the process of wudu is in the context of this speech, it represents men thinking they have the authority to perform duties that traditionally they may have expected from women. It challenges the perception that women’s roles are confined to domestic duties, emphasizing their need for autonomy, equality, and respect.

    5. How does the text approach the topic of adoption within Islamic contexts, particularly for couples who are unable to conceive?

    The text indicates that while adoption is not formally recognized in some interpretations of Islamic law (and therefore cannot allow someone to become a formal heir), it acknowledges the desire of couples without children to raise and care for children. The text suggests that if a couple adopts a child, that they should treat the child as their own, offer love, and ensure a good upbringing. Further, the text recommends giving a third of what you own to that child as a way of support in their life, rather than as formal inheritance. The text emphasizes the need to love and care for adopted children. It also warns against adopting a child from relatives in order to avoid future conflict. The key message is to ensure an orphaned child receives love and support without creating future difficulties for the adopting family.

    6. What practical advice does the text offer to couples considering adoption?

    The text advises that couples seeking to adopt should first seek other methods of having their own children. Then, if they must adopt, they should avoid taking a child from close relatives, as that can create future problems. It also highlights the importance of loving the adopted child and making sure that they’re well provided for in the home. The text also shares that they can use a third of their finances to support that child after their passing. It also makes clear that when parents adopt, they need to realize they must be prepared to act as if the child was their own and love them accordingly.

    7. What does the text say about the importance of making a will and how it relates to children both biological and adopted?

    The text specifies that while you cannot make a will that favors one biological child over others, there is the possibility of giving up to 1/3 of your money to adopted children. This is permissible in Islamic law. While there is some discussion about how a child will inherit from their parents, it is also made clear that the parents must give to the adopted child if they have that financial capacity. If a will isn’t made, there is discussion as to how that adopted child will be provided for after their parents passing. This is why the text encourages proper documentation of all assets.

    8. What are some of the broader societal issues related to stress, tension and lack of communication highlighted in the text?

    The text links the lack of communication, societal tensions and family issues, to health problems, emphasizing that unresolved conflicts and concerns cause bitterness and distress that manifests as diseases such as high blood pressure. The text calls out that “worry is a disease” and indicates that society would benefit by having difficult discussions and finding solutions to the tensions being discussed. This points to a need for open communication and conflict resolution, especially within the family unit. Ultimately, the text seems to be advocating for more open discussion of difficult topics in order to reach a solution.

    Marital Tensions, Women’s Rights, and Adoption in South Asia

    Okay, here is a timeline of events and a cast of characters based on the provided text. Please note that this is based on a single, rather rambling source, and the events are not presented in a clear chronological order within it. Therefore, the timeline is a reconstruction based on the sequence of discussion within the text.

    Timeline of Main Events and Issues Discussed

    1. Initial Discussion on Marital Tension and Childlessness: The discussion opens with a general concern about tension in marriages, specifically referencing a couple who did not understand each other from the start, exacerbated by their inability to have children. This includes mention of a woman, Ghalib, who had a child by someone outside of her marriage.
    2. Critique of Male Dominance and Justification: A key theme arises, critiquing male dominance and the idea that men have a right to command women, viewing women’s roles as serving them (cooking, cleaning, etc). The speaker notes this is a pervasive idea despite efforts to counter it.
    3. Incidents of Violence Against Women: The text describes several specific incidents:
    • A man who abused and then killed his sister after she was seen talking to a classmate. This is framed within a discussion of “honor killings.”
    • A general mention of countless women being raped due to a “system of jagirdars” (landlords or feudal system)
    1. Discussions on Local Councils and Support for Women: The role of local councils (Masalia) is brought up, suggesting some effort to support women and resolve issues outside of court. These have been happening since 1981. The speaker expresses being happy to be included in those council chair roles.
    2. Polygamy and Wives’ Rights: The issue of men taking multiple wives is discussed, noting that permission should be sought from existing wives, there should be some room for recourse if permission is not granted (for example if a wife will not allow the investigation of a property), and suggesting men should not be allowed to take multiple wives due to a power differential
    3. Adoption and Childlessness: A significant portion of the discussion revolves around adoption, particularly for childless couples. Key points include:
    • The lack of legal recognition of adoption in their society.
    • The complexities of lineage and inheritance related to adopted children.
    • The emotional aspects of adoption, noting the importance of treating an adopted child like one’s own.
    • The need to secure an adopted child’s rights, ideally through gifting (Hiba) in life, not inheritance, or a will limited to one-third of assets.
    1. Inheritance and Wills: Discussion on inheritance laws and whether a parent can give a will to some children but not others
    2. Dangers of Adoption within the Family A suggestion that if you must adopt, do not do so within the family
    3. General societal woes: There are general comments on the dangers of societal stress and how concern, worry, and stress causes many diseases

    Cast of Characters

    • Nachana Javed Iqbal Sahib: A retired Justice. He appears to be a respected figure.
    • Mumtaz Sahib: Mentioned alongside Justice Iqbal, likely a person of some status.
    • Afzal Rehan Sahib: A legal guide and author of the book Islamic Tehzeeb Ka Mubarak Magri Tehzeeb. He appears to be an expert on Islamic and Western societies and their comparison.
    • Ghalib: A woman who had a child outside of her marriage, sparking discussion about infidelity and family tensions.
    • “Bhature President”: (Unnamed) A woman who is an ex-president of “courage” for 12 years and is addressed in the discussion. Her insight is requested based on her experience. This name has a disrespectful tone towards this woman.
    • Sweety: A person whose specific situation leads to discussion about women’s rights. The nature of “Sweety’s condition” is not fully detailed.
    • Adhin: Sweety’s family doctor.
    • The Man Who Killed His Sister: An unnamed man who committed an honor killing. His actions are used as an example of violence against women.
    • The Sister Who Was Killed: An unnamed woman, killed by her brother after being seen speaking to a male classmate.
    • The “Lip-Lock Girl”: An unnamed girl whose existence is seen as the source of contention between a couple. This is a derogatory term used in the text and may not be the girl’s actual name.
    • Rasulallah: The prophet, mentioned as having a son who was not his own.
    • Various unnamed council members Mentioned throughout the text

    Key Themes

    • Women’s Rights and Status: The text is heavily focused on the injustices faced by women within the society. This encompasses physical violence, emotional abuse, and the denial of agency.
    • Male Dominance: The traditional power dynamic between men and women and its effects is a key concern.
    • Marriage, Childlessness, and Adoption: These interlinked issues are a major focus, particularly the legal, emotional, and social implications of adoption in a society where it isn’t recognized legally.
    • Tradition vs. Progress: The text grapples with a tension between tradition and what is considered progress. This is particularly evident in discussions around legal reform, women’s rights, and adoption.
    • Social Woes: There are discussions on how stress, worry, and bitterness contribute to societal problems and diseases

    Let me know if you have any other questions or requests!

    Women’s Justice in Society

    The sources discuss issues related to women’s justice in society, particularly within the context of family, marriage, and societal norms. Here’s a breakdown of the key points:

    • Lack of Justice for Women: One source states that there is a lack of justice for women in society [1]. It is argued that men are conditioned from birth to believe they have the right to command and that women are meant to serve them [1]. This includes expectations that women should perform domestic tasks like cooking and cleaning, and that men have the right to control or “spy” on women [1].
    • Male Dominance and Control: The sources describe a patriarchal system where men believe they have a right to command and women are expected to serve [1]. One source claims that men often think they are superior and have a right to control women [2]. This can lead to situations where men abuse their power, and even resort to violence against women [1, 3].
    • Violence Against Women: The sources describe instances of violence against women, including “honor killings” [1]. One example is given of a man killing his sister because she was talking to a classmate [3]. It’s also noted that in 90% of court cases, men are the perpetrators of violence against women [1]. The “jagirdars” system is mentioned as a factor contributing to the rape of countless women [1].
    • Societal Norms and Expectations: Societal norms and expectations often contribute to the injustices faced by women. For example, there’s a tendency to blame women for problems in relationships [1]. Even in cases where a woman is mistreated, she may be questioned or blamed [1]. A woman who speaks out may be accused of “saying all this to the night” [1].
    • Marriage and Family Dynamics: The sources reveal that tension can arise in marriages, particularly when couples are childless [4]. The issue of a woman having a child with someone other than her husband is also discussed [4]. Additionally, the sources discuss the practice of polygamy, and the need for a man to seek permission from his existing wife before marrying another [5]. In some cases, women may be restricted from even allowing investigation of a husband’s property [5].
    • Adoption and its complexities: Adoption practices are discussed, revealing that adoption is not legally recognized [6]. There are considerations of who can inherit what, and how to handle a child that isn’t biologically one’s own [6, 7]. There’s also mention that if an adopted child is from relatives, there may be issues in the future because the biological parents may want their child back [8].
    • Role of Religious and Cultural Norms: The sources mention religious and cultural aspects that affect women’s rights [1]. There’s a discussion about whether Shariat accepts “dotting” or not [2]. One source mentions that religious and societal rust is very deep, and these issues won’t go away easily [1].

    These points highlight a complex web of societal, cultural, and religious factors that contribute to injustices against women.

    Islamic Adoption: Law, Inheritance, and Social Dynamics

    The sources discuss Islamic adoption practices, highlighting legal and social considerations. Here’s a breakdown:

    • Lack of Legal Recognition: Adoption is not legally recognized [1]. This means that while a child may be taken in and raised by a family, they do not have the same legal rights as biological children, particularly regarding inheritance [1, 2].
    • Inheritance Rights:
    • Adopted Children: An adopted child cannot inherit from their adoptive parents in the same way as a biological child [1].
    • Wills and Bequests: While a will cannot be made in favor of one’s own children [1], up to one-third of one’s property can be bequeathed to an adopted child [2]. The remaining amount would go to the family’s trust, or to charity if there is no trust, as long as the person has made time for the adopted child [2].
    • Hiba: A gift (Hiba) can be given to an adopted child during the adoptive parents’ lifetime [1]. However, it’s suggested that the adoptive parents should retain some of their own property [1].
    • Social and Emotional Considerations:Love and Care: Even if an adopted child does not have the same legal rights, the sources emphasize that they should always be loved [1]. The sources suggest that when a child is adopted, the adoptive parents should consider them as their own child [2].
    • Parental Feelings: It is said that when a child is adopted, the adoptive parents can develop strong feelings of companionship, and consider the child as their own [2]. However, there can be pain if people make comments that highlight that the child is not biological [3].
    • Potential Issues with Relatives: It is advised not to adopt a child from close relatives, as biological parents may want the child back in the future [4]. This could result in difficulties for the adoptive parents [4].
    • Establishing Lineage:The sources note that a child should go to their own parents if they have them [5].
    • If the child doesn’t have parents, adoptive parents may give their “virus” to the child. However, since the child doesn’t have the adopter’s name, it can be difficult to establish a lineage [5].
    • Alternative Approaches:The sources mention that adoption is one way of addressing the desire to raise a child, particularly when there are no biological children [4, 6].
    • There are instances of people adopting children when they cannot have children of their own [6].
    • Medical science is cited as having advanced to help women have children, but if a woman still cannot have children, it is understood that adoption may occur [6].

    In summary, while adoption exists in Islamic society, it differs significantly from legal adoption in many western countries, particularly regarding inheritance rights and legal recognition. The focus is on love, care, and the social and emotional aspects of raising a child, with an emphasis on the challenges and complications that can arise in adoption situations [1, 2].

    Islamic Adoption: Law, Inheritance, and Social Dynamics

    The sources discuss child adoption within an Islamic context, highlighting several key aspects related to legal status, inheritance, and social considerations [1-9].

    • Legal Recognition: Adoption is not legally recognized in the society described by the sources [6]. This means that while a family may take in and raise a child, the child does not have the same legal rights as a biological child, particularly when it comes to inheritance [6, 7].
    • Inheritance Rights:
    • Adopted children cannot inherit from their adoptive parents in the same way as biological children [6].
    • However, up to one-third of one’s property can be bequeathed to an adopted child through a will [7]. The rest of the money would go to the family’s trust or to charity [7].
    • A gift (Hiba) can be given to an adopted child during the adoptive parents’ lifetime [6]. It is also suggested that adoptive parents should retain some of their own property [6].
    • A will cannot be made in favor of one’s own children, so as not to create an injustice to other children [6].
    • Social and Emotional Considerations:
    • Adopted children should always be loved and cared for by their adoptive parents [6].
    • Adoptive parents often develop strong feelings for adopted children, viewing them as their own [7].
    • However, comments from others that highlight that the child is not biological can be hurtful [8].
    • It is advised not to adopt children from close relatives, as their biological parents may want them back [9].
    • There is a desire to raise a child among many couples, and adoption is seen as a way to do this when there are no biological children [4, 9].
    • Establishing Lineage:
    • If the child has parents, the child should go to them [5].
    • If the child does not have parents, adoptive parents may give their “virus” to the child [5]. However, because the child does not have the adopter’s name, this can make it difficult to establish lineage [5].
    • Alternatives:
    • Medical science has advanced to help women have children, but adoption is an option if a woman cannot conceive [4].
    • There are instances of people adopting children when they cannot have children of their own [4, 9].
    • The sources mention that if a couple adopts a child, they should consider them as their own child [7].
    • Other Considerations:
    • If someone is going to adopt, they should think carefully before doing so and if they do, to do so with proof [6].
    • If an orphan is adopted, there should be careful consideration of whether to do so [6].
    • There are concerns about the future of the child if the adoptive parents do not have their own children [6, 8].
    • It’s important to understand that a child adopted will not have the same attachment to the adoptive family as a biological child [6].

    In summary, the sources outline a system of adoption that exists in the Islamic society described. The focus is on the emotional and social bonds formed, rather than the legal aspects, as the legal system does not recognize adoption, particularly in terms of inheritance. While there are practices to provide for the child, the adopted child does not have the same rights as a biological child.

    Family Disputes and Societal Norms

    Family disputes are a recurring theme in the sources, arising from various issues including marital tension, childlessness, adoption, and differing views on gender roles and rights. Here’s a breakdown of the different types of family disputes discussed in the sources:

    • Marital Tension and Childlessness: The sources indicate that tension can arise within a marriage, particularly when a couple is unable to have children [1]. This lack of children can exacerbate existing issues between spouses. Additionally, disputes may arise when a woman has a child with someone other than her husband [1].
    • Polygamy and Spousal Conflict: The practice of a man taking multiple wives is discussed, and the sources indicate that this can lead to conflict and tension [2]. A man is supposed to seek permission from his current wife before marrying another [2]. Disputes can arise if a wife does not want her husband to take another wife, or if the man does so without permission [2].
    • Gender Roles and Male Dominance: The sources reveal that disputes often stem from differing views on gender roles and rights [3, 4]. Men may believe they have the right to command and control women, while women are expected to be subservient [3]. This can lead to conflict when women do not conform to these expectations [3]. There can be disputes about domestic duties, such as who should cook or clean, and whether men have the right to monitor or “spy” on women [3].
    • Violence and “Honor Killings”: The sources describe how disputes can escalate to violence, including “honor killings” [3, 5]. One example is given of a man killing his sister because she was talking to a male classmate [5]. The sources reveal that in the majority of court cases, men are the perpetrators of violence against women [3].
    • Adoption and Inheritance Issues: Disputes can arise in the context of adoption, particularly when it comes to inheritance rights [6, 7]. Because adoption is not legally recognized, adopted children do not have the same inheritance rights as biological children [6]. This can lead to disputes among family members about who is entitled to what [6]. There can be disputes about who should care for and raise a child, especially if the biological parents of an adopted child want their child back [8]. Also, the sources say that there can be issues when people make comments about an adopted child not being biologically related to the family [9].
    • Disputes over Lineage: If a couple adopts a child, but does not have any biological children, there can be disputes over who the adopted child’s family is [4]. The sources note that a child should go to their own parents, if they have them [4].
    • Societal and Cultural Pressures: The sources note that family disputes are often exacerbated by broader societal and cultural norms [3, 9]. There is a tendency to blame women for problems in relationships, or for not conforming to traditional expectations [3].
    • Role of Extended Family: The sources mention that extended family can also play a role in disputes, especially when they try to interfere in the lives of married couples [6, 9]. For example, the mother of a spouse may become involved in a dispute [4].
    • Divorce: The sources also mention that some family disputes can lead to divorce [8]. There are concerns about the increase in the rate of divorce [8]. It is mentioned that many illnesses can be caused by stress related to family disputes, and those issues can lead to divorce [8].

    In summary, the sources present family disputes as a complex issue stemming from marital problems, gender inequality, violence, and differing perspectives on adoption and inheritance, exacerbated by societal norms and cultural expectations.

    Family Law in an Islamic Society

    The sources discuss various legal issues, primarily within the context of family and personal law, particularly concerning marriage, divorce, adoption, and inheritance. Here’s a breakdown of the legal issues discussed:

    • Adoption and Legal Recognition:
    • Adoption is not legally recognized [1]. This means that while a child can be taken in and raised by a family, the child doesn’t have the same legal rights as a biological child, particularly when it comes to inheritance [1].
    • The lack of legal recognition for adoption creates challenges regarding the child’s rights and status within the family and society [1].
    • Inheritance Laws:
    • Adopted children cannot inherit from their adoptive parents in the same way as biological children [1].
    • A will cannot be made in favor of one’s own children [1]. This is to ensure that all children are treated fairly [1].
    • However, up to one-third of one’s property can be bequeathed to an adopted child through a will [2]. The rest of the money would go to the family’s trust or to charity [2].
    • A gift (Hiba) can be given to an adopted child during the adoptive parents’ lifetime [1]. It is also suggested that adoptive parents should retain some of their own property [1].
    • If a person does not make a will, the adopted child will not get anything [2].
    • Marriage and Polygamy:
    • The sources suggest that a man is supposed to seek permission from his current wife before marrying another [3].
    • There is some scope that a man can marry another woman if his current wife does not give too much resistance. A man may make an application to the chairman if his wife does not allow him to marry another woman [3].
    • The sources indicate that taking multiple wives can lead to conflict and tension within the family [3].
    • Divorce:
    • The sources mention the increasing rate of divorce and the societal problems that can lead to divorce [4].
    • There are concerns that stress related to family disputes can cause illnesses and contribute to divorce [4].
    • Gender Roles and Rights:
    • The sources reveal a patriarchal societal structure where men are often seen as having the right to command and control women [5, 6].
    • There are disputes over domestic duties [5, 6].
    • The sources reveal that in the majority of court cases, men are the perpetrators of violence against women [5].
    • The sources discuss issues of women’s rights and justice within the society, and there are concerns that the legal system is not always fair to women [5].
    • “Honor Killings”:
    • The sources discuss the issue of “honor killings” and other forms of violence against women [5, 7].
    • One example of a man killing his sister because she was talking to a male classmate is mentioned, which highlights the extreme consequences of these cultural norms [5, 7].
    • Family Courts and Councils:
    • The sources mention the existence of councils and committees, which suggests an alternative means of resolving disputes outside of formal court systems [7].
    • These councils can provide support to women and families within their own locality, offering an alternative to going through the court system [7].
    • Child Custody:
    • The sources note that if a child has their own parents, the child should go to them [6].
    • In adoption cases, there can be disputes over who should care for and raise a child, especially if the biological parents want their child back [4].
    • If a child is adopted by a couple, and the couple has no children of their own, there can be disputes about who the child’s family is [6].
    • Property Rights:
    • The sources mention that if a man wants to marry again, his wife may want to ensure her property rights are protected [3].
    • There is the implication that men are often landlords with control over property [3].

    In summary, the sources reveal a complex legal landscape that reflects the societal and cultural norms of the described Islamic society. While there are formal legal structures, the discussions suggest that customary practices, cultural traditions, and religious interpretations heavily influence how legal issues are handled, particularly within family law.

    By Amjad Izhar
    Contact: amjad.izhar@gmail.com
    https://amjadizhar.blog

  • Trump And Zelensky Oval Office Meeting Ends In Utter Disaster In Front Of The Cameras Trump, Zelensky, and the Ukraine Peace Deal

    Trump And Zelensky Oval Office Meeting Ends In Utter Disaster In Front Of The Cameras Trump, Zelensky, and the Ukraine Peace Deal

    The provided text presents a discussion between former President Trump and President Zelensky of Ukraine, focusing on a potential peace deal between Ukraine and Russia. Trump emphasizes his ability to negotiate a favorable agreement, leveraging Ukraine’s rare earth minerals to benefit the United States while aiming to end the conflict. Zelensky stresses the need for strong security guarantees and air defense systems for Ukraine, expressing concerns about Russia’s aggression and untrustworthiness. The conversation reveals tensions, with Trump pressing Zelensky for gratitude and indicating that continued US support depends on a deal. Trump highlights his intention to act as a mediator, striving for a resolution despite the deep-seated animosity between the two countries. Ultimately, the transcript reflects the complex dynamics and high stakes involved in brokering peace in the region, highlighting the unique perspectives and priorities of the leaders involved.

    Understanding the “Trump, Zelensky, and the Ukraine Peace Deal” Transcript: A Study Guide

    I. Study Objectives

    • Understand the positions of President Trump and President Zelensky regarding the war in Ukraine.
    • Analyze the proposed “deal” and its key components, including rare earth minerals.
    • Identify the potential security guarantees discussed and their feasibility.
    • Evaluate the historical context and potential future implications of the negotiations.
    • Explore the tension and disagreements present during the discussion.

    II. Key Themes and Concepts

    • Negotiation & Compromise: The entire transcript revolves around the idea of a negotiated peace deal. Understand the compromises each side may need to make.
    • Rare Earth Minerals: This is a central component of the proposed deal for the United States. Understand its significance for US industries (AI, military, etc.) and its potential impact on the US-Ukraine relationship.
    • Security Guarantees: Ukraine seeks assurances of its security, particularly against future Russian aggression. Analyze the different forms these guarantees could take and the roles of the US and Europe.
    • Ceasefire vs. Lasting Peace: Pay attention to the distinction between a temporary cessation of hostilities and a long-term resolution of the conflict. Zelensky’s concerns about broken ceasefires are crucial.
    • Trump’s Approach to Diplomacy: Analyze Trump’s self-portrayal as a dealmaker, his confidence in his ability to negotiate with Putin, and his willingness to take a different approach from his predecessors.
    • Zelensky’s Perspective: Understand Zelensky’s unwavering focus on territorial integrity, the return of Ukrainian children, and the need for strong security commitments. Note his frustration with past agreements and Russia’s unreliability.
    • Aid and Burden Sharing: Understand the discussion surrounding financial and military aid to Ukraine from the US and Europe and Trump’s insistence on fairness and burden sharing.
    • Historical Analogies and Legacy: Note the references to historical figures and the discussion of Trump’s desired legacy as a peacemaker.

    III. Quiz (Short Answer)

    Answer each question in 2-3 sentences.

    1. What is the primary economic benefit the United States seeks from the proposed deal with Ukraine, according to President Trump?
    2. What key condition does President Zelensky emphasize is necessary to agree to a ceasefire with Russia?
    3. What is President Zelensky’s perspective on Russian President Putin?
    4. Why is Ukraine’s geographical location described as providing ‘little protection against bullets’?
    5. What historical figures does Trump compare himself to, and why does he make this comparison with a caveat?
    6. What security commitments have been made or are expected to be made by France and the UK in support of Ukraine?
    7. According to President Trump, how will the US be “protected” in this agreement?
    8. What is the primary concern raised regarding Prime Minister Storr of the UK, and how does the US plan to address it?
    9. What does President Zelensky share with President Trump concerning Russian prisons and the treatment of prisoners of war?
    10. According to President Trump, what did the Biden administration do wrong regarding the Russia/Ukraine war?

    Quiz Answer Key

    1. The United States seeks access to rare earth minerals, which are essential for various industries, including AI, weaponry, and military applications. Trump emphasizes that the US currently lacks these resources domestically and this deal would satisfy these needs.
    2. Zelensky emphasizes that any ceasefire must include strong security guarantees to prevent Russia from violating the agreement as it has done in the past. He highlights the unreliability of Putin’s word and the necessity of concrete assurances.
    3. Zelensky views Putin as a “killer and terrorist” who is untrustworthy and unwilling to stop the war. He expresses the need for a strong stance against Putin to protect Ukrainian values, freedom, and territorial integrity.
    4. Ukraine’s geography is characterized as consisting of dead-level farmland with very little protection against bullets, thus making it especially vulnerable in the conflict.
    5. Trump jokingly compares himself to George Washington and Abraham Lincoln but then dismisses the comparison. He says he doesn’t compare himself to anyone and he is there to do a job.
    6. France and the UK are expected to provide security commitments to Ukraine after a deal is reached, particularly regarding security and a possible military presence in Ukraine. Trump suggests that Europe, particularly the UK and France, are likely to station soldiers in Ukraine.
    7. The US will be “protected” via a large investment in Ukraine that will result in raw earth materials being exported to the United States. This agreement is considered a “big investment” in Ukraine that will protect the American taxpayer.
    8. The primary concern is that Prime Minister Storr’s government engages in censorship and pressures American companies to censor Americans, which contradicts the value of free speech. The US plans to address it via vigorous defense of free speech for American citizens and companies, and a belief that a common ground can be found on the matter.
    9. President Zelensky shares images of captured Ukrainian soldiers who have been beaten and malnourished. Zelensky also shares that Russian authorities have stolen 20,000 Ukrainian children and changed their names and relatives.
    10. According to President Trump, the Biden administration didn’t speak to Russia and allowed the war to continue. Trump states he would have had a deal negotiated and this war never would have happened.

    IV. Essay Questions

    Consider these questions to deepen your understanding of the source material.

    1. Analyze the potential benefits and risks of Trump’s proposed “deal” with Ukraine, considering both the economic interests of the US and the security concerns of Ukraine.
    2. Evaluate the feasibility of achieving a lasting peace in Ukraine based on the perspectives and positions of Trump, Zelensky, and Putin, as reflected in the transcript.
    3. Compare and contrast the diplomatic approaches of Trump and Biden towards Russia and Ukraine, and discuss the potential consequences of each approach.
    4. Assess the roles of the United States and Europe in providing security guarantees to Ukraine, considering the historical context and the potential implications for international relations.
    5. Discuss the ethical considerations surrounding the exploitation of rare earth minerals in Ukraine, balancing the economic benefits for the US with the potential environmental and social impacts on Ukraine.

    V. Glossary of Key Terms

    • Rare Earth Minerals: A set of seventeen metallic elements that are essential for many modern technologies, including electronics, renewable energy, and defense systems.
    • Security Guarantees: Assurances provided to a nation to protect it from potential threats or aggression, often involving military or political commitments from other countries or organizations.
    • Ceasefire: A temporary cessation of hostilities or fighting in a conflict, often as a prelude to further negotiations or a more permanent peace agreement.
    • Trilateral Summit: A meeting or conference involving three parties, in this case, the potential meeting of the United States, Russia, and Ukraine.
    • LNG (Liquefied Natural Gas): Natural gas that has been cooled to a liquid state for ease of storage or transportation.
    • Normandy Format: A diplomatic group consisting of representatives from France, Germany, Ukraine, and Russia, established to resolve the conflict in Eastern Ukraine.
    • Raw Earth: A seemingly intentional mispronunciation of ‘rare earth’ by President Trump. It seemingly refers to the same grouping of mineral resources.
    • Javelins: Portable anti-tank missile used by the Ukrainian army and supplied by the U.S.
    • The Russia Hoax: President Trump’s name for the investigation into Russian interference in the 2016 United States elections.
    • Lutnick: Reference to Howard Lutnick who served under President Trump in a variety of advisory positions.

    Trump, Zelensky, and Ukraine: A Deal for Peace?

    Okay, here’s a briefing document summarizing the main themes and important ideas from the provided source, including direct quotes where relevant.

    Briefing Document: Trump, Zelensky, and the Ukraine Peace Deal

    Executive Summary:

    This document details a conversation between former President Donald Trump and Ukrainian President Volodymyr Zelensky, ostensibly surrounding a new “deal” aimed at ending the war in Ukraine. The conversation reveals key themes around the exchange of rare earth minerals for US support, Trump’s confidence in his ability to negotiate with Putin, and Zelensky’s continued need for security guarantees and military aid. The meeting is marked by tensions, particularly regarding Zelensky’s perceived lack of gratitude for US aid and Trump’s insistence on compromise. It highlights a transactional approach to foreign policy, driven by Trump’s belief in his deal-making prowess, and raises questions about the long-term security and stability of Ukraine.

    Key Themes and Ideas:

    1. The “Deal” and Rare Earth Minerals:
    • A central element of the agreement involves Ukraine providing the US with access to rare earth minerals. Trump emphasizes the importance of these resources for US technological and military needs: “We have something that is a very fair deal and we look forward to getting in and digging digging digging and working and getting some of the rare earth but it means we’re going to be inside and it’s a it’s a big commitment from the United States.”
    • Trump sees this as a mutually beneficial arrangement: “This is an incredible agreement for UK Ukraine because we have a big investment in their country now and and what what they have very few people have and we’re able to uh really go forward with very very high-tech things and many other things including Weaponry Weaponry that we’re going to use in many locations but that we need for our country.”
    • He suggests this arrangement will fund US contributions: “we’re going to be putting some money in a fund uh that we’re going to get from the raar earth that we’re going to be taking and uh sharing in terms of Revenue so it’s going to be a lot of money will be made from the sale and from the use of raw Earth.”
    • Zelensky expresses hope the “document first document will be first step to real security guarantees for Ukraine our people our children I really count on it and of course we count that America will not stop support really for us it’s very important to support and to continue it.”
    1. Trump’s Confidence in Negotiating with Putin:
    • Trump repeatedly expresses his belief that he can secure a deal with Putin, based on his past dealings with the Russian leader. “I’ve spoken with President Putin and uh I think I mean I feel very strong I’ve known them for a long time and I feel very strongly that uh they’re very serious about it and we’ll make a deal.”
    • He attributes the war to the Biden administration’s lack of engagement with Russia: “until we came along the Biden Administration didn’t speak to Russia whatsoever they didn’t speak to anybody they just allowed this to continue.” He even declares “if I were president of this war would have never happened we would have had a deal negotiated for you without having to go through what you’ve gone through.”
    • Trump portrays himself as a peacemaker: “I hope I’m going to be uh remembered as a peacemaker uh this is this would be a great thing if we could do this I’m doing this to save lives more than anything else second is to save a lot of money but I considered that to be far less important.”
    1. Zelensky’s Concerns and Priorities:
    • Zelensky focuses on the need for concrete security guarantees, a long-term shield, and military aid, particularly air defense systems. “of course I want to discuss with you what United States will be ready to do and uh I really count on your strong position to stop Putin and uh and you said that enough with the War I think that is very important B to say these words to Putin at the very beginning at the very beginning of War because he is a killer and terrorist.”
    • He highlights the importance of allies in Europe as well as the United States being on Ukraine’s side, and the importance of American backstop of other countries promises to provide aid: “about security guarantees when the Europeans are ready for cones they need USA back stop if there will not be United States we will not never have any conion strong contigent from the Europeans because they don’t want to divide Airlines connection between the United States and the main and strongest Sal and Europeans this is crucial this is important that what we want to speak about very much this is very important and air defense so air defense really we have big deficit with all these systems and we need to provide this we need it very much otherwise Putin will never stop and we’ll go further and further.”
    • He emphasizes that he is against a ceasefire, and is looking for strong security guarantees to ensure the end of the war. “that’s why we will never accept just CE fire it will not work without security guarantees security guarantees maybe president is right about this document and other but this document is not enough strong”
    • Zelensky also stresses Russia’s atrocities, particularly the abduction of Ukrainian children and the mistreatment of prisoners of war, trying to convey the stakes involved. “this crazy Russian that they stolen 20,000 of children Ukrainian children they changed their names they changed their you know their families relatives and uh now they in Russia we want to bring them back and really it’s a big big dream task and goal for me and and our Warriors we by the way Mr we brought we exchanged we yes released more than 4,000 Warriors from Russian prison but there are thousands more in the prison.”
    1. Compromise and Potential Concessions:
    • Trump insists that compromise will be necessary to reach a deal. “I think you’re going to have to always make compromises you can’t do any deals without compromises so certainly he’s going to have to make some compromises but hopefully they won’t be as big as some people think you’re going to have to make that’s all it’s all we can do.”
    • When asked about Russia controlling areas with minerals Zelensky was hesitant that Putin would give the land back. “Some of those minerals are in the east of Ukraine not far from the front lines and in areas that Russia has occupied will you direct President Putin to to withdraw his forces from those areas if you’re there’s us interest well we’ll take a look at at the time we have a lot of area uh it’s a very big area we’re talking about so we’ll take a look I’ll study that and I’ll see”
    1. Tensions and Accusations:
    • The conversation becomes heated, with Trump and his advisors criticizing Zelensky for a perceived lack of gratitude for US aid.
    • Trump attacks Zelensky when he is told that he is against a cease fire: “Listen low soldiers it would be a damn good thing then you then you tell us I don’t want to cease fire I don’t want to cease fire I want to go and I wanted this look if you could get a ceasefire right now I tell you you take it so the bullets stop Flying and you me stop course of course we want to stop the war but I saying you don’t want a ceas said to you I want a ceas guarante because you’ll get a ceasefire faster than it agree.” He goes on to say, “you’re in no position to dictate what we’re going to feel we’re going to feel very good and very strong you will feel influence you’re right now not in a very good position you’ve allowed yourself to be in a very bad position.”
    • Trump insinuates that Zelensky campaigned against him in the US.

    Analysis:

    The conversation highlights a starkly transactional approach to international relations. Trump’s focus is on securing a deal that benefits the US (access to rare earth minerals), while Zelensky is primarily concerned with his nation’s survival and long-term security. Trump’s confidence in his personal relationships and deal-making abilities is a recurring theme, but the document raises concerns about the potential for Ukraine to be pressured into unfavorable concessions to secure an end to the conflict.

    The emphasis on rare earth minerals could also lead to further environmental concerns, depending on the method and extent of extraction that is used in Ukraine.

    Finally, the tense exchange reveals the challenges of balancing the need for international support with maintaining national sovereignty and pursuing the best interests of one’s country. The dynamic between the two leaders suggests a potentially difficult path ahead for any negotiated settlement.

    Ukraine Peace Deal: Trump, Zelensky, and U.S. Interests

    FAQ on Trump, Zelensky, and the Ukraine Peace Deal

    1. What is the core of the agreement between the U.S. and Ukraine, and how does it address U.S. interests?

    The agreement primarily focuses on U.S. access to and development of rare earth mineral resources in Ukraine. The U.S. will invest in Ukraine’s rare earth reserves, utilizing them for various purposes, including AI, weaponry, and military applications. This arrangement addresses the U.S.’s shortage of these crucial minerals and ensures a domestic supply chain, reducing reliance on foreign sources.

    2. What is Trump’s vision for ending the war in Ukraine, and what role does compromise play in his strategy?

    Trump aims to broker a deal between Ukraine and Russia to stop the fighting. He believes that any deal requires compromise from both sides. His approach is to act as a mediator, bringing the two parties to the table to negotiate an agreement that halts the loss of life and diverts resources toward reconstruction.

    3. How does Zelensky view the importance of security guarantees for Ukraine, and what kind of support does he seek from the United States and Europe?

    Zelensky emphasizes the need for strong security guarantees beyond just a ceasefire. He points to Russia’s repeated violations of past ceasefire agreements. He wants a strong air defense and appreciates Europe’s assistance, but stresses the need for the U.S. to provide backstop support, especially regarding military aid and preventing further Russian aggression. He also seeks assistance in repatriating Ukrainian children taken to Russia.

    4. What are the major obstacles to reaching a lasting peace agreement, according to Zelensky?

    Zelensky identifies Putin’s core issue as a deep-seated hatred of Ukraine and Ukrainians, coupled with a denial of Ukrainian nationhood and the desire to destroy the country. He believes Putin will not stop without strong, definitive action.

    5. What are the financial aspects of the agreement, and who will bear the costs of rebuilding Ukraine?

    The financial aspects involve a fund generated from the revenue of rare earth mineral extraction in Ukraine, which will benefit both countries. Zelensky argues that Russia, as the aggressor, should bear the primary responsibility for rebuilding Ukraine, potentially through the use of seized Russian assets in Europe.

    6. What is the long-term security strategy being developed for Ukraine under this new deal, and how does it differ from the Biden administration’s approach?

    Trump claims his deal, secured through the rare earth agreement and potential ceasefire, will effectively prevent future conflict. He criticized the Biden administration for providing financial aid without adequate security measures. Conversely, he emphasizes this agreement as a major investment in Ukraine, ensuring U.S. protection and strategic leverage in the region.

    7. How does the issue of free speech factor into the United States’ relationship with European allies, particularly the UK?

    The U.S. officials expressed concern to the UK government regarding free speech issues and censorship, particularly how those policies affect American companies and citizens. They emphasized the importance of shared values, including free speech, and vowed to defend those rights for Americans, even when disagreeing with the content of their speech.

    8. What is Trump’s message to Poland and other Eastern European nations concerned about his relationship with Putin?

    Trump asserts that he must engage with both sides, including Putin, to reach a deal and end the war. He emphasizes that he is aligned with the United States’ interests and the good of the world, not necessarily with Putin himself. He acknowledges Poland’s commitment to NATO and its importance to regional security.

    Trump-Zelensky Discussion: Ukraine-Russia Peace Deal

    The transcript provided contains a discussion between then US President Trump, Ukraine President Zelensky, and members of the press regarding a potential peace deal between Ukraine and Russia.

    Key Points of the Discussion:

    • Negotiations and Potential Deal: Trump mentions ongoing discussions with Russia, including President Putin, to bring the conflict to a close. He believes a fair deal is possible and emphasizes the importance of stopping the loss of soldiers on both sides.
    • Compromises: Trump notes that compromises will be necessary to reach an agreement.
    • Role of the United States: Trump positions himself as a mediator or arbitrator. He also criticizes the Biden administration’s approach to Russia and asserts that the war would not have happened if he were president.
    • Zelensky’s Perspective: Zelensky expresses hope that the agreement will provide real security guarantees for Ukraine. He also emphasizes the need for continued American support and expresses concerns about Russian aggression.
    • Areas of DiscussionRare Earth Minerals: Part of the deal involves the United States accessing Ukraine’s reserves of rare earth minerals.
    • LNG Terminals: Zelensky mentions the importance of LNG terminals for Ukraine’s and Europe’s energy security.
    • Air Defense: Zelensky stresses the need for air defense systems and proposes a license exchange for drone production.
    • Exchange of prisoners: Zelensky shares the status of Ukrainian prisoners in Russia. He also shares images depicting the harsh conditions and treatment of Ukrainian prisoners in Russia.
    • Security Guarantees: While Zelensky seeks security guarantees, Trump focuses on getting the deal done first, considering security a secondary issue.
    • Ending the War: Both leaders express a desire to end the war, but Zelensky insists that a simple ceasefire is not enough without security guarantees, citing previous broken agreements with Putin.
    • Trump’s Legacy: Trump hopes to be remembered as a peacemaker.
    • Aid to Ukraine: Trump states the US will continue to provide arms to Ukraine. However, he hopes it won’t be necessary if the war can be ended quickly.
    • Commitment to Eastern Europe: Trump expresses commitment to Poland and the Baltic states.

    Points of Contention/Discussion:

    • Compromises: Trump suggests compromises are necessary, while Zelensky initially states there will be “no compromises with a killer about our territories”.
    • Past Ceasefires: Zelensky claims that Putin has broken every ceasefire.
    • Blame for the War: There is disagreement regarding who is to blame for the war and who is helping Ukraine.
    • Gratitude: Trump believes Zelensky is not showing enough gratitude for the help that the U.S. is providing.
    • Alignments: Trump says he is aligned with the United States and wants to get the deal done.

    Overall, the discussion highlights the complexities and differing perspectives involved in seeking a resolution to the conflict between Ukraine and Russia.

    Russian Aggression in Ukraine: Perspectives and Evidence

    The sources address Russian aggression primarily in the context of the war in Ukraine and discussions surrounding a potential peace deal.

    Details regarding Russian aggression, according to the sources:

    • Zelensky’s perspective is that Putin is a “killer and terrorist” who initiated the war and must be stopped. He states that Russia’s aim is to destroy Ukraine, its people, and its values because Putin “hates Ukrainians” and “doesn’t respect” their nation. He cites 25 broken ceasefires prior to his presidency.
    • Evidence of atrocities comes from Zelensky, who shares images of Ukrainian prisoners of war, describing their poor condition as a result of mistreatment. He also accuses Russia of stealing 20,000 Ukrainian children and changing their identities.
    • Continued attacks despite discussions of peace are mentioned. Zelensky notes that even with ongoing conversations about a resolution, Russia continues to use ballistic missiles against Ukrainian hospitals and schools.
    • Territorial Ambitions: Zelensky says that Putin wants to bring the Baltic states back into a Russian empire.
    • Compromises and Ceasefires: Zelensky is wary of ceasefires without security guarantees, given past experiences of Russia violating such agreements.
    • Historical Context: Zelensky references the 2014 occupation of parts of Ukraine, including Crimea, as evidence of ongoing Russian aggression.
    • Casualties: Trump states that 2,000 soldiers were dying each week.
    • Trump’s perspective is that if he were president, the war would have never started. He also notes that the Biden administration didn’t speak to Russia, which allowed the conflict to continue.
    • A journalist’s perspective refers to Russia’s destruction of a significant portion of Ukraine, which occurred during the Biden administration, despite tough rhetoric from the US.

    Ukraine-Russia Peace Deal: Conflicting Views on Security Guarantees

    The sources discuss security guarantees primarily in the context of a potential peace deal between Ukraine and Russia, with differing perspectives from the leaders involved.

    Details regarding security guarantees, according to the sources:

    • Zelensky’s view:Real Security: Zelensky expresses hope that any agreement reached will provide “real security guarantees” for Ukraine, its people, and its children.
    • Continued Support: He emphasizes the importance of continued support from the United States.
    • Air Shield: He expresses Ukraine’s need for an “air shield” to ensure the nation’s calm and security, even after the war. He notes the need for air defense.
    • Contingents: He notes the need for “strong contingents” from European countries, but states that this will not be possible “without the United States back stop”. He expresses that without the United States, Europe will not be ready to be as strong as Ukraine needs.
    • Past Failures: He claims Putin has broken 25 ceasefires prior to his presidency. He insists that a simple ceasefire is not enough without security guarantees because Putin has broken his own signatures repeatedly. He states that Putin broke ceasefires, killed people and did not exchange prisoners.
    • Trump’s view:Deal First, Security Later: Trump prioritizes reaching a deal to stop the fighting and loss of life, considering security a secondary issue. He states “I don’t want to talk about security yet because I want to get the deal done…security is so easy that’s about 2% of the problem”.
    • Role of Other Nations: Trump anticipates that European countries, such as France and the UK, will provide security.
    • Alternative Security: He suggests that the presence of American workers involved in extracting rare earth minerals could serve as a form of security.
    • Rare Earth Elements (REE): Trump states that the deal involves the U.S. accessing rare earth minerals in Ukraine. He believes that once the agreement is made, fighting will cease and that the agreement is 95% of the solution. He says that the U.S. will be “digging, digging, digging, taking the raw Earth”. He states that the U.S. needs the rare earth minerals for computers, AI, weapons and the military.
    • Compromises: Trump believes that compromises have to be made in order to make any deals.
    • Lack of Gratitude: Trump feels as though Zelensky should be more thankful for the military equipment and financial assistance from the U.S.. He says that Zelensky campaigned for the opposition in Pennsylvania.

    These differing perspectives highlight the complexities of negotiating security guarantees in the context of the Russia-Ukraine conflict.

    US-Ukraine Rare Earth Agreement

    The sources discuss raw earth in the context of a potential agreement between the United States and Ukraine.

    Key points regarding raw earth, according to the sources:

    • Fair Deal: Trump describes the agreement as a “very fair deal” that involves “getting in and digging digging digging and working and getting some of the rare earth”.
    • US Commitment: The deal signifies “a big commitment from the United States”.
    • Revenue and a Fund: Money from the raw earth will be put into a fund.
    • Strategic Importance:Trump states that Ukraine has “among the best in the world in terms of R[are] Earth”.
    • The raw earth contains “just about every component” needed for computers and other technologies.
    • Securing these resources “puts us [the U.S.] in great shape”.
    • The rare earth elements are needed “for all of the things we do including AI and including weapons and the military”.
    • U.S. Needs: Trump notes that the U.S. “doesn’t have much raw Earth” and what it does have is “protected by the environmentalists”.
    • Investment: The agreement signifies “a big investment” by the U.S. in Ukraine because of the rare earth elements.
    • Security: Trump implies the U.S. workers present to extract raw earth minerals could be a form of security.
    • Location: Trump said that some of the minerals are in the east of Ukraine and that the U.S. will take a look at the area.
    • Protection: Trump was asked who would protect the minerals and he said the European agreement and the U.S. agreement would protect them.

    Trump and Zelensky: Negotiating Peace in Ukraine

    The sources discuss ending the war between Russia and Ukraine from the perspectives of then US President Trump and Ukraine President Zelensky, along with some input from journalists.

    Key points in the discussion about ending the war, according to the sources:

    • Negotiations: Trump mentions ongoing discussions with Russia, including President Putin, aimed at bringing the conflict to a close. He expresses optimism that a fair deal is possible.
    • Compromises: Trump believes that compromises will be necessary to reach an agreement. He is acting as “an arbitrator” and “mediator”.
    • Role of the United States: Trump positions himself as a mediator. He criticizes the Biden administration’s approach to Russia.
    • Zelensky’s Perspective: Zelensky hopes that the agreement will provide real security guarantees for Ukraine. He emphasizes the need for continued American support. He also says that he wants Trump to “stop Putin”.
    • “Enough with the War”: Zelensky recounts Trump saying “enough with the War” to Putin at the beginning of the war. He thinks that this is “very important”.
    • Areas of Discussion:
    • Rare Earth Minerals: Part of the deal involves the United States accessing Ukraine’s reserves of rare earth minerals.
    • LNG Terminals: Zelensky mentions the importance of LNG terminals for Ukraine’s and Europe’s energy security.
    • Air Defense: Zelensky stresses the need for air defense systems.
    • Exchange of prisoners: Zelensky shares the status of Ukrainian prisoners in Russia. He also shares images depicting the harsh conditions and treatment of Ukrainian prisoners in Russia.
    • Security Guarantees: While Zelensky seeks security guarantees, Trump focuses on getting the deal done first, considering security a secondary issue.
    • Casualties: Trump states the need to stop the loss of soldiers on both sides. He notes that 2,000 soldiers were dying each week.
    • Trump’s Legacy: Trump hopes to be remembered as a peacemaker.
    • Aid to Ukraine: Trump states the US will continue to provide arms to Ukraine. However, he hopes it won’t be necessary if the war can be ended quickly.
    • “No Compromises”: Zelensky initially states there will be “no compromises with a killer about our territories”.
    • Past Ceasefires: Zelensky claims that Putin has broken every ceasefire.
    • Ending the War: Both leaders express a desire to end the war, but Zelensky insists that a simple ceasefire is not enough without security guarantees, citing previous broken agreements with Putin.
    • Visiting Ukraine: When asked about visiting Ukraine, Trump said that he wants to talk about making a deal and getting peace, and does not want to talk about Odessa.
    • Confidence in Putin: When asked what gave Trump assurance that Putin wanted peace, Trump said that making deals is what he does his whole life and that he knows Putin pretty well. He also mentioned that Putin had to suffer through the “Russia hoax”.
    • Aligned with U.S.: Trump says he is aligned with the United States and wants to get the deal done.
    • Thankfulness: Trump says that Zelensky has to be thankful because he does not have the cards.
    • Ceasefire: When asked what if Russia breaks a ceasefire, Trump said that Putin didn’t break a deal with him.
    • Future: Trump says that Zelensky is either going to make a deal or the U.S. is out.
    Trump And Zelensky Oval Office Meeting Ends In Utter Disaster In Front Of The Cameras
    ‘You Don’t See All The Things That Led Up To This’: Rubio Defends Trump After Clash With Zelensky
    What Kaitlan Collins saw during fiery Trump-Zelensky argument
    Zelenskyy asked whether he owes Trump an apology
    Zelenskyy in UK for crucial summit after extraordinary Trump talks

    The Original Text

    well thank you very much it’s an honor to have President zalinski of Ukraine and we’ve been working very hard very close and we’ve actually known each other for a long time we’ve been uh dealing with each other for a long time and very well we had little negotiation spat but that worked out great I think for for both countries I think for the world actually Beyond both countries and we have something that is a very fair deal and we look forward to getting in and digging digging digging and working and getting some of the rare earth but it means we’re going to be inside and it’s a it’s a big commitment from the United States and we appreciate working with you very much and uh we will continue to do that we have had some very good discussions with Russia I spoke with President Putin and we’re going to try and bring this to a close it’s something that you want and that he wants we have to negotiate a deal but we’ve started the confines of a deal and I think something can happen uh the big thing is the uh number of soldiers mostly at this point but soldiers being killed you’re losing thousands of soldiers on both sides we’re losing a lot of soldiers and we want to see it stop and we want to see the money get put to different kinds of use like rebuilding the rebuilding and we’re going to be working very hard but we’ve had a lot of very good conversations I will say on until we came along the Biden Administration didn’t speak to Russia whatsoever they didn’t speak to anybody they just allowed this to continue and uh I will say that uh I’ll say in front of you you’ve heard me say it a thousand times if I were president of this war would have never happened we would have had a deal negotiated for you without having to go through what you’ve gone through but you uh your soldiers have been unbelievably Brave we’ve given them great equipment but they somebody has to use the equipment they’ve been unbeliev Brave and we give him great credit this was supposed to be over very quickly and uh here we are three years later so I give tremendous credit to your generals and your soldiers and yourself in the sense that uh it’s been very hard fighting very tough fighting they great Fighters and uh you have to be very proud of them from that standpoint but now we want to get it over with it’s enough right we want to get it over with so uh it’s an honor to have you here thank you very much for coming we’re going to sign uh the agreement at the conference in the East room in a little while right after lunch and we’ll be having lunch together we’re also discussing some other things and we appreciate everybody being here it’s a somewhat of an exciting moment but the really exciting moment is when we get a when they stop the shooting or we end up with a deal and I think we’re fairly close to getting that and uh honor to have you and please like to say something yeah thank you so much Mr President thank you for invitation and um really I hope that this um document first document will be first step to real security guarantees for Ukraine our people our children I really count on it and of course we count that America will not stop support really for us it’s very important to support and to continue it I want to discuss it with detail further during our conversation and of course the infrastructure or security guarantees because for today I understand what Europe is ready to do and of course I want to discuss with you what United States will be ready to do and uh I really count on your strong position to stop Putin and uh and you said that enough with the War I think that is very important B to say these words to Putin at the very beginning at the very beginning of War because he is a killer and terrorist I hope that together we can stop him but for us it’s very important to you know to save our country our values our freedom the democracy and of course uh no compromises with a killer about our territories but it will be later and of course I what I wanted you know we spoke about it by phone with you about the Dron production we have very good TR production I think the best one in the world for today because of the war yes and and uh of course we need very much uh the air defense you have the best air defense in the world and really you helped us under attacks of Russians and I want to speak how we can exchange the licenses we’re open to share the licenses of all our drones with you of course with the United States and we need licenses for quick production of air defense even after the war we need our nation to be calm that we are secured so that’s why we need this air shield and of course about this uh I want to speak about the contigs I think that France and UK already spoke to you and we know that Europe is ready but without the United States they will not be ready to be as strong as we need and that the last point last not least uh about exchange about our people and children and you know that this crazy Russian that they stolen 20,000 of children Ukrainian children they changed their names they changed their you know their families relatives and uh now they in Russia we want to bring them back and really it’s a big big dream task and goal for me and and our Warriors we by the way Mr we brought we exchanged we yes released more than 4,000 Warriors from Russian prison but there are thousands more in the prison I wanted to share with you some some images how how just just can can I can I now pleas some minute one minute one minute I just you to understand what in what circumstances in what situation they are and what the attitude of Russia to our prisons that guys just you before before and after and you see before and after just you to understand now thousands of such guys ladies and men there and that so they don’t eat they beat them and they you know they do a lot of a lot of you know bad things so out out of even during the war There Are Rules everybody knows There are rules during the war these guys they don’t have any rules you see that 50 60 kilog left and and a lot of such things and I didn’t want to show you what what the changes with images of children because I will share just share with you I mean it’s looking tragic yep it’s tough stuff yeah I wanted very much to to give you and you you see this is Pastor by the way they stolen pastors because it’s not Russian Church they stolen pastors and move pastors to the prison we at the end of last year we we brought three pastors and we we could exchange them but this is Pastor you see yeah just St yeah so I inan this I wanted to show you and um this so thank you very much we want to get that ended right yeah yeah of course of course we will I think we will I think we will and uh we have to of course do you have any questions please Mr President Mr thank you Mr President um with the how much money is the US going to put into the fund that that is being created today and how does this provide long-term security for Ukraine well we don’t know exactly how much because we’re going to be putting some money in a fund uh that we’re going to get from the raar earth that we’re going to be taking and uh sharing in terms of Revenue so it’s going to be a lot of money will be made from the sale and from the use of raw Earth and as you know our country doesn’t have much raw Earth we have a lot of oil and gas but we don’t have a lot of the raw Earth and what we do have is protected by the environmentalists but that could be unprotected but still it’s not very much uh they have uh F among the best in the world in terms of R so we’re going to be using that taking it using it for all of the things we do including Ai and including weapons and the military and it’s uh really going to very much satisfy our needs so something that just worked out uh really well we have a lot of oil and we have a lot of gas we have a lot but we don’t have raw Earth so uh this uh this has just about every component of the raw Earth that we need for computers for all all of the things we do this puts us in great shape and longterm security do this provide I think they’re going to have great long I think once we make the agreement that’s going to be 95% of it it’s they’re not going to go back to fighting uh I’ve spoken with President Putin and uh I think I mean I feel very strong I’ve known them for a long time and I feel very strongly that uh they’re very serious about it and we’ll make a deal and when the deal is made I don’t think we talk about security everyone’s talking about the the other day all they talked about was security I said let me make the deal first I have to make the deal first I don’t worry about security right now I got have to we have to have a deal because right now last week 2,000 soldiers died on both sides 2,000 and they’re losing a, 2,000 3,000 a week so as we sit here and we talk people are getting shot and dying on the battlefield and you know they’re not American soldiers but they’re Russian soldiers and they’re Ukrainian soldiers and we want to be able to stop it and we want to be able also to spend money on other things we don’t want to this is a tremendous amount of money and what the Biden Administration did was terrible they were giving money but he had no security on the money Europe as you know gave much less money but they had security it was in the form of a loan they get their money back and we didn’t and now at least we’re protected because the American taxpayer has to be protected too but uh this is an incredible agreement for UK Ukraine because we have a big investment in their country now and and what what they have very few people have and we’re able to uh really go forward with very very high-tech things and many other things including Weaponry Weaponry that we’re going to use in many locations but that we need for our country Mr this allows this allows us to do this but Mr President will you will you continue military agent yes go ahead please I if I can just yes in the document there is one of the very important points if we speak about business and investment we never had LG terminals in Ukraine this document will open I mean the next documents but anyway the here we see in the framework we we see we see a really good will for this LG terminals for us is very important and I think for security of European continent we have the biggest storage gas storage we have the biggest in Europe yes yes and we can use it you use for LNG use it for L and we will do it and really we we can help Europe because Europe really helped president Trump said that they made uh less support but they have our friends and they our very supportive uh Partners they really gave a lot Mr BR really they did they gave a lot but they gave much less no much less no no don’t argue no okay okay but Mr President and president pleas uh Mr President Trump you have repeatedly called the deal with Ukraine has as a historical one and as a president of the United States you make historical decision in other issues which affect America and other world so uh what place in the world history history do you want to take and do you associate yourself yourself with any famous historical figures I’d say George Washington Abraham Lincoln I would say I’m far superior to George Washington and Abraham Lincoln now you know I’m only kidding right because when I say that the fake news is going to go wild they’re going to say he considers himself to be better than Washington but you never know you never know uh I don’t compare myself to anybody I just have I’m here to do a job we’ve had a great 35 days or whatever it might be a month a little more than a month uh We’ve accomplished tremendous amounts not only this this would be a very great achievement if we could get this the war stopped and get them back to normalization I think that’s going to happen we’ve had very good talks on both sides as you know but uh I think we’ve done a very good job just generally if you look at all of the things we’ve done in 30 days they’re saying there’s never been a opening for a president the first month uh there’s never been a first month like uh like we’ve had and this is one of the very important things this to me is one of the most important things because we have tremendous death taking place as we speak and I don’t want to have that you know think of the parents think of the whether they’re in Russia or Ukraine think of the parents of all these people being killed needlessly they came to all should have never started this if I were president this would have never started Mr president president president Trump will you continue sending military aid to Ukraine after you uh the US signs this agreement with Ukraine Yeah question to president zensky do you feel like the US is on your side that the president that President Trump is on your side at this uh at this moment well what do you think he wants to know do you think that sort of a stupid question I guess I guess we wouldn’t be here if I wasn’t I think that I think that the United States on our side from the very beginning of occupation and uh I think that President Trump on our side and and of course I not I’m sure that United States President will not stop support this is crucial for us it’s important for us yes and put president speaks about the people and the soldiers which are dying but they came to our territory they came to our land they began this war and they have to stop and uh I think all this is the question with really the most important question can president Trump I hope yes with some other allies to stop Putin withdraw these enemies our and withdraw these troops from our land and I think that you asked about the history about the I think that if president or when he will stop Putin if president Trump will bring peace to our country I think he will be on this wall I we’ve had very very good uh talks to Ukraine president Mr President zilinski just said that there’ be no compromises with uh um Vladimir Putin um I just wanted to ask both of you firstly um are there compromises that you think that president zalinski is going to have to make and president zalinsky is there anything that you might you think that you may be able to offer a bring to the table for example elections thank you I think you’re going to have to always make compromises you can’t do any deals without compromises so certainly he’s going to have to make some compromises but hopefully they won’t be as big as some people think you’re going to have to make that’s all it’s all we can do I’m here as a as an arbitrator as a mediator to a certain extent between two parties that have uh been very hostile to put it mildly they’ve been very hostile has been a vicious War this been a vicious War you know it’s a very level Battlefield and uh those bullets go out and as I’ve said many times we’re talking about it with Pete uh many times the only thing stopping those bullets is a human body and in the case we’re talking about generally young human bodies are stopping a lot of bullets it’s dead level that’s what why it’s great Farmland it’s great land it’s great Farmland but there’s very little protection against the bullet that are being and other things that are being shot so all I can do is see if I can get everybody at the table and get an agreement and I think we’re going to end up with an agreement otherwise I wouldn’t probably be even here today will president pu will president have to make compromises Mr President I got two questions for you you think ultimately your legacy will be The Peacemaker and not the president that led this country into another war and ended Foreign Wars and I’ve got a a question I hope it will I mean I hope I’m going to be uh remembered as a peacemaker uh this is this would be a great thing if we could do this I’m doing this to save lives more than anything else second is to save a lot of money but I considered that to be far less important so I hope I’m going to thank you Brian for that question it was a nice question uh I hope I’ll be known and recognized as a peacemaker this this would be a great thing to solve this is a very dangerous situation you know this could lead to a third world war War this is this was headed in the wrong direction if this election were lost if we didn’t win this election and by way we won it by a lot that was a mandate we won every swing state we won the popular vote by millions and millions of votes we won everything uh the districts you look at the areas of of red take a look at a map this was a big mandate and uh this was one of the things I said we’re going to get this thing settled if we didn’t win I think this would have this could have very well ended up in a third world war and that would not that would not have been a good situation what was your second question my second question for president go do you ever why don’t you wear a suit you’re why don’t you wear a suit you’re the highest level in this country’s office and you refuse to wear a suit just want to see if you do you own a suit yeah yeah have problems I a lot of Americans have problems with you not I don’t have S uh I will wear costume after this war will finish okay yes maybe well maybe something like yours yes maybe some something better I I don’t know we will see maybe something cheaper than yeah thank you president Trump trump you said yesterday thank thank you president Trump you said yesterday that you have are you going to send more arms to Ukraine in case there’s no peace yeah we’re going to have arms to Ukraine yeah sure hopefully I won’t have to send very much because hopefully we’re going to have it finished we’re looking forward to finishing this quickly uh we’re not looking forward to sending a lot of arms we’re looking forward to getting the war finished so we can uh do other things but uh we very much appreciate the agreement because we needed what they had and we’re treating you know our country is now treated fairly Biden didn’t do that Biden didn’t he didn’t know what the hell he was doing this should have never happened this should have never started but uh you know sure the answer is yes but hopefully we won’t have to send much because I’m looking forward to get it done getting it done quickly very quickly does that mean you’ll provide security guarantees Mr President uh I don’t want to talk about security yet because I want to get the deal done you know you fall into the same trap like everybody else a million times you said over and over I want to get the deal done security is so easy that’s about 2% of the problem uh I’m not worried about security I’m worried about getting the deal done uh the security is the easy part security is very nice everybody stop shooting and now will Europe put people there I know France is going to I know the UK is going to I know other countries are going to and they happen to be right next door we haven’t committed but we could conceivably you know we have Security in a different form we’ll have workers there uh digging digging digging taking the raw Earth so that we can create a lot of great product in this country uh so in that sense you have something but we haven’t determined that yet I will say uh in speaking to French and then speaking to and they were here as you know last week and just the other day uh they have committed to a lot of security I don’t think you’re going to need much security I think once this deal gets done it’s over Russia is not going to want to go back and nobody’s going to want to go back when this deal ends I really believe this deal is is going to be over uh question yeah please go ahead go ahead Mr President thank you uhing here St at the White House this past week both of whom praised your courage and conviction to lead the pathway towards peace yes part of that involved though re-engaging Russia in diplomatic relations something that previous leaders lacked the conviction to do so what gave you the moral courage and conviction to step forward and Lead that well I love this guy who are you with one American News sir well that’s that why I like him one American News does a great job that’s very I like the question I think it’s a very good question it is it’s a pathway to peace it’s a pathway to getting something solved and I feel that as the head of this country I have an obligation to do that plus you know we’re very much involved we got involved uh it’s too bad we got involved because there should have been no involvement because there should have been no war and there shouldn’t have been October 7th that would have never happened as you know Iran was broke they had no money to give to Hezbollah they had no money to give to Hamas they would Stone Cold broke and then under Biden they became rich as hell they went from no money to $300 billion in a period of four years and they gave a lot of that money away and you see what happened and that’s a real mess also that we hope to be able to solve but uh no I I appreciate your question very much it’s just I feel I have an obligation to try and uh do something to stop the death Mr President I can if I can answer yes if I can answer sorry please please and I do like you CL yeah really even though I have to I think he’s a great guy by the way I I don’t know if you two like each other but you know what I think why I like this guy I don’t know I think he’s just beauti so I have more I have more serious things than answer on such question I will answer on more serious question if I can yeah so please uh about security guarantees and about just sis fire we can’t just speak about sis fire and speak and speak it will not work just s fire will not never War because I’m like a president I have I have this experience and not only me Ukraine before before my presidency from the 2014 Putin broken 25 times 25 times he broken his own signature 25 times he broken C fire it he never broke to me he never broke no no you were the president you were the president dur never brought in 2016 you been the president M Mr surpr You’ been the president but he for he had of course not with you but he had during those period he had conversations with our side and we had normandi for format you know the France Germany Ukraine and Russia and he broken 25 times that’s why we will never accept just CE fire it will not work without security guarantees security guarantees maybe president is right about this document and other but this document is not enough strong Army is enough because his soldiers afraid Putin soldiers afraid of our soldiers when we’re strong enough if we are not strong enough if we are empty if our storage is empty we can’t defend our our land today you know he knows that we have me all the world knows that we have meeting yes why he’s using ballistic Putin today using ballistic on our Hospital schools and Etc ballistic so he knows that we are here and that President Trump is really have good will to stop to stop this war and I and you hear now the president so why he’s using so he doesn’t want to stop he doesn’t what but I hope that we will do it really we’ll do it security when we speak about security guarantees when the Europeans are ready for cones they need USA back stop if there will not be United States we will not never have any conion strong contigent from the Europeans because they don’t want to divide Airlines connection between the United States and the main and strongest Sal and Europeans this is crucial this is important that what we want to speak about very much this is very important and air defense so air defense really we have big deficit with all these systems and we need to provide this we need it very much otherwise Putin will never stop and we’ll go further and further he doesn’t want he he hate us you know it’s not about me he hate ukrainians he thinks that we are not a nation he thinks and he shared this swords I think maybe with your team also I don’t know but with all the Europeans in media officially and not he always said that we there is no such country such Nation such language and such life like Ukrainian no he really doesn’t respect all the ukrainians and he wants destroy us we we and you are right Mr President that’s 2% this document maybe other documents it’s a very good Star very good but it will not enough to stop this person should Russia pay to rebuild Ukraine Mr President under should Russia pay to Ukraine they have to pay this is the rule this is the rule of the war this is the rule of the war during all the centuries all the history this is the rule of the war who began those pay do you agree this is the rule Putin began this war he has to pay all money for inovation he has to pay of course some Russian assets what we have in Europe about 300 billions we can use them we can use for renovation and buy military support from the United States also we can do it but it’s not enough it’s not question because I wanted to know please wait one second I want I ask this question that you didn’t like because I want you to know if you want to position yourself in the middle between Russia and Ukraine or on the Ukraine side I’m in the middle I want to solve this thing I’m for I’m for both I want to get it solved and uh it’s wonderful to speak badly about somebody else but I want to get it solved if we can solve it great if we can’t solve it they’re going to have to fight it out and who knows what’s going to happen but I want to see it get solved one more question about US troops in Europe uh after Russian invasion of Ukraine uh your predecessor sent additional troops to Eastern Europe including Poland my country are you committed to keeping this troops on the Eastern flank of NATO uh in the future I’m very committed to Poland I think Poland has really stepped up and done a great job for NATO they as you know they paid more than they had to they are one of the finest groups of people I’ve ever known uh I’m very committed to Poland what about B Poland’s in a tough neighborhood you know what about Baltic the baltics uh the baltics uh they got a lot of it’s a tough neighborhood too but we’re committed we’re going to be very committed and we’re committed to Nato but NATO has to step up and the Europeans have to step up more than they have and I want to see them equalize because they are in for far less than we’re in and they should be at least equal you understand that why is the United States we have an ocean in between why is the United States in for so much more money and other things as Europe with that being said and as you said they’ve also been obviously very helpful but we have put in far more than they have and I think they should equalize Mr President pleas about the agreement today what changed between the first time that secretary vess gave president the agreement and today for the signing we made a deal all what was the factor I’m I’m a business person we made a deal that’s what changed a lot of those minerals I didn’t think we were going to make a deal and uh we ended up making the deal so that changed a president when and how do you envision a trilateral summit with president zalinski and pu I don’t know but well they don’t like each other I can tell you that okay they do not like each other this is not a love match and it’s unfortunate that’s why you’re in this this situation the United States should not have allowed this to happen Okay the United States run by a man that didn’t know much I’m going to be very nice run by an incompetent person very incompetent person should never have allowed this to happen I’ve stopped Wars I’ve stopped many wars my people will tell you I stopped Wars that nobody ever heard about I stopped Wars before they ever started you can look at some of of uh some of I could give you a lot of Nations that would tell you right now they were probably going to war I could tell you right now there’s a nation thinking about going to war on something that nobody in this room has ever even heard about two smaller Nations but big still big and I I think I’ve stopped it but this should have never happened about uh about sorry just a second uh about the any negotiations first of all I want I want really to tell you and I think that everybody understand that Ukraine more than ukrainians nobody want to stop this war but at the future any negotiations it’s understandable that two uh sides of the war not Russia and the United States because this is not the war between Russia and the United States This Is War of Russia against Ukraine and Ukrainian people so these two sides will be at any anyway will be at the negotiation and negot ation table then of course United States like the strongest partner of the Ukraine and of course Europe I think Europe is very important I want to speak about it with the president yes Europe is very important for us because we really defend Europe for today all Europeans are really recognized that we are defend in line and they have real life and our people are dying that’s why they helped us and also it’s about the N yeah yes between like the president said you have big nice ocean yes between us but if we will not stay Russia will go further to baltics and to Poland by the way but first to the baltics it’s understandable for them because they’ve been they’ve been in the USSR you know they they’ve been one of the republics of the USSR and Putin wants to bring them back to his Empire it’s a fact and when he will go there if we will not stay you will fight your American soldiers it doesn’t matter do you have Ocean or not your soldiers will fight Mr President would are be willing to visit Ukraine may be or Odessa which is going to be a their with black SE it was my question sorry I don’t want to talk about Odessa now let’s not talk about Odessa I want to talk about making a deal getting peace we don’t have to talk about Odessa but a lot of cities have been destroyed a lot of cities that are not recognizable there’s not a building standing and a lot of a lot of things you have to come and to look no no no we have very good cities yes a lot of things been destroyed but mostly cities alive and people work and children go to school sometimes it’s very difficult sometimes closer to Front Line children have to go to underground schools or online but we live Ukraine is fighting and Ukraine lives this is where and maybe it’s Putin is sharing this information that he destroyed us he lost 700,000 people 700,000 soldiers he lost ever SE yes Mr President mineral Mr President um when did you last speak with President Putin and what did he say that couple of days ago and what what did he tell you that gave you the assurance that he wanted peace well that’s what I do my whole life is deals I know pretty good uh and I really I’ve uh I’ve known him for a long time I’ve dealt with him for a long time he had to suffer through the uh Russia hoax you know Russia Russia Russia was a hoax it was all Biden it was nothing to do with him so he had to suffer through that and he he was able to do that uh I think that uh he wants to make a deal and he like to see it end it’s all I do that’s what I do my whole life that’s what I do is make deals I’m in the middle of a mess because this is a real mess it’s a very dangerous one if this doesn’t get solved now it’s not going to get solved for a long time so I hope we’re going to I hope we’re going to get it Sol in the back please thank you Mr President uh prime minister storr claimed repeatedly that his government believes in free speech and was not engaged in censorship uh but his country’s government arrest people for memes and thought crimes and even more worrisome is pressuring uh American companies to to to censor Americans on its behalf um how can he be a reliable trustworthy partner when he says things that are demonstrably false on such an important topic well we actually spoke to him about that yesterday and we thought they took it very very much too far JD was very strong on it so was I so was Marco and we’ve been speaking to him about it Marco would you like to say something about we we we have concerns obviously with the conduct of there particularly as it impacts Americans and there’s real concern that American speech which is online could fall into the hands of British or any country’s jurisdiction and so this is a point the vice president made at Munich and and I think it’s a very compelling one that what unites us with Europe as much as anything else is these shared values and one of them being free speech and so if Americans are threatened by it we’re going to need to take action in that regard J it’s it’s actually a very important question we we spoke about this in detail with the Prime Minister the foreign secretary and others at at lunch yesterday and I know that Secretary of Commerce lutnick followed up in private meetings last night this this is really important we believe Americans have the right to speak their mind even if we in this room disagree with them they have the right to speak their mind in the Public Square which is often online these days and we’re going to defend that right as it pertains to American companies and American citizens vigorously if we have to I do think that under the president’s leadership we’re going to find common ground with our friends in the UK on this question but it remains to be seen the principle that will guide us is we believe in free speech in this country and we’ll fight for it for American citizens Mr Mr oil and gas component to the deal is it all critical little bit we’ll see on L but we’re not really looking for that so much we got a lot we have more than anybody in the world by far so no we’re not talking about it too much but a little bit I think it it it affects also but uh for the most part no and Sir is there any uh agreement from uh Ukraine to purchase uh us LNG as part of the deal or is that on the table at all no some of those we don’t need that some of those you just mentioned that you’d spoken to Vladimir Putin a couple of days ago just to be clear that’s a new call not the one that you spoken to him on numerous occasions okay and how was the latest call what did you discuss how did it go are you serious with that question I am i’ it went well I think I think we’re going to have a deal on the minerals deal Mr President some of those minerals are in the east of Ukraine not far from the front lines and in areas that Russia has occupied will you direct President Putin to to withdraw his forces from those areas if you’re there’s us interest well we’ll take a look at at the time we have a lot of area uh it’s a very big area we’re talking about so we’ll take a look I’ll study that and I’ll see and who would protect those minerals if if they are us interests would that be Ukrainian forces European agreement will protect them US forces agreement yeah we’re signing an agreement right but what if Russia tries to invade or or there’s Russian aggression in those spots what would I just told you I don’t think that’s going to happen and if that were going to happen I wouldn’t make a deal if I thought that was happen I wouldn’t make a deal some people may wonder why you know they ought to focus on CNN on Survival not asking me these ridiculous question why you have confidence that Putin won’t on Surviving because CNN’s got such low ratings I don’t think they’re going to survive people will ask why you have confidence VI deal this is already I already mentioned Poland uh Poland was under Russian control for decades after the second world war when I was a kid I looked at the United States not only as a most powerful country richest country in the world the country that has great music great movies great muscle cars but also as a Force for good do you and now I’m talking with my friends in Poland and they they are worried that you align yourself too much with Putin what’s your message for them well if I didn’t align myself with both of them you’d never have a deal you want me to to say uh really terrible things about Putin and then say hi Vladimir how are we doing on the deal that doesn’t work that way I’m not aligned with Putin I’m not aligned with anybody I’m aligned with the United States of America and for the good of the world I’m aligned with the world and I want to get this thing over with you see the hatred he’s got for Putin it’s very tough for me to make a deal with that kind of hat he’s got tremendous hatred and I understand that but I can tell you the other side isn’t exactly in love with you know him either uh so it’s not a question of alignment I have to I’m aligned with the world I want to get the things set i’m aligned with Europe I want to see if we can get this thing done you want me to be tough I could be tougher than any human being you’ve ever seen I’d be so tough but you’re never going to get a deal that way so that’s the way it goes all right one more question I want to respond to this so look for four years in the United States of America we had a president who stood up press conferences and talk tough about Vladimir Putin and then Putin invaded Ukraine and destroyed a significant chunk of the country the path to peace and the path to Prosperity is maybe engaging in diplomacy we tried the pathway of Joe Biden of thumping our chest and pretending that the president of the United States’s words mattered more than the president of the United States’s actions what makes America a good country is America engaging in diplomacy that’s what president Trump is doing can I ask you sure yeah yeah okay so he occupied it uh our parts big parts of Ukraine part of East and Crimea uh so he occupied it on 2014 so during a lot of years I’m not speaking about just Biden but those time was Obama then President Obama then president Trump then President Biden now the president Trump and God bless now president Trump will stop him but during 2014 nobody stopped him he just occupied and took he killed people you know what the contact 2015 2014 2014 2014 yeah so he killed was not here yeah but exactly right yes but during 2014 till 2022 you the what the situation the same that people have been dying on the contact line nobody stopped here you know that we had conversations with him a lot of conversation my bilateral conversation and we signed with him me like a new president in 2019 I signed with him the deal I signed with him macron and Merkel we signed ceasefire ceasefire all of them told me that he will never go we signed him gas contract gas contract yes but after that he broken this cire he killed our people and he didn’t exchange prisoners we signed the exchange of prisoners but he didn’t do it what kind of diplomacy JD you are speaking about what what you what you what do you mean I’m talking about the kind of diplomacy that’s going to end the destruction of your country yes but if you Mr Mr President with respect I think it’s disrespectful for you to come into the Oval Office and try to litigate this in front of the American Media right now you guys are going around and forcing conscripts to the front lines because you have power problems you should be thanking the president for to bring end to this have you ever been to Ukraine that you say what problems we have I have been to I’ve actually I’ve actually watched and seen the stories and I know what happens is you bring people you bring them on a propaganda tour Mr President are do you disagree that you’ve had problems what bringing people into your military and do you think that it’s respectful to come to the Oval Office of the United States of America and attack the administration that is trying to trying to prevent the destruction of your country a lot of a lot of questions let’s start from the beginning first of all during the war everybody has problems even you but you have nice ocean and don’t feel now but you will feel it in the future God bless you don’t know that God bless God bless you will not have War don’t tell us what we’re going to feel we’re trying to solve a problem don’t tell us what we’re going to feel I’m not telling you because you’re in no position to dictate that remember this you’re in no position to dictate what we’re going to feel we’re going to feel very good feel influence we’re going to feel very good and very strong you will feel influence you’re right now not in a very good position you’ve allowed yourself to be in a very bad position and he happens to be right about from the very beginning of the world you’re not in a good position you don’t have the cards right now with us you start having cards right now you don’t you playing carding you’re gambling with the lives of millions of people you’re gambling with World War I you’re gambling with World War I and what you’re doing is very dis disrespectful to the country this country back you far more than a lot of people said they should have have you said thank you once entire meeting no in this entire meeting have you said thank you you went to Pennsylvania and campaigned for the opposition in October offer some words of appreciation for the United States of America and the president who’s trying to save your country please you think that if you will speak very loudly about the war you can he’s not speaking loudly he’s not speaking loudly your country is in big trouble can I no no you’ve done a lot of talking your country is in big trouble I know you’re not winning you’re not winning this you have a damn good chance of coming out okay because of us Mr President we are staying in our country staying strong from the very beginning of the war we’ve been alone and we are thankful I said thanks you haven’t cabinet and we gave you through this stupid president $350 billion we gave you military equipment and you met are brave but they had to use our military if you didn’t have our military equipment if you didn’t have our military equipment this war would have been over in two weeks in three days I heard it from Putin in three days this is something maybe less in two weeks of course yes it’s going to be a very hard thing to do business like this I tell you thank you I said a lot of except to American people except that there are disagreements and let’s go litigate those disagreements rather than trying to fight it out in the American Media when you’re wrong we know that you’re wrong but you see I think it’s good for the American people to see what’s going on I think it’s very important that’s why I kept this going so long you have to be thankful you don’t have the cards thanful you’re buried there you’re people are dying you’re running low on solders listen low soldiers it would be a damn good thing then you then you tell us I don’t want to cease fire I don’t want to cease fire I want to go and I wanted this look if you could get a ceasefire right now I tell you you take it so the bullets stop Flying and you me stop course of course we want to stop the war but I saying you don’t want a ceas said to you I want a ceas guarante because you’ll get a ceasefire faster than it agree ask our people about this fire what they think that was matter for you what that wasn’t with me that was with a guy named Biden who was not a smart person that was that was with it was your president excuse me that was with Obama who gave you sheets and I gave you javelins yes I gave you the javelins to take out all those tanks Obama gave you sheets in fact the statement is Obama gave sheets and Trump gave javelins you got to be more thankful because let me tell you you don’t have the cards with us you have the cards but without us you you don’t have any cards one more question to Mr Vice President Sor going to be a tough deal to make because the attitudes have to change what if Russia breaks this fire what if Russia breaks his talks what do you do then understand that it’s a conversation right what are you saying she’s asking what if Russia breaks the ceasefire what if they what if anything what if a bomb drops on your head right now okay what if they broke it I don’t know they broke it with Biden because Biden they didn’t respect him they didn’t respect Obama they respect me let me tell you Putin went through a hell of a lot with me he went through a phony Witch Hunt where they used him and Russia Russia Russia Russia you ever hear of that deal that was a phony that was a phony Hunter Biden Joe Biden scam Hillary Clinton Shifty Adam shiff it was a Democrat scam and he had to go through that and he did go through it we didn’t end up in a war and he went through it he was accused of all that stuff he had nothing to do with it it came out of Hunter Biden’s bathroom it came out of Hunter Biden’s bedroom it was disgusting and then they said oh oh the laptop from hell was made by Russia the 51 agents the whole thing was a scam and he had to put up with that he was being accused of all that stuff all I can say is this he might have broken deals with with Obama and Bush and he might have broken him with Biden he did maybe maybe he didn’t I don’t know what happened but he didn’t break him with me he wants to make a deal I don’t know if you can make a deal the problem is I’ve empowered you to be a tough guy and I don’t think you’d be a tough guy without the United States and your people are very brave but you’re either going to make a deal or we’re out and if we’re out you’ll fight it out I don’t think it’s going to be pretty but you’ll fight it out but you don’t have the cards but once we sign that deal you’re in a much better position but you’re not acting at all thankful and that’s not a nice thing I’ll be honest that’s not a nice thing all right uh I think we’ve seen enough what do you think what’s this negotiation going to look like this is going to be great television I will say that all right we’ll see what we can do you everybody everybody out can you neate

    By Amjad Izhar
    Contact: amjad.izhar@gmail.com
    https://amjadizhar.blog

  • Visual FoxPro 6 Accounting, Inventory & Payroll Integrated Software PRG files Developed by Me in 1996

    Visual FoxPro 6 Accounting, Inventory & Payroll Integrated Software PRG files Developed by Me in 1996

    PRG files in Original Script.

    ACCTCODE.PRG

    • Date: 12-Feb-2017
    • Program: AcctCode.PRG
    • Program to replace AcctCode Field with C1+C2+C3 code
    • and Replace chart field with chart description

    CLEAR
    CLOSE ALL

    SET TALK OFF
    SET SAFE OFF
    SET CONFIRM OFF

    CLEAR
    @ 20, 40 SAY “Running INDEXALL.PRG” FONT “Times New Roman”,26
    DO INDEXALL.PRG

    CLEAR
    @ 20, 40 SAY “Running acctcode.PRG – ldgrcode.dbf updates” FONT “Times New Roman”,26

    USE ldgrcode EXCL

    SCAN

    MPC1 = REPLICATE('0',2-LEN(LTRIM(STR(c1))))+LTRIM(STR(c1))
    MPC2 = REPLICATE('0',2-LEN(LTRIM(STR(c2))))+LTRIM(STR(c2))
    MPC3 = REPLICATE('0',3-LEN(LTRIM(STR(c3))))+LTRIM(STR(c3))
    REPLACE acctcode WITH MPC1+"-"+MPC2+"-"+MPC3
    
    DO CASE
        CASE c1 >= 10 AND c1 <= 19
            REPLACE chart WITH "Capital / Equity"
        CASE c1 >= 20 AND c1 <= 29
            REPLACE chart WITH "Long Term Liabilities"
        CASE c1 >= 30 AND c1 <= 39
            REPLACE chart WITH "Current Liabilities"
        CASE c1 >= 40 AND c1 <= 49
            REPLACE chart WITH "Long Term Assets"
        CASE c1 >= 50 AND c1 <= 59
            REPLACE chart WITH "Current Assets"
        CASE c1 >= 60 AND c1 <= 69
            REPLACE chart WITH "Sales / Revenues"
        CASE c1 >= 70 AND c1 <= 79
            REPLACE chart WITH "Cost of Sales"
        CASE c1 >= 80 AND c1 <= 89
            REPLACE chart WITH "Expenses"
        CASE c1 >= 90 AND c1 <= 99
            REPLACE chart WITH "Appropriations"
    
    OTHERWISE
        REPLACE chart WITH "Not Applicable"
    ENDCASE
    

    ENDSCAN

    INDEX ON acctcode TAG acctcode
    INDEX ON chart TAG chart
    USE


    CLEAR
    CLOSE ALL

    CLEAR
    @ 20, 40 SAY “Running acctcode.PRG – tran.dbf updates” FONT “Times New Roman”,26

    USE tran EXCL

    SCAN

    MPC1 = REPLICATE('0',2-LEN(LTRIM(STR(c1))))+LTRIM(STR(c1))
    MPC2 = REPLICATE('0',2-LEN(LTRIM(STR(c2))))+LTRIM(STR(c2))
    MPC3 = REPLICATE('0',3-LEN(LTRIM(STR(c3))))+LTRIM(STR(c3))
    REPLACE acctcode WITH MPC1+"-"+MPC2+"-"+MPC3
    
    DO CASE
        CASE c1 >= 10 AND c1 <= 19
            REPLACE chart WITH "Capital / Equity"
        CASE c1 >= 20 AND c1 <= 29
            REPLACE chart WITH "Long Term Liabilities"
        CASE c1 >= 30 AND c1 <= 39
            REPLACE chart WITH "Current Liabilities"
        CASE c1 >= 40 AND c1 <= 49
            REPLACE chart WITH "Long Term Assets"
        CASE c1 >= 50 AND c1 <= 59
            REPLACE chart WITH "Current Assets"
        CASE c1 >= 60 AND c1 <= 69
            REPLACE chart WITH "Sales / Revenues"
        CASE c1 >= 70 AND c1 <= 79
            REPLACE chart WITH "Cost of Sales"
        CASE c1 >= 80 AND c1 <= 89
            REPLACE chart WITH "Expenses"
        CASE c1 >= 90 AND c1 <= 99
            REPLACE chart WITH "Appropriations"
    
    OTHERWISE
        REPLACE chart WITH "Not Applicable"
    ENDCASE
    

    ENDSCAN

    INDEX ON acctcode TAG acctcode
    INDEX ON chart TAG chart
    USE
    USE ldgrcode EXCL
    INDEX ON acctcode TAG acctcode
    USE

    SELECT 1
    USE tran ORDER acctcode

    SELECT 2
    USE ldgrcode ORDER acctcode

    SELECT 1
    SET RELATION TO acctcode INTO ldgrcode ADDITIVE

    REPL ALL title WITH ldgrcode.title

    CLEAR
    CLOSE ALL


    CLEAR
    CLOSE ALL

    CLEAR
    @ 20, 40 SAY “Running acctcode.PRG – master.dbf updates” FONT “Times New Roman”,26

    USE master EXCL

    SCAN

    MPC1 = REPLICATE('0',2-LEN(LTRIM(STR(c1))))+LTRIM(STR(c1))
    MPC2 = REPLICATE('0',2-LEN(LTRIM(STR(c2))))+LTRIM(STR(c2))
    MPC3 = REPLICATE('0',3-LEN(LTRIM(STR(c3))))+LTRIM(STR(c3))
    REPLACE acctcode WITH MPC1+"-"+MPC2+"-"+MPC3
    
    DO CASE
        CASE c1 >= 10 AND c1 <= 19
            REPLACE chart WITH "Capital / Equity"
        CASE c1 >= 20 AND c1 <= 29
            REPLACE chart WITH "Long Term Liabilities"
        CASE c1 >= 30 AND c1 <= 39
            REPLACE chart WITH "Current Liabilities"
        CASE c1 >= 40 AND c1 <= 49
            REPLACE chart WITH "Long Term Assets"
        CASE c1 >= 50 AND c1 <= 59
            REPLACE chart WITH "Current Assets"
        CASE c1 >= 60 AND c1 <= 69
            REPLACE chart WITH "Sales / Revenues"
        CASE c1 >= 70 AND c1 <= 79
            REPLACE chart WITH "Cost of Sales"
        CASE c1 >= 80 AND c1 <= 89
            REPLACE chart WITH "Expenses"
        CASE c1 >= 90 AND c1 <= 99
            REPLACE chart WITH "Appropriations"
    
    OTHERWISE
        REPLACE chart WITH "Not Applicable"
    ENDCASE
    

    ENDSCAN

    INDEX ON acctcode TAG acctcode
    INDEX ON chart TAG chart
    USE

    USE ldgrcode EXCL
    INDEX ON acctcode TAG acctcode
    USE

    SELECT 1
    USE master ORDER acctcode

    SELECT 2
    USE ldgrcode ORDER acctcode

    SELECT 1
    SET RELATION TO acctcode INTO ldgrcode ADDITIVE

    REPL ALL title WITH ldgrcode.title

    CLEAR
    CLOSE ALL


    • Tran-key VchNo field type Character 5-12-12345

    CLEAR
    CLOSE ALL

    CLEAR
    @ 20, 40 SAY “Running acctcode.PRG – tran-key.dbf updates” FONT “Times New Roman”,26

    USE tran-key EXCL

    SCAN

    MVCH1 = REPLICATE('0',1-LEN(LTRIM(STR(vch_type))))+LTRIM(STR(vch_type))
    MVCH2 = REPLICATE('0',2-LEN(LTRIM(STR(vch_no1))))+LTRIM(STR(vch_no1))
    MVCH3 = REPLICATE('0',5-LEN(LTRIM(STR(vch_no2))))+LTRIM(STR(vch_no2))
    REPLACE VchNo WITH MVCH1+"-"+MVCH2+"-"+MVCH3
    
    DO CASE
    
        CASE vch_type = 1
            REPLACE type WITH "Cash Receipt"
        CASE vch_type = 2
            REPLACE type WITH "Cash Payment"
        CASE vch_type = 3
            REPLACE type WITH "Bank Receipt"
        CASE vch_type = 4
            REPLACE type WITH "Bank Payment"
        CASE vch_type = 5
            REPLACE type WITH "Journal"
        CASE vch_type = 6
            REPLACE type WITH "Sales"
        CASE vch_type = 7
            REPLACE type WITH "Purchase"
    
    OTHERWISE
        REPLACE type WITH "Not Applicable"
    ENDCASE
    

    ENDSCAN

    INDEX ON VchNo TAG VchNo
    INDEX ON Type TAG type
    USE


    • Tran VchNo field type Character 5-12-12345

    CLEAR
    CLOSE ALL

    CLEAR
    @ 20, 40 SAY “Running acctcode.PRG – tran.dbf updates” FONT “Times New Roman”,26

    USE tran EXCL

    SCAN

    MVCH1 = REPLICATE('0',1-LEN(LTRIM(STR(vch_type))))+LTRIM(STR(vch_type))
    MVCH2 = REPLICATE('0',2-LEN(LTRIM(STR(vch_no1))))+LTRIM(STR(vch_no1))
    MVCH3 = REPLICATE('0',5-LEN(LTRIM(STR(vch_no2))))+LTRIM(STR(vch_no2))
    REPLACE VchNo WITH MVCH1+"-"+MVCH2+"-"+MVCH3
    
    DO CASE
    
        CASE vch_type = 1
            REPLACE type WITH "Cash Receipt"
        CASE vch_type = 2
            REPLACE type WITH "Cash Payment"
        CASE vch_type = 3
            REPLACE type WITH "Bank Receipt"
        CASE vch_type = 4
            REPLACE type WITH "Bank Payment"
        CASE vch_type = 5
            REPLACE type WITH "Journal"
        CASE vch_type = 6
            REPLACE type WITH "Sales"
        CASE vch_type = 7
            REPLACE type WITH "Purchase"
    
    OTHERWISE
        REPLACE type WITH "Not Applicable"
    ENDCASE
    

    ENDSCAN

    INDEX ON VchNo TAG VchNo
    INDEX ON Type TAG type
    USE


    • Master VchNo field type Character 5-12-12345

    CLEAR
    CLOSE ALL

    CLEAR
    @ 20, 40 SAY “Running acctcode.PRG – master.dbf updates” FONT “Times New Roman”,26

    USE master EXCL

    SCAN

    MVCH1 = REPLICATE('0',1-LEN(LTRIM(STR(vch_type))))+LTRIM(STR(vch_type))
    MVCH2 = REPLICATE('0',2-LEN(LTRIM(STR(vch_no1))))+LTRIM(STR(vch_no1))
    MVCH3 = REPLICATE('0',5-LEN(LTRIM(STR(vch_no2))))+LTRIM(STR(vch_no2))
    REPLACE VchNo WITH MVCH1+"-"+MVCH2+"-"+MVCH3
    
    DO CASE
    
        CASE vch_type = 1
            REPLACE type WITH "Cash Receipt"
        CASE vch_type = 2
            REPLACE type WITH "Cash Payment"
        CASE vch_type = 3
            REPLACE type WITH "Bank Receipt"
        CASE vch_type = 4
            REPLACE type WITH "Bank Payment"
        CASE vch_type = 5
            REPLACE type WITH "Journal"
        CASE vch_type = 6
            REPLACE type WITH "Sales"
        CASE vch_type = 7
            REPLACE type WITH "Purchase"
    
    OTHERWISE
        REPLACE type WITH "Not Applicable"
    ENDCASE
    

    ENDSCAN

    INDEX ON VchNo TAG VchNo
    INDEX ON Type TAG type
    USE


    • This Update: 12-Feb-2017
    • Prepare ChartOfAccts.XLS

    CLEAR
    @ 20, 40 SAY “Running acctcode.PRG – XLS files” FONT “Times New Roman”,26

    SELECT Acctcode,;
    Title,;
    Ldgr_bal,;
    Status,;
    Chart,;
    LEFT(AcctCode,1) AS “ChrtNo”;
    FROM LdgrCode.dbf;
    ORDER BY AcctCode;
    INTO DBF ChartOfAccts.dbf

    CLOSE ALL

    USE ChartOfAccts.dbf EXCL
    INDEX ON AcctCode TAG AcctCode
    SET ORDER TO AcctCode
    COPY TO XLS\ChartOfAccts.XLS TYPE XLS
    USE

    CLOSE ALL

    SELECT Acctcode,;
    Title,;
    SUM(Ldgr_bal) AS “Total”,;
    Status,;
    Chart,;
    LEFT(AcctCode,1) AS “ChrtNo”,;
    LEFT(AcctCode,2) AS “C1”;
    FROM LdgrCode.dbf;
    ORDER BY AcctCode;
    GROUP BY ldgrcode.c1;
    INTO DBF SumLevel_1.dbf

    USE SumLevel_1.dbf EXCL
    INDEX ON AcctCode TAG AcctCode
    SET ORDER TO AcctCode
    COPY TO XLS\SumLevel_1.XLS TYPE XLS
    USE


    CLEAR
    CLEAR ALL
    CLOSE ALL

    CLEAR
    @ 20, 40 SAY “Running acctcode.PRG – Chart_L2.dbf updates” FONT “Times New Roman”,26

    SELECT C1,C2,TITLE FROM LDGRCODE INTO DBF CHART_L2.DBF WHERE C3=0 ORDER BY C1,C2
    SELECT CHART_L2
    USE

    SELECT 1
    USE CHART_L2 EXCL
    INDEX ON STR(C1,2)+STR(C2,2) TAG ACL2

    CLEAR
    CLEAR ALL
    CLOSE ALL

    ASKPW.PRG

    • PROGRAM : ASKPW.PRG
    • WRITTEN BY AMJAD IZHAR
    • LAST REVISED ON 03-04-2001
      *————————————

    SET TALK OFF
    PUBLIC pass,mm1,Permit
    CLEAR

    pass=SPACE(9)
    mm1=space(9)
    Permit = Space(2)

    DEFINE WINDOW upper FROM 0,0 TO 22,78 NONE
    ACTIVATE WINDOW upper
    @ 1,1 SAY “Password:”

    DEFINE WINDOW inwin FROM 2,0 TO 10,20 NONE
    DEFINE WINDOW hidewin FROM 2,0 TO 8,20 NONE
    ACTIVATE WINDOW hidewin NOSHOW
    HIDE WINDOW hidewin IN WINDOW inwin

    @ 1,1 GET pass PICT “@!”
    READ COLOR 1,1

    USE Usr

    LOCATE FOR usrcode = mMenu

    DO back

    DO CASE

    CASE pass <> mm1
    
        CLEAR WINDOWS
    
        *FOR a = 1 TO 4
        *   SET BELL TO 300,1
        *   ?? CHR(7)
        *   SET BELL TO
        *   DO ACSSDEN
    
            Permit = "OK"
    
        *ENDFOR
    
    CASE pass = mm1
            Permit = "OK"
    

    ENDCASE

    CLEAR WINDOWS
    DEACTIVATE WINDOW upper
    DEACTIVATE WINDOW inwin
    DEACTIVATE WINDOW hidewin


    PROCEDURE AcssDen


    • ÖÄÄÄÄÄÄÄÄÄÄÄÄÄÄÄÄÄÄÄÄÄÄÄÄÄÄÄÄÄÄÄÄÄÄÄÄÄÄÄÄÄÄÄÄÄÄÄÄÄÄÄÄÄÄÄÄÄ·
    • º º
    • º 07/23/96 ACSSDEN.SPR 13:13:49 º
    • º º
    • ÇÄÄÄÄÄÄÄÄÄÄÄÄÄÄÄÄÄÄÄÄÄÄÄÄÄÄÄÄÄÄÄÄÄÄÄÄÄÄÄÄÄÄÄÄÄÄÄÄÄÄÄÄÄÄÄÄĶ
    • º º
    • º Author’s Name º
    • º º
    • º Copyright (c) 1996 Company Name º
    • º Address º
    • º City, Zip º
    • º º
    • º Description: º
    • º This program was automatically generated by GENSCRN. º
    • º º
    • ÓÄÄÄÄÄÄÄÄÄÄÄÄÄÄÄÄÄÄÄÄÄÄÄÄÄÄÄÄÄÄÄÄÄÄÄÄÄÄÄÄÄÄÄÄÄÄÄÄÄÄÄÄÄÄÄÄĽ

    REGION 0

    REGIONAL m.currarea, m.talkstat, m.compstat

    IF SET(“TALK”) = “ON”
    SET TALK OFF
    m.talkstat = “ON”
    ELSE
    m.talkstat = “OFF”
    ENDIF
    m.compstat = SET(“COMPATIBLE”)
    SET COMPATIBLE FOXPLUS

    • ÖÄÄÄÄÄÄÄÄÄÄÄÄÄÄÄÄÄÄÄÄÄÄÄÄÄÄÄÄÄÄÄÄÄÄÄÄÄÄÄÄÄÄÄÄÄÄÄÄÄÄÄÄÄÄÄÄÄ·
    • º º
    • º MS-DOS Window definitions º
    • º º
    • ÓÄÄÄÄÄÄÄÄÄÄÄÄÄÄÄÄÄÄÄÄÄÄÄÄÄÄÄÄÄÄÄÄÄÄÄÄÄÄÄÄÄÄÄÄÄÄÄÄÄÄÄÄÄÄÄÄĽ
      *
    • ÖÄÄÄÄÄÄÄÄÄÄÄÄÄÄÄÄÄÄÄÄÄÄÄÄÄÄÄÄÄÄÄÄÄÄÄÄÄÄÄÄÄÄÄÄÄÄÄÄÄÄÄÄÄÄÄÄÄ·
    • º º
    • º ACSSDEN/MS-DOS Screen Layout º
    • º º
    • ÓÄÄÄÄÄÄÄÄÄÄÄÄÄÄÄÄÄÄÄÄÄÄÄÄÄÄÄÄÄÄÄÄÄÄÄÄÄÄÄÄÄÄÄÄÄÄÄÄÄÄÄÄÄÄÄÄĽ
      *

    REGION 1

    @ 13,33 SAY “Access Denied!” ;
    SIZE 1,14, 0

    REGION 0

    IF m.talkstat = “ON”
    SET TALK ON
    ENDIF
    IF m.compstat = “ON”
    SET COMPATIBLE ON
    ENDIF

    RETURN


    PROCEDURE back


    *PUBLIC mm1

    STORE SUBSTR(pw,1,1) TO ncode1
    STORE SUBSTR(pw,2,1) TO ncode2
    STORE SUBSTR(pw,3,1) TO ncode3
    STORE SUBSTR(pw,4,1) TO ncode4
    STORE SUBSTR(pw,5,1) TO ncode5
    STORE SUBSTR(pw,6,1) TO ncode6
    STORE SUBSTR(pw,7,1) TO ncode7
    STORE SUBSTR(pw,8,1) TO ncode8
    STORE SUBSTR(pw,9,1) TO ncode9

    mm1 = chr(asc(“&ncode1”)+30)+;
    chr(asc(“&ncode2”)+28)+;
    chr(asc(“&ncode3”)+29)+;
    chr(asc(“&ncode4”)+21)+;
    chr(asc(“&ncode5”)+19)+;
    chr(asc(“&ncode6”)+13)+;
    chr(asc(“&ncode7”)+12)+;
    chr(asc(“&ncode8”)+18)+;
    chr(asc(“&ncode9”)+19)

    RETURN

    ATDETSHT.PRG

    • Report Program for Employee Detailed Attendence Sheet

    SET TALK OFF
    SET SAFETY OFF

    CLEAR
    CLOSE DATA

    @ 1,20 SAY “Report: Employee Detailed Attendence Sheet”
    @ 2,20 SAY “——————————————“

    PUBLIC mMnth,mMcode,mYear,Vp
    mMnth = space(10)
    mMcode = 0
    mYear = 0
    Vp = space(1)

    SELECT 1
    USE attend ORDER empno2
    STORE mcode TO mMcode
    STORE year TO mYear

    SELECT 2
    USE employee ORDER empno

    SELECT 3
    USE salary ORDER empno

    SELECT 4
    USE ovtime ORDER empno2

    SELECT 5
    USE deptt ORDER deptcode

    SELECT 6
    USE salcode ORDER salcode

    SELECT 7
    USE month ORDER mcode
    STORE month.month TO mMnth

    SELECT 8
    USE artime ORDER empno2

    SELECT 1
    SET RELATION TO str(deptcode)+str(empno) INTO employee ADDITIVE
    SET RELATION TO str(deptcode)+str(empno) INTO salary ADDITIVE
    SET RELATION TO str(deptcode)+str(empno) INTO artime ADDITIVE
    SET RELATION TO str(deptcode)+str(empno) INTO ovtime ADDITIVE
    SET RELATION TO deptcode INTO deptt ADDITIVE
    SET RELATION TO mcode INTO month ADDITIVE

    SELECT 3
    SET RELATION TO salcode INTO salcode ADDITIVE

    SELECT 1

    DO AskEmpno

    @ 12,5 SAY “Report to Printer or View (P/V) ? “
    @ ROW(),COL() GET Vp PICT “@!” VALID INLIST(Vp,’P’,’V’);
    ERROR “(P)rinter,(V)iew “
    READ

    DO CASE

    CASE Vp = "P"
    
        REPORT FORM ATDETSHT.FRX TO PRINTER NOEJECT FOR;
         deptcode = mDptCode .and. empno = mEmpNo
    
    CASE Vp = "V"
    
        REPORT FORM ATDETSHT.FRX PREVIEW FOR;
         deptcode = mDptCode .and. empno = mEmpNo
    

    ENDCASE

    CLOSE DATA


    PROCEDURE AskEmpno


    PUBLIC mDptCode,mEmpNo

    mDptCode = 0
    mEmpNo = 0

    @ 5,5 SAY “Enter Empno for which you want Detailed Attendence Sheet ? “
    @ ROW(),COL() GET mDptCode PICT “99” VALID VmDptCode()
    @ ROW(),COL() SAY “-“
    @ ROW(),COL() GET mEmpNo PICT “999” VALID VmEmpNo()
    READ

    RETURN


    PROCEDURE VmDptCode


    SELECT deptt
    LOCATE FOR deptcode = mDptCode
    IF FOUND()
    @ 8,0 TO 8,79 CLEAR
    @ 8,5 SAY “Department Name: “
    @ ROW(),COL() SAY deptname
    SELECT 1
    RETURN .T.
    ELSE
    @ 8,0 TO 8,79 CLEAR
    WAIT WINDOW “Deptt.Code Not in File! Try Again” TIMEOUT 1
    SELECT 1
    RETURN .F.
    ENDIF
    SELECT 1
    RETURN .T.


    PROCEDURE VmEmpNo


    SELECT 1
    LOCATE FOR deptcode = mDptCode AND empno = mEmpNo

    DO CASE

    CASE FOUND()
    
        @ 10,0 TO 10,79 CLEAR
        @ 10,5 SAY "Employee Name: "
        @ ROW(),COL() SAY employee.name
    
    CASE NOT FOUND()
        @ 10,0 TO 10,79 CLEAR
        WAIT WINDOW "Employee Code Not in File! Try Again" TIMEOUT 1
        SELECT 1
        _CUROBJ = 1
        RETURN .T.
    

    ENDCASE

    SELECT 1

    RETURN .T.


    ATNDV2.PRG


    • PROGRAM: ATNDV2.PRG
    • Program to paint a brow for attendence register
    • with complete 31 days
    • Programmer: Amjad Izhar
    • This update: 29-Dec-2019

    DO mainprog


    PROCEDURE mainprog


    DO iniset
    DO SetVars
    DO paintbrow
    DO endprog
    RETURN


    PROCEDURE iniset


    CLEAR
    *HIDE POPUP mainmenu
    SET TALK OFF
    SET SAFETY OFF

    ON KEY LABEL F1 DO Ord1
    ON KEY LABEL F2 DO Ord2
    ON KEY LABEL F3 DO Ord3

    SET FUNCTION F4 TO
    SET FUNCTION F5 TO
    SET FUNCTION F6 TO
    SET FUNCTION F7 TO
    SET FUNCTION F8 TO
    SET FUNCTION F9 TO
    SET FUNCTION F10 TO
    SET FUNCTION F11 TO
    SET FUNCTION F12 TO

    PUBLIC mMcode,mYear
    mMcode = 0
    mYear = 0

    SELECT 1
    USE attend.dbf
    SET ORDER TO empno

    STORE mcode TO mMcode
    STORE year TO mYear

    SELECT 2
    USE employee.dbf
    SET ORDER TO empno

    SELECT 3
    USE month
    SET ORDER TO mcode

    SELECT 4
    USE ovtime
    SET ORDER TO empno

    SELECT 5
    USE deptt
    SET ORDER TO deptcode

    SELECT 6
    USE salary ORDER empno2

    SELECT 7
    USE saldtail ORDER empno

    SET FILTER TO
    SET FILTER TO mcode = mMcode AND year = mYear

    SELECT 1
    SET RELATION TO str(deptcode)+str(empno) INTO employee ADDITIVE
    SET RELATION TO str(deptcode)+str(empno) INTO salary ADDITIVE

    SET RELATION TO str(deptcode)+str(empno)+str(mcode)+str(year);
    INTO saldtail ADDITIVE

    SET RELATION TO mcode INTO month ADDITIVE
    SET RELATION TO str(deptcode)+str(empno)+str(mcode)+str(year) INTO ovtime ADDITIVE
    SET RELATION TO deptcode INTO deptt ADDITIVE

    goto top

    RETURN


    PROCEDURE SetVars


    PUBLIC CurFld
    CurFld = space(3)
    RETURN


    PROCEDURE paintbrow


    PUBLIC Pal

    *@ 0,0,40,120 BOX

    DEFINE WINDOW b FROM 0,0 TO 24,79

    mrecord = RECNO()

    SCAN
    Pal = d1+d2+d3+d4+d5+d6+d7+d8+d9+d10+d11+d12+d13+d14+d15+;
    d16+d17+d18+d19+d20+d21+d22+d23+d24+d25+d26+d27+d28+;
    d29+d30+d31

    REPLACE present WITH OCCURS(“P”,Pal)
    REPLACE absent WITH OCCURS(“A”,Pal)
    REPLACE leave WITH OCCURS(“L”,Pal)
    REPLACE late WITH OCCURS(“T”,Pal)
    ENDSCAN

    GOTO mrecord

    BROWS FIELDS;
    Eno = str(deptcode,2)+”-“+;
    str(empno,3)+”³”;
    :R :H = “Code” :W=.F.,;
    employee.name :18 :R :W=.F.,;
    L1 = “³” :1 :R :H = “” :W=.F.,D1:H=”1 “:P=”@!”:V=UP(),;
    D2:H=”2 “:P=”@!”:V=UP(),D3:H=”3 “:P=”@!”:V=UP(),;
    D4:H=”4 “:P=”@!”:V=UP(),D5:H=”5 “:P=”@!”:V=UP(),;
    D6:H=”6 “:P=”@!”:V=UP(),D7:H=”7 “:P=”@!”:V=UP(),;
    D8:H=”8 “:P=”@!”:V=UP(),D9:H=”9 “:P=”@!”:V=UP(),;
    D10:H=”10″:P=”@!”:V=UP(),D11:H=”11″:P=”@!”:V=UP(),;
    D12:H=”12″:P=”@!”:V=UP(),D13:H=”13″:P=”@!”:V=UP(),;
    D14:H=”14″:P=”@!”:V=UP(),D15:H=”15″:P=”@!”:V=UP();
    WINDOW b;
    NOAPPEND NODELETE

    BROWS FIELDS;
    Eno = str(deptcode,2)+”-“+;
    str(empno,3)+”³”;
    :R :H = “Code” :W=.F.,;
    employee.name :16 :R:W=.F.,;
    L1 = “³” :1 :R :H = “”:W=.F.,;
    D16:H=”16″:P=”@!”:V=UP(),D17:H=”17″:P=”@!”:V=UP(),;
    D18:H=”18″:P=”@!”:V=UP(),D19:H=”19″:P=”@!”:V=UP(),;
    D20:H=”20″:P=”@!”:V=UP(),D21:H=”21″:P=”@!”:V=UP(),;
    D22:H=”22″:P=”@!”:V=UP(),D23:H=”23″:P=”@!”:V=UP(),;
    D24:H=”24″:P=”@!”:V=UP(),D25:H=”25″:P=”@!”:V=UP(),;
    D26:H=”26″:P=”@!”:V=UP(),;
    D27:H=”27″:P=”@!”:V=UP(),;
    D28:H=”28″:P=”@!”:V=UP(),;
    D29:H=”29″:P=”@!”:V=UP(),;
    D30:H=”30″:P=”@!”:V=UP(),;
    D31:H=”31″:P=”@!”:V=UP();
    WINDOW b;
    NOAPPEND NODELETE

    ON KEY
    SET INDEX TO attend.cdx
    SET ORDER TO empno

    RETURN


    PROCEDURE below && Browse When clause


    @ 22,2 SAY deptcode
    @ 22,4 SAY “-“
    @ 22,5 SAY empno PICT “@L”

    *@ 22,9 SAY employee.salutation+”.”
    @ 22,12 SAY employee.name
    @ 22,35 SAY deptt.deptname

    @ 23,9 SAY “P=”
    @ 23,11 SAY present
    @ 23,15 SAY “A=”
    @ 23,17 SAY absent
    @ 23,21 SAY “L=”
    @ 23,23 SAY leave
    @ 23,27 SAY “T=”
    @ 23,29 SAY late

    IF ovtime.totalot <> 0
    @ 23,35 SAY “Tot.OT=”
    @ 23,42 SAY ovtime.totalot
    ELSE
    @ 23,32 TO 23,48 CLEAR

    ENDIF

    @ 22,60 SAY ALLTRIM(month.month)+”,”+ALLTRIM(STR(attend.year));
    COLOR GR+/B

    @ 23,60 SAY “Payable Days: “
    @ ROW(),COL() SAY pbldays

    @ 24,9 SAY “F1=Attendence Wise F2=Emp.No Wise F3=Name Wise”

    RETURN .T.


    PROCEDURE Up


    STORE VARREAD() TO CurFld

    IF INLIST(&CurFld,’P’,’A’,’L’,’T’,’ ‘,’F’,’H’) = .F.
    WAIT WINDOW “(P)resent,(A)bsent,(L)eave,La(T)e” TIMEOUT 3
    RETURN .F.
    ENDIF

    Pal = d1+d2+d3+d4+d5+d6+d7+d8+d9+d10+d11+d12+d13+d14+d15+;
    d16+d17+d18+d19+d20+d21+d22+d23+d24+d25+d26+d27+d28+;
    d29+d30+d31

    REPLACE present WITH OCCURS(“P”,Pal)
    REPLACE absent WITH OCCURS(“A”,Pal)
    REPLACE leave WITH OCCURS(“L”,Pal)
    REPLACE late WITH OCCURS(“T”,Pal)

    PUBLIC mPblDysS,mPblDysW,mPblDysP
    mPblDysS = 0
    mPblDysW = 0
    mPblDysP = 0

    IF present <> 0
    mPblDysS = month.mdays-absent
    mPblDysW = present+late
    mPblDysP = month.mdays-absent
    ENDIF

    DO CASE
    CASE salary.mpay AND NOT employee.probation

    REPLACE pbldays WITH mPblDysS
    

    CASE salary.mpay AND employee.probation

    REPLACE pbldays WITH mPblDysP
    

    CASE salary.mpay = .f. ;
    AND salary.wrdaily = .f. AND NOT employee.probation;
    AND NOT EMPTY(salary.dwratem)

    REPLACE pbldays WITH mPblDysS
    

    CASE salary.mpay = .f. ;
    AND salary.wrdaily = .f. AND employee.probation;
    AND NOT EMPTY(salary.dwratem)

    REPLACE pbldays WITH mPblDysP
    

    OTHERWISE

    REPLACE pbldays WITH mPblDysW
    

    ENDCASE

    REPLACE saldtail.days WITH pbldays

    RETURN .T.


    PROCEDURE Ord1


    STORE RECNO() TO mRecord
    WAIT WINDOW “Changing Order to Attendence Wise” TIMEOUT 1
    SET INDEX TO attend.cdx
    SET ORDER TO empno
    KEYBOARD ‘{PGUP}’
    KEYBOARD ‘{PGUP}’
    GOTO mRecord

    RETURN


    PROCEDURE Ord2


    STORE RECNO() TO mRecord
    WAIT WINDOW “Changing Order to Emp. No. Wise” TIMEOUT 1
    SET INDEX TO attend.cdx
    SET ORDER TO empno2
    KEYBOARD ‘{PGUP}’
    KEYBOARD ‘{PGUP}’
    GOTO mRecord

    RETURN


    PROCEDURE Ord3


    STORE RECNO() TO mRecord
    WAIT WINDOW “Changing Order to Name Wise” TIMEOUT 1

    INDEX ON employee.name TO atname.idx
    SET INDEX TO atname.idx

    KEYBOARD ‘{PGUP}’
    KEYBOARD ‘{PGUP}’
    GOTO mRecord

    RETURN


    PROCEDURE endprog


    CLEAR
    CLOSE DATABASES
    CLEAR WINDOWS
    *SHOW POPUP mainmenu

    IF _DOS
    RESTORE SCREEN FROM backgrnd
    ENDIF

    RETURN


    ATNDV3.PRG

    • This update: 22-Sep-2017

    clear
    @ 0,0,21,79 BOX
    DEFINE WINDOW bratnd FROM 1,1 TO 20,78

    SET VIEW TO attend

    BROWS FIELDS;
    Ename = employee.name :H = “Employee Name”,;
    L1 = “³” :1 :R :H = “”,;
    D1 :H = “1 “,;
    D2 :H = “2 “,;
    D3 :H = “3 “,;
    D4 :H = “4 “,;
    D5 :H = “5 “,;
    D6 :H = “6 “,;
    D7 :H = “7 “,;
    D8 :H = “8 “,;
    D9 :H = “9 “,;
    D10 :H = “10”,;
    D11 :H = “11”,;
    D12 :H = “12”,;
    D13 :H = “13”,;
    D14 :H = “14”,;
    D15 :H = “15”,;
    D16 :H = “16”,;
    D17 :H = “17”,;
    D18 :H = “18”,;
    D19 :H = “19”,;
    D20 :H = “20”,;
    D21 :H = “21”,;
    D22 :H = “22”,;
    D23 :H = “23”,;
    D24 :H = “24”,;
    D25 :H = “25”,;
    D26 :H = “26”,;
    D27 :H = “27”,;
    D28 :H = “28”,;
    D29 :H = “29”,;
    D30 :H = “30”,;
    D31 :H = “31”;
    WINDOW bratnd;
    WHEN below();
    TITLE “Daily Attendence Register”;
    NOAPPEND NOEDIT

    CLEAR ALL
    CLEAR
    CANCEL

    RETURN

    PROCEDURE below

    @ 22,2 SAY deptcode
    @ 22,4 SAY “-“
    @ 22,5 SAY empno PICT “@L”

    @ 22,9 SAY employee.salutation+”.”
    @ 22,12 SAY employee.name
    @ 22,35 SAY deptt.deptname

    RETURN

    ATNDVIEW.PRG

    • this update: 22-Sep-2017

    clear
    DEFINE WINDOW fullview FROM 0,0 TO 24,79
    SET VIEW TO attend

    BROWS FIELDS;
    Ename = employee.name :H = “Employee Name”,;
    L1 = “³” :1 :R :H = “”,;
    D1;
    WINDOW fullview;
    TITLE “Daily Attendence Register”

    ATSHEET.PRG

    CLOSE DATA

    CLEA
    SET TALK OFF
    SET SAFETY OFF

    SELECT 1
    USE attend ORDER empno

    SELECT 2
    USE employee ORDER empno

    SELECT 3
    USE ovtime ORDER empno3

    SELECT 4
    USE artime ORDER empno2

    SELECT 5
    USE deptt ORDER deptcode

    SELECT 6
    USE month ORDER mcode

    SELECT 1
    SET RELATION TO str(deptcode)+str(empno) INTO employee ADDITIVE
    SET RELATION TO str(deptcode)+str(atord)+str(empno) INTO ovtime ADDITIVE
    SET RELATION TO str(deptcode)+str(empno) INTO artime ADDITIVE
    SET RELATION TO deptcode INTO deptt ADDITIVE
    SET RELATION TO mcode INTO month ADDITIVE

    CLEAR

    PUBLIC Vp
    Vp = space(1)

    @ 11,19 SAY “Report to Printer or View (P/V) ? “
    @ ROW(),COL() GET Vp PICT “@!” VALID INLIST(Vp,’P’,’V’);
    ERROR “(P)rinter,(V)iew “
    READ

    DO CASE

    CASE Vp = "P"
    
        ??? CHR(15)
        ??? CHR(15)
    
        REPORT FORM ATsheet.FRX TO PRINTER NOEJECT
    
    CASE Vp = "V"
    
        REPORT FORM ATsheet.FRX PREVIEW
    

    ENDCASE

    CLEAR
    CLOSE DATA

    ATSHEET2.PRG

    • This Update: 22-Sep-2017

    CLOSE DATA
    CLEA
    SET TALK OFF
    SET SAFETY OFF

    SELECT 1
    USE attend ORDER empno

    SELECT 2
    USE employee ORDER empno

    SELECT 3
    USE ovtime ORDER empno3

    SELECT 4
    USE artime ORDER empno2

    SELECT 5
    USE deptt ORDER deptcode

    SELECT 6
    USE month ORDER mcode

    SELECT 1
    SET RELATION TO str(deptcode)+str(empno) INTO employee ADDITIVE
    SET RELATION TO str(deptcode)+str(atord)+str(empno) INTO ovtime ADDITIVE
    SET RELATION TO str(deptcode)+str(empno) INTO artime ADDITIVE
    SET RELATION TO deptcode INTO deptt ADDITIVE
    SET RELATION TO mcode INTO month ADDITIVE

    CLEAR

    PUBLIC Vp
    Vp = space(1)

    @ 11,19 SAY “Report to Printer or View (P/V) ? “
    @ ROW(),COL() GET Vp PICT “@!” VALID INLIST(Vp,’P’,’V’);
    ERROR “(P)rinter,(V)iew “
    READ

    DO CASE

    CASE Vp = "P"
    
        ??? CHR(15)
        ??? CHR(15)
    
        REPORT FORM ATsheet2.FRX TO PRINTER NOEJECT
    
    CASE Vp = "V"
    
        REPORT FORM ATsheet2.FRX PREVIEW
    

    ENDCASE

    CLEAR
    CLOSE DATA

    ATSHEET3.PRG

    CLOSE DATA
    CLEA
    SET TALK OFF
    SET SAFETY OFF

    SELECT 1
    USE attend ORDER empno

    SELECT 2
    USE employee ORDER empno

    SELECT 3
    USE ovtime ORDER empno3

    SELECT 4
    USE artime ORDER empno2

    SELECT 5
    USE deptt ORDER deptcode

    SELECT 6
    USE month ORDER mcode

    SELECT 1
    SET RELATION TO str(deptcode)+str(empno) INTO employee ADDITIVE
    SET RELATION TO str(deptcode)+str(atord)+str(empno) INTO ovtime ADDITIVE
    SET RELATION TO str(deptcode)+str(empno) INTO artime ADDITIVE
    SET RELATION TO deptcode INTO deptt ADDITIVE
    SET RELATION TO mcode INTO month ADDITIVE

    CLEAR

    PUBLIC Vp
    Vp = space(1)

    @ 11,19 SAY “Report to Printer or View (P/V) ? “
    @ ROW(),COL() GET Vp PICT “@!” VALID INLIST(Vp,’P’,’V’);
    ERROR “(P)rinter,(V)iew “
    READ

    DO CASE

    CASE Vp = "P"
    
        ??? CHR(15)
        ??? CHR(15)
    
        REPORT FORM ATsheet3.FRX TO PRINTER NOEJECT
    
    CASE Vp = "V"
    
        REPORT FORM ATsheet3.FRX PREVIEW
    

    ENDCASE

    CLEAR
    CLOSE DATA

    ATSHEET4.PRG

    CLOSE DATA
    CLEA
    SET TALK OFF
    SET SAFETY OFF

    SELECT 1
    USE attend ORDER empno

    SELECT 2
    USE employee ORDER empno

    SELECT 3
    USE ovtime ORDER empno3

    SELECT 4
    USE artime ORDER empno2

    SELECT 5
    USE deptt ORDER deptcode

    SELECT 6
    USE month ORDER mcode

    SELECT 1
    SET RELATION TO str(deptcode)+str(empno) INTO employee ADDITIVE
    SET RELATION TO str(deptcode)+str(atord)+str(empno) INTO ovtime ADDITIVE
    SET RELATION TO str(deptcode)+str(empno) INTO artime ADDITIVE
    SET RELATION TO deptcode INTO deptt ADDITIVE
    SET RELATION TO mcode INTO month ADDITIVE

    CLEAR

    PUBLIC Vp
    Vp = space(1)

    @ 11,19 SAY “Report to Printer or View (P/V) ? “
    @ ROW(),COL() GET Vp PICT “@!” VALID INLIST(Vp,’P’,’V’);
    ERROR “(P)rinter,(V)iew “
    READ

    DO CASE

    CASE Vp = "P"
    
        REPORT FORM ATsheet4.FRX TO PRINTER NOEJECT
    
    CASE Vp = "V"
    
        REPORT FORM ATsheet4.FRX PREVIEW
    

    ENDCASE

    CLEAR
    CLOSE DATA

    BACKGRND.PRG

    • ÖÄÄÄÄÄÄÄÄÄÄÄÄÄÄÄÄÄÄÄÄÄÄÄÄÄÄÄÄÄÄÄÄÄÄÄÄÄÄÄÄÄÄÄÄÄÄÄÄÄÄÄÄÄÄÄÄÄ·
    • º º
    • º 11/18/95 BACKGRND.SPR 17:42:11 º
    • º º
    • ÇÄÄÄÄÄÄÄÄÄÄÄÄÄÄÄÄÄÄÄÄÄÄÄÄÄÄÄÄÄÄÄÄÄÄÄÄÄÄÄÄÄÄÄÄÄÄÄÄÄÄÄÄÄÄÄÄĶ
    • º º
    • º Author’s Name º
    • º º
    • º Copyright (c) 1995 Company Name º
    • º Address º
    • º City, Zip º
    • º º
    • º Description: º
    • º This program was automatically generated by GENSCRN. º
    • º º
    • ÓÄÄÄÄÄÄÄÄÄÄÄÄÄÄÄÄÄÄÄÄÄÄÄÄÄÄÄÄÄÄÄÄÄÄÄÄÄÄÄÄÄÄÄÄÄÄÄÄÄÄÄÄÄÄÄÄĽ

    REGION 0

    REGIONAL m.currarea, m.talkstat, m.compstat

    IF SET(“TALK”) = “ON”
    SET TALK OFF
    m.talkstat = “ON”
    ELSE
    m.talkstat = “OFF”
    ENDIF
    m.compstat = SET(“COMPATIBLE”)
    SET COMPATIBLE FOXPLUS

    • ÖÄÄÄÄÄÄÄÄÄÄÄÄÄÄÄÄÄÄÄÄÄÄÄÄÄÄÄÄÄÄÄÄÄÄÄÄÄÄÄÄÄÄÄÄÄÄÄÄÄÄÄÄÄÄÄÄÄ·
    • º º
    • º MS-DOS Window definitions º
    • º º
    • ÓÄÄÄÄÄÄÄÄÄÄÄÄÄÄÄÄÄÄÄÄÄÄÄÄÄÄÄÄÄÄÄÄÄÄÄÄÄÄÄÄÄÄÄÄÄÄÄÄÄÄÄÄÄÄÄÄĽ
      *
    • ÖÄÄÄÄÄÄÄÄÄÄÄÄÄÄÄÄÄÄÄÄÄÄÄÄÄÄÄÄÄÄÄÄÄÄÄÄÄÄÄÄÄÄÄÄÄÄÄÄÄÄÄÄÄÄÄÄÄ·
    • º º
    • º BACKGRND/MS-DOS Screen Layout º
    • º º
    • ÓÄÄÄÄÄÄÄÄÄÄÄÄÄÄÄÄÄÄÄÄÄÄÄÄÄÄÄÄÄÄÄÄÄÄÄÄÄÄÄÄÄÄÄÄÄÄÄÄÄÄÄÄÄÄÄÄĽ
      *

    REGION 1

    @ 24,77 SAY “°°°” ;
    SIZE 1,3, 0
    @ 1,0 SAY “°°” ;
    SIZE 1,2, 0
    @ 1,2 SAY “°°°°°°°°°°°°°°°°°°°°°°°°°°°°°°°°°°°°°°°°°°°°°°°°°°°°°°°°°°°°°°°°°°°°°°°°°°°” ;
    SIZE 1,75, 0
    @ 2,0 SAY “°°°°°°°°°°°°°°°°°°°°°°°°°°°°°°°°°°°°°°°°°°°°°°°°°°°°°°°°°°” ;
    SIZE 1,58, 0
    @ 3,0 SAY “°°” ;
    SIZE 1,2, 0
    @ 3,2 SAY “°°°°°°°°°°°°°°°°°°°°°°°°°°°°°°°°°°°°°°°°°°°°°°°°°°°°°°°°°°°°°°°°°°°°°°°°°°°” ;
    SIZE 1,75, 0
    @ 4,0 SAY “°°°°°°°°°°°°°°°°°°°°°°°°°°°°°°°°°°°°°°°°°°°°°°°°°°°°°°°°°°” ;
    SIZE 1,58, 0
    @ 5,0 SAY “°°” ;
    SIZE 1,2, 0
    @ 5,2 SAY “°°°°°°°°°°°°°°°°°°°°°°°°°°°°°°°°°°°°°°°°°°°°°°°°°°°°°°°°°°°°°°°°°°°°°°°°°°°” ;
    SIZE 1,75, 0
    @ 6,0 SAY “°°°°°°°°°°°°°°°°°°°°°°°°°°°°°°°°°°°°°°°°°°°°°°°°°°°°°°°°°°” ;
    SIZE 1,58, 0
    @ 7,0 SAY “°°” ;
    SIZE 1,2, 0
    @ 7,2 SAY “°°°°°°°°°°°°°°°°°°°°°°°°°°°°°°°°°°°°°°°°°°°°°°°°°°°°°°°°°°°°°°°°°°°°°°°°°°°” ;
    SIZE 1,75, 0
    @ 8,0 SAY “°°°°°°°°°°°°°°°°°°°°°°°°°°°°°°°°°°°°°°°°°°°°°°°°°°°°°°°°°°” ;
    SIZE 1,58, 0
    @ 9,0 SAY “°°” ;
    SIZE 1,2, 0
    @ 9,2 SAY “°°°°°°°°°°°°°°°°°°°°°°°°°°°°°°°°°°°°°°°°°°°°°°°°°°°°°°°°°°°°°°°°°°°°°°°°°°°” ;
    SIZE 1,75, 0
    @ 10,0 SAY “°°°°°°°°°°°°°°°°°°°°°°°°°°°°°°°°°°°°°°°°°°°°°°°°°°°°°°°°°°” ;
    SIZE 1,58, 0
    @ 11,0 SAY “°°” ;
    SIZE 1,2, 0
    @ 11,2 SAY “°°°°°°°°°°°°°°°°°°°°°°°°°°°°°°°°°°°°°°°°°°°°°°°°°°°°°°°°°°°°°°°°°°°°°°°°°°°” ;
    SIZE 1,75, 0
    @ 12,0 SAY “°°°°°°°°°°°°°°°°°°°°°°°°°°°°°°°°°°°°°°°°°°°°°°°°°°°°°°°°°°” ;
    SIZE 1,58, 0
    @ 13,0 SAY “°°” ;
    SIZE 1,2, 0
    @ 13,2 SAY “°°°°°°°°°°°°°°°°°°°°°°°°°°°°°°°°°°°°°°°°°°°°°°°°°°°°°°°°°°°°°°°°°°°°°°°°°°°” ;
    SIZE 1,75, 0
    @ 14,0 SAY “°°°°°°°°°°°°°°°°°°°°°°°°°°°°°°°°°°°°°°°°°°°°°°°°°°°°°°°°°°” ;
    SIZE 1,58, 0
    @ 15,0 SAY “°°” ;
    SIZE 1,2, 0
    @ 15,2 SAY “°°°°°°°°°°°°°°°°°°°°°°°°°°°°°°°°°°°°°°°°°°°°°°°°°°°°°°°°°°°°°°°°°°°°°°°°°°°” ;
    SIZE 1,75, 0
    @ 16,0 SAY “°°°°°°°°°°°°°°°°°°°°°°°°°°°°°°°°°°°°°°°°°°°°°°°°°°°°°°°°°°” ;
    SIZE 1,58, 0
    @ 17,0 SAY “°°” ;
    SIZE 1,2, 0
    @ 17,2 SAY “°°°°°°°°°°°°°°°°°°°°°°°°°°°°°°°°°°°°°°°°°°°°°°°°°°°°°°°°°°°°°°°°°°°°°°°°°°°” ;
    SIZE 1,75, 0
    @ 18,0 SAY “°°°°°°°°°°°°°°°°°°°°°°°°°°°°°°°°°°°°°°°°°°°°°°°°°°°°°°°°°°” ;
    SIZE 1,58, 0
    @ 19,0 SAY “°°” ;
    SIZE 1,2, 0
    @ 19,2 SAY “°°°°°°°°°°°°°°°°°°°°°°°°°°°°°°°°°°°°°°°°°°°°°°°°°°°°°°°°°°°°°°°°°°°°°°°°°°°” ;
    SIZE 1,75, 0
    @ 0,58 SAY “°°°°°°°°°°°°°°°°°°°” ;
    SIZE 1,19, 0
    @ 2,58 SAY “°°°°°°°°°°°°°°°°°°°” ;
    SIZE 1,19, 0
    @ 4,58 SAY “°°°°°°°°°°°°°°°°°°°” ;
    SIZE 1,19, 0
    @ 6,58 SAY “°°°°°°°°°°°°°°°°°°°” ;
    SIZE 1,19, 0
    @ 8,58 SAY “°°°°°°°°°°°°°°°°°°°” ;
    SIZE 1,19, 0
    @ 10,58 SAY “°°°°°°°°°°°°°°°°°°°” ;
    SIZE 1,19, 0
    @ 12,58 SAY “°°°°°°°°°°°°°°°°°°°” ;
    SIZE 1,19, 0
    @ 14,58 SAY “°°°°°°°°°°°°°°°°°°°” ;
    SIZE 1,19, 0
    @ 16,58 SAY “°°°°°°°°°°°°°°°°°°°” ;
    SIZE 1,19, 0
    @ 18,58 SAY “°°°°°°°°°°°°°°°°°°°” ;
    SIZE 1,19, 0
    @ 20,0 SAY “°°°°°°°°°°°°°°°°°°°°°°°°°°°°°°°°°°°°°°°°°°°°°°°°°°°°°°°°°°°°°°°°°°°°°°°°°°°°°” ;
    SIZE 1,77, 0
    @ 21,0 SAY “°°°°°°°°°°°°°°°°°°°°°°°°°°°°°°°°°°°°°°°°°°°°°°°°°°°°°°°°°°°°°°°°°°°°°°°°°°°°°” ;
    SIZE 1,77, 0
    @ 22,0 SAY “°°°°°°°°°°°°°°°°°°°°°°°°°°°°°°°°°°°°°°°°°°°°°°°°°°°°°°°°°°°°°°°°°°°°°°°°°°°°°” ;
    SIZE 1,77, 0
    @ 23,1 SAY “°°°°°°°°°°°°°°°°°°°°°°°°°°°°°°°°°°°°°°°°°°°°°°°°°°°°°°°°°°°°°°°°°°°°°°°°°°°°°” ;
    SIZE 1,77, 0
    @ 0,77 SAY “°°°” ;
    SIZE 1,3, 0
    @ 1,77 SAY “°°°” ;
    SIZE 1,3, 0
    @ 2,77 SAY “°°°” ;
    SIZE 1,3, 0
    @ 3,77 SAY “°°°” ;
    SIZE 1,3, 0
    @ 4,77 SAY “°°°” ;
    SIZE 1,3, 0
    @ 5,77 SAY “°°°” ;
    SIZE 1,3, 0
    @ 6,77 SAY “°°°” ;
    SIZE 1,3, 0
    @ 7,77 SAY “°°°” ;
    SIZE 1,3, 0
    @ 8,77 SAY “°°°” ;
    SIZE 1,3, 0
    @ 9,77 SAY “°°°” ;
    SIZE 1,3, 0
    @ 10,77 SAY “°°°” ;
    SIZE 1,3, 0
    @ 11,77 SAY “°°°” ;
    SIZE 1,3, 0
    @ 12,77 SAY “°°°” ;
    SIZE 1,3, 0
    @ 13,77 SAY “°°°” ;
    SIZE 1,3, 0
    @ 14,77 SAY “°°°” ;
    SIZE 1,3, 0
    @ 15,77 SAY “°°°” ;
    SIZE 1,3, 0
    @ 16,77 SAY “°°°” ;
    SIZE 1,3, 0
    @ 17,77 SAY “°°°” ;
    SIZE 1,3, 0
    @ 18,77 SAY “°°°” ;
    SIZE 1,3, 0
    @ 19,77 SAY “°°°” ;
    SIZE 1,3, 0
    @ 20,77 SAY “°°°” ;
    SIZE 1,3, 0
    @ 21,77 SAY “°°°” ;
    SIZE 1,3, 0
    @ 22,77 SAY “°°°” ;
    SIZE 1,3, 0
    @ 23,77 SAY “°°°” ;
    SIZE 1,3, 0
    @ 22,22 SAY “Designed & Developed by Amjad Izhar” ;
    SIZE 1,35, 0
    @ 0,4 SAY “°°°°°°°°°°°° P°°° A°°° Y°°° R°°° O°°° L°°° L°°°°°°°°°°°°°°°°°°°°°°°°°°°°” ;
    SIZE 1,72, 0
    @ 0,0 SAY “°°” ;
    SIZE 1,2, 0
    @ 0,2 SAY “°°” ;
    SIZE 1,2, 0
    @ 24,0 SAY “°°°°°°°°°°°°°°°°°°°°°°°°°°°°°°°°°°°°°°°°°°°°°°°°°°°°°°°°°°°°°°°°°°°°°°°°°°°°°” ;
    SIZE 1,77, 0
    @ 23,0 SAY “°” ;
    SIZE 1,1, 0

    REGION 0

    IF m.talkstat = “ON”
    SET TALK ON
    ENDIF
    IF m.compstat = “ON”
    SET COMPATIBLE ON
    ENDIF

    BACKGRWN.PRG

    • *
    • *
    • * 09/03/96 BACKGRWN.SPR 12:44:18
    • *
    • *
    • *
    • * Author’s Name
    • *
    • * Copyright (c) 1996 Company Name
    • * Address
    • * City, Zip
    • *
    • * Description:
    • * This program was automatically generated by GENSCRN.
    • *
    • *

    REGION 0

    REGIONAL m.currarea, m.talkstat, m.compstat

    IF SET(“TALK”) = “ON”
    SET TALK OFF
    m.talkstat = “ON”
    ELSE
    m.talkstat = “OFF”
    ENDIF
    m.compstat = SET(“COMPATIBLE”)
    SET COMPATIBLE FOXPLUS

    m.rborder = SET(“READBORDER”)
    SET READBORDER ON

    m.currarea = SELECT()

    • *
    • *
    • * Windows Window definitions
    • *
    • *
      *

    IF _DOS
    MODIFY WINDOW SCREEN ;
    AT 0.000, 0.000 ;
    SIZE 30.769,125.000 ;
    FONT “MS Sans Serif”, 8 ;
    NOFLOAT ;
    NOCLOSE ;
    NOMINIMIZE ;
    FILL FILE LOCFILE(“REDBRICK.BMP”,”BMP|ICO|PCT|ICN”, ;
    “Where is redbrick?”)
    ENDIF

    CLEAR

    • *
    • *
    • * BACKGRWN/Windows Screen Layout
    • *
    • *
      *

    REGION 1

    IF _DOS
    @ 27.308,2.000 SAY (LOCFILE(“copyrite.bmp”,”BMP|ICO|PCT|ICN”, “Where is copyrite?” )) BITMAP ;
    SIZE 1.615,4.200 ;
    STYLE “T”
    ENDIF

    DO top IN tbl_proc.PRG
    DO bot IN tbl_proc.PRG

    @ 11,58 SAY “P A Y R O L L – M A I N M E N U” FONT ‘FoxFont’,11
    @ 37,141 SAY “P a y r o l l” FONT “Times New Roman”, 14 STYLE “BIT”

    *@ 25.769,6.800 SAY “Designed & Developed By: Amjad Izhar. amjad18@yahoo.com” ;

    • FONT “Busorama Md BT”, 10 ;
    • STYLE “BT” ;
    • COLOR RGB(0,255,0,,,,)

    *@ 27.462,7.000 SAY “Dada Industries. 2015-16” ;

    • FONT “Photina”, 12 ;
    • STYLE “BT” ;
    • COLOR RGB(255,255,0,,,,)

    SELECT (m.currarea)

    REGION 0

    SET READBORDER &rborder

    IF m.talkstat = “ON”
    SET TALK ON
    ENDIF
    IF m.compstat = “ON”
    SET COMPATIBLE ON
    ENDIF

    BACKUP.PRG

    !PKZIP DBFS.ZIP *.DBF
    !PKZIP CDX.ZIP *.CDX
    !PKZIP FPT.ZIP *.FPT
    !PKZIP PRGS.ZIP *.PRG

    BHM_PROC.PRG


    • PROGRAM: BHM_PROC.PRG
    • Author: Amjad Izhar
    • Budget Heads Maintenance
    • Revised Again On : 18-01-2001

    • 1 – Budget Heads ….. Creation budg_ent
    • 2 – Budget Heads ….. Printing/Display budg_prt

    • 1 – Budget Heads ….. Creation budg_ent *

    PROCEDURE budg_ent


    CLEAR
    CLOSE ALL
    SET CONFIRM OFF

    IF _DOS
    SET COLOR TO 7/1
    ENDIF

    SELECT 1
    USE ldgrcode ORDER ac1

    SELECT 3
    USE chart ORDER crt

    STORE 0 TO MC1, MC2, MC3
    DO WHILE .T.
    CLEAR
    DO top IN tbl_proc.prg

    IF _DOS
    SET COLOR TO +7/1
    ENDIF

    @ 6, 25 SAY ‘Budget Maintenance Entry ‘

    IF _DOS
    SET COLOR TO 7/1
    ENDIF

    @ 23, 1 TO 23, 79
    SELECT 1

    IF _DOS
    SET COLOR TO 7/1
    ENDIF

    @ 24, 51 SAY ‘Press Ctrl Q To Quit ‘
    @ 8, 8 SAY ‘Ledger Head Code ‘

    IF _DOS
    SET COLOR TO /w
    ENDIF

    @ 8, 30 SAY ‘ – – ‘
    @ 8, 30 GET MC1 PICTURE ‘@z 99’

    IF _DOS
    SET COLOR TO 7/1
    ENDIF

    READ
    IF READKEY()=12
    CLEAR
    CLOSE ALL
    SET CONFIRM OFF
    RETURN
    ENDIF
    @ 24, 50 CLEAR TO 24, 78
    IF MC1=0
    LOOP
    ENDIF
    SELECT 3
    SET FILTER TO MC1>=FR.and.MC1<=TO GOTO TOP IF MC1>=FR.and.MC1<=TO
    SEEK STR(FR,2)+STR(TO,2)
    IF FOUND()
    MCH= CHART
    ENDIF
    ENDIF
    SET FILTER TO
    SELECT 1
    IF MC1<10
    @ 24, 1 SAY ‘Code C1 less than 10 not allowed.’
    WAIT ”
    @ 24, 1
    LOOP
    ENDIF

    IF _DOS
    SET COLOR TO *+7/1
    ENDIF

    @ 8, 50 SAY MCH

    IF _DOS
    SET COLOR TO 7/1
    ENDIF

    IF MC1>99.and.MC1<100

    IF _DOS
    SET COLOR TO *+7/1
    ENDIF

      @ 8, 50 SAY 'Not Defined Head      '
    

    IF _DOS
    SET COLOR TO 7/1
    ENDIF

    ENDIF
    MPC1= REPLICATE(‘0’,2-LEN(LTRIM(STR(MC1))))+LTRIM(STR(MC1))

    IF _DOS
    SET COLOR TO /w
    ENDIF

    @ 8, 30 SAY MPC1
    @ 8, 33 GET MC2 PICTURE ‘@z 99’
    READ
    MPC2= REPLICATE(‘0’,2-LEN(LTRIM(STR(MC2))))+LTRIM(STR(MC2))
    @ 8, 33 SAY MPC2
    @ 8, 36 GET MC3 PICTURE ‘@z 999’
    READ
    MPC3= REPLICATE(‘0’,3-LEN(LTRIM(STR(MC3))))+LTRIM(STR(MC3))
    @ 8, 36 SAY MPC3

    IF _DOS
    SET COLOR TO 7/1
    ENDIF

    IF READKEY()=12
    CLOSE DATA
    CLEAR
    RETURN
    ENDIF
    SELECT 1
    STORE STR(MC1,2)+STR(MC2,2)+STR(MC3,3) TO MLCODE
    SEEK MLCODE
    IF .not. FOUND()
    @ 24, 15 SAY ‘This Code Does Not Exist — Please Re-try ‘
    WAIT ”
    @ 24, 8 CLEAR TO 24, 63
    LOOP
    ENDIF
    IF MC3=0
    @ 12, 1 CLEAR TO 22, 79
    @ 12, 8 SAY ‘ Note:- Three zeros at the end of the ledger code’
    @ 13, 8 SAY ‘ will make it a consolidation head i.e you’
    @ 14, 8 SAY ‘ will not be able to Post Transactions’
    @ 15, 8 SAY ‘ directly into this head.’
    @ 16, 8 SAY ‘ Hit any key to continue ……….’
    WAIT ”
    CLEAR
    LOOP
    ENDIF
    @ 10, 8 SAY ‘Title of Ledger Head ‘ GET TITLE
    CLEAR GETS
    IF SR_NO>1
    @ 14, 17 SAY ‘Transactions already exist for this ‘
    @ 15, 17 SAY ‘Ledger Head therefore you can only ‘
    @ 16, 17 SAY ‘make changes in the Title and cannot ‘
    @ 17, 17 SAY ‘make changes in the Budget Amount ‘
    WAIT ”
    CLEAR
    LOOP
    ENDIF
    IF SR_NO=1.and.C3<>0
    @ 12, 8 SAY ‘Budget Amount Rs. ‘ GET BUDGET PICTURE ‘999999999.99’
    READ
    ENDIF
    Q= ‘ ‘
    DO WHILE .not. Q$’YN’
    @ 24, 25 SAY ‘More Data Entry – Y/N’ GET Q FUNCTION ‘!’
    READ
    ENDDO
    IF Q=’N’
    CLEAR
    CLOSE ALL
    SET CONFIRM OFF
    RETURN
    ENDIF
    MC3= MC3+1
    ENDDO

    RETURN


    • 2 – Budget Heads ….. Printing/Display budg_prt *

    PROCEDURE budg_prt


    CLEAR
    CLOSE ALL
    USE ldgrcode ORDER ac1

    IF RECCOUNT()=0
    CLEAR
    @ 12, 12 SAY ‘No Ledger Heads Exist in Data File – Press any key to return to menu …. ‘
    WAIT ”
    CLEAR
    CLOSE ALL
    RETURN
    ENDIF
    P= ‘ ‘
    DO WHILE .not. P$’PSQ’
    @ 23, 45 SAY ‘Printer/Screen/Quit – P/S/Q ‘ GET P FUNCTION ‘!’
    READ
    ENDDO
    IF P=’Q’
    CLOSE ALL
    CLEAR
    RETURN
    ENDIF
    IF P=’S’
    CLEAR
    SET PRINTER OFF
    SET DEVICE TO SCREEN
    ELSE
    CLEAR
    PANS= ‘ ‘
    do PRNCHK in tbl_proc
    IF PANS=’Q’
    CLOSE ALL
    CLEAR
    RETURN
    ENDIF
    @ 11, 20 SAY ‘Please wait … Printing in progress ‘
    SET PRINTER ON
    SET DEVICE TO PRINTER
    ENDIF
    HEADING= .T.
    PAGE= 0
    DO WHILE .not. EOF()
    IF HEADING
    L= 3
    PAGE= PAGE+1
    IF P=’P’
    DO top_prt1 IN tbl_proc.prg
    @ 3, 15 SAY CHR(18)
    @ 3, 33 SAY ‘BUDGET HEADS’
    @ 4, 32 SAY ‘————–‘
    @ 4, 65 SAY ‘Page -‘
    @ 4, 71 SAY PAGE PICTURE ’99’
    L= L+1
    ELSE
    DO screen IN tbl_proc.prg
    @ 3, 30 SAY ‘BUDGET HEADS’
    L= L+1
    @ L, 30 SAY ‘————– Page – ‘
    @ L, 70 SAY PAGE PICTURE ‘999’
    ENDIF
    L= L+2
    @ L, 7 SAY ‘Code’
    @ L, 28 SAY ‘Title’
    @ L, 52 SAY ‘Budget’
    L= L+1
    @ L, 5 SAY REPLICATE(‘-‘,72)
    HEADING= .F.
    ENDIF
    IF C3=0
    SKIP
    LOOP
    ENDIF
    IF BUDGET=0
    SKIP
    LOOP
    ENDIF
    L= L+1
    IF C2=0.and.C3=0.and.RIGHT(STR(C1),1)=’0′
    L= L+1
    MPC1= REPLICATE(‘0’,2-LEN(LTRIM(STR(C1))))+LTRIM(STR(C1))
    @ L, 5 SAY MPC1
    @ L, 7 SAY ‘-‘
    MPC2= REPLICATE(‘0’,2-LEN(LTRIM(STR(C2))))+LTRIM(STR(C2))
    @ L, 8 SAY MPC2
    @ L, 10 SAY ‘-‘
    MPC3= REPLICATE(‘0’,3-LEN(LTRIM(STR(C3))))+LTRIM(STR(C3))
    @ L, 11 SAY MPC3
    @ L, 20 SAY TITLE
    MLEN= LEN(RTRIM(TITLE))
    L= L+1
    @ L, 5 SAY REPLICATE(‘-‘,15+MLEN)
    ENDIF
    IF C3=0.and.RIGHT(STR(C1),1)<>’0′
    L= L+1
    MPC1= REPLICATE(‘0’,2-LEN(LTRIM(STR(C1))))+LTRIM(STR(C1))
    @ L, 5 SAY MPC1
    @ L, 7 SAY ‘-‘
    MPC2= REPLICATE(‘0’,2-LEN(LTRIM(STR(C2))))+LTRIM(STR(C2))
    @ L, 8 SAY MPC2
    @ L, 10 SAY ‘-‘
    MPC3= REPLICATE(‘0’,3-LEN(LTRIM(STR(C3))))+LTRIM(STR(C3))
    @ L, 11 SAY MPC3
    @ L, 20 SAY TITLE
    ELSE
    IF C3<>0
    MPC1= REPLICATE(‘0’,2-LEN(LTRIM(STR(C1))))+LTRIM(STR(C1))
    @ L, 8 SAY MPC1
    @ L, 10 SAY ‘-‘
    MPC2= REPLICATE(‘0’,2-LEN(LTRIM(STR(C2))))+LTRIM(STR(C2))
    @ L, 11 SAY MPC2
    @ L, 13 SAY ‘-‘
    MPC3= REPLICATE(‘0’,3-LEN(LTRIM(STR(C3))))+LTRIM(STR(C3))
    @ L, 14 SAY MPC3
    @ L, 20 SAY TITLE
    ENDIF
    ENDIF
    @ L, 45 SAY BUDGET PICTURE ‘999,999,999.99’
    SKIP
    IF EOF()
    IF P=’P’
    EJECT
    SET PRINTER OFF
    SET DEVICE TO SCREEN
    ENDIF
    ENDIF
    IF P=’S’
    IF L>21
    @ 24, 15 SAY ”
    XYZ= ‘ ‘
    DO WHILE .not. XYZ$’CQ’
    SET CONFIRM OFF
    @ 24, 55 SAY ‘Continue/Quit – C/Q ‘ GET XYZ FUNCTION ‘!’
    READ
    ENDDO
    IF XYZ=’Q’
    CLEAR
    CLOSE ALL
    RETURN
    ENDIF
    CLEAR
    L= 3
    HEADING= .T.
    ENDIF
    ENDIF
    IF P=’P’
    IF L>56
    EJECT
    L= 3
    HEADING= .T.
    ENDIF
    ENDIF
    ENDDO
    IF P=’S’
    @ 24, 7 SAY ‘End of Screen Printing – Press any key to return to menu…. ‘
    WAIT ”
    ELSE
    EJECT
    SET PRINTER OFF
    SET DEVICE TO SCREEN
    ENDIF
    CLOSE ALL

    RETURN


  • Visual Basic and VB.NET Books

    Visual Basic and VB.NET Books

    My Visual Basic and VB.NET books in Video Books format.

    Visual Basic & SQL Server Hitchhiker’s Guide
    Visual Basic NET Databases

    By Amjad Izhar
    Contact: amjad.izhar@gmail.com
    https://amjadizhar.blog

  • Kashmir Conflict: Origins, Exodus, and International Involvement

    Kashmir Conflict: Origins, Exodus, and International Involvement

    The provided text is a comprehensive overview of the Kashmir conflict, extracted from a Wikipedia article. It covers the historical background, including the partition, wars between India and Pakistan, and UN mediation attempts. The resource examines internal conflicts, political movements, the rise of separatism, and human rights abuses in the region. The text presents the national stances of India, Pakistan, China, and Kashmiri people regarding the region, alongside efforts to resolve the ongoing dispute. Furthermore, the resource explores Pakistan’s relationship with militants, Al-Qaeda’s involvement, and other recent developments, such as the revocation of Kashmir’s special status by India.

    The Kashmir Conflict: A Study Guide

    Quiz

    Instructions: Answer the following questions in 2-3 sentences each.

    1. What was the primary reason given by Maharaja Hari Singh for initially choosing to remain independent in 1947?
    2. What was the “Instrument of Accession” and what did it entail?
    3. What is the “Dixon Plan” and why did it ultimately fail?
    4. Describe Nehru’s initial stance on a plebiscite in Kashmir and how it changed over time.
    5. What was “Operation Gibraltar” and what was its goal?
    6. What was the initial objective of the Jammu Kashmir Liberation Front (JKLF) and how did other groups change the dynamic of the conflict?
    7. What is Article 370 of the Indian constitution, and what did it grant to Jammu and Kashmir?
    8. Briefly describe the events of the 1989 popular insurgency and militancy.
    9. What roles are associated with the Inter-Services Intelligence (ISI)?
    10. What impact has militancy had on the demographics of the Kashmir Valley?

    Quiz Answer Key

    1. Maharaja Hari Singh chose to remain independent initially because he believed that the State’s Muslims would be unhappy with accession to India, and the Hindus and Sikhs would become vulnerable if he joined Pakistan. He hoped to maintain peace and stability within his diverse kingdom.
    2. The Instrument of Accession was a legal document signed by Maharaja Hari Singh in October 1947, acceding the State of Jammu and Kashmir to the Union of India. In exchange for military assistance, the Maharaja transferred control of defense, external affairs, and communications to India.
    3. The Dixon Plan was proposed by UN mediator Sir Owen Dixon, suggesting a plebiscite be limited to the Kashmir Valley while recognizing the pro-India sentiments in Jammu and Ladakh, and pro-Pakistan sentiments in Azad Kashmir and the Northern Areas. It failed because Pakistan believed that India’s commitment to a plebiscite for the whole state should not be abandoned, and India rejected the plan and wanted to keep troops in Kashmir for security purposes.
    4. Nehru initially offered a plebiscite after law and order were restored in Kashmir, promising the people the right to decide their future. However, his stance evolved, and he later withdrew the plebiscite offer, primarily due to Pakistan’s military pact with the United States and skepticism about the plebiscite’s wisdom and practicality.
    5. Operation Gibraltar was a covert operation launched by Pakistan in 1965, involving the infiltration of Pakistani soldiers and irregulars into Indian-administered Kashmir. The goal was to incite a local rebellion and destabilize the region, leading to its annexation by Pakistan.
    6. The JKLF initially aimed for the complete independence of the former princely state of Jammu and Kashmir from both India and Pakistan. Later, other groups like Hizbul Mujahideen, supported by Pakistan, emerged with the goal of merging with Pakistan and introducing an Islamist dimension to the conflict.
    7. Article 370 granted special autonomous status to the state of Jammu and Kashmir within the Indian constitution. It specified that the State must concur in the application of laws by the Indian parliament, except those that pertain to Communications, Defence and Foreign Affairs.
    8. The 1989 insurgency erupted in the Indian-administered Kashmir Valley due to years of political disenfranchisement, alienation, and with logistical support from Pakistan. This insurgency was driven by separatist sentiments and led to widespread violence and displacement.
    9. The Inter-Services Intelligence (ISI) is Pakistan’s intelligence agency and it has been accused of having provided weapons, training, advice, and planning assistance to militant outfits operating in Jammu and Kashmir, especially in the 1990s and early 2000s. Some believe that the ISI was also coordinating the shipment of arms from the Pakistani side of Kashmir to the Indian side.
    10. The militancy in Kashmir resulted in the exodus of Kashmiri Hindus (Pandits) from the predominantly Muslim Kashmir Valley in the early 1990s, significantly altering the region’s demographic composition. A minimum of 506,000 people in the Indian-administered Kashmir Valley are internally displaced due to militancy in Kashmir, about half of whom are Hindu pandits.

    Essay Questions

    Instructions: Choose one of the following questions and write a well-organized essay addressing the prompt, using evidence from the source material.

    1. Analyze the role of external actors, specifically Pakistan and the United Nations, in shaping the trajectory of the Kashmir conflict.
    2. Discuss the evolution of Kashmiri identity and political movements from the Dogra rule to the rise of separatism in the late 20th century.
    3. Evaluate the arguments for and against holding a plebiscite in Kashmir, considering the historical context and contemporary views.
    4. Explore the human rights abuses committed by both state and non-state actors in the Kashmir conflict, and their impact on the civilian population.
    5. Assess the significance of the revocation of Article 370 in 2019 and its potential implications for the future of the region.

    Glossary of Key Terms

    • Instrument of Accession: A legal document signed by Maharaja Hari Singh in 1947, acceding the State of Jammu and Kashmir to India.
    • Plebiscite: A direct vote by eligible voters to decide on an important question, such as sovereignty or political status.
    • Line of Control (LOC): The de facto border between Indian-administered and Pakistani-administered Kashmir, established after the Indo-Pakistani War of 1947.
    • Article 370: A provision in the Indian constitution that granted special autonomous status to Jammu and Kashmir, allowing it to have its own constitution and laws.
    • Azad Kashmir: A region administered by Pakistan, also known as Pakistan-administered Kashmir.
    • Gilgit-Baltistan: A region administered by Pakistan, formerly known as the Northern Areas.
    • Kashmiri Pandits: A Hindu minority community native to the Kashmir Valley, many of whom were displaced due to militancy.
    • Militancy/Insurgency: Armed resistance or rebellion against a government or authority, often involving guerilla warfare tactics.
    • Inter-Services Intelligence (ISI): The primary intelligence agency of Pakistan.
    • Dogra Dynasty: The Hindu dynasty that ruled the princely state of Jammu and Kashmir from 1846 to 1947.
    • National Conference: A major political party in Jammu and Kashmir, initially led by Sheikh Abdullah.
    • Muslim Conference: A political party in Jammu and Kashmir that advocated for the rights of Muslims and later supported accession to Pakistan.
    • Operation Gibraltar: A covert operation launched by Pakistan in 1965, involving the infiltration of Pakistani soldiers into Indian-administered Kashmir.
    • UN Resolutions: Resolutions passed by the United Nations Security Council regarding the Kashmir dispute, calling for a plebiscite and peaceful resolution.
    • Jihad: A religious term referring to a struggle or striving, often interpreted as a holy war by some Islamist groups.
    • Razakars: Volunteers.
    • Mujahideen: Guerrilla fighters in Islamic countries, especially those who are fighting against non-Muslim forces.
    • Aburi Hakoomat: Provisional government.
    • Sadr-i-Riyasat: Constitutional Head of State.

    The Kashmir Conflict: Historical Background, Stances, and Key Issues

    Kashmir Conflict: Briefing Document

    This document provides a briefing on the Kashmir conflict based on the provided Wikipedia excerpt. It covers the historical background, key events, national stances, and ongoing issues related to this protracted dispute.

    I. Historical Background and Key Events:

    • Princely State and Partition: From 1846 to 1947, Kashmir was a princely state ruled by the Dogra dynasty under British paramountcy. “According to the 1941 census, the state’s population was 77 percent Muslim, 20 percent Hindu and 3 percent others (Sikhs and Buddhists).” Despite the Muslim majority, the Hindu Maharaja Hari Singh initially chose to remain independent after the partition of India and Pakistan.
    • Accession to India: Faced with a tribal invasion from Pakistan in 1947, the Maharaja signed the Instrument of Accession to India. “Accordingly, the Maharaja signed an instrument of accession on 26 October 1947, which was accepted by the Governor General the next day.” India accepted the accession but with the “proviso that it would be submitted to a ‘reference to the people’ after the state is cleared of the invaders.”
    • Indo-Pakistani Wars: The conflict triggered the first Indo-Pakistani War in 1947. Further wars in 1965 and 1971, and the Kargil conflict in 1999, were also linked to the Kashmir dispute.
    • Internal Conflict and Insurgency: “In 1989, an armed insurgency erupted against Indian rule in Indian-administered Kashmir Valley, after years of political disenfranchisement and alienation, with logistical support from Pakistan.” This insurgency, initially driven by Kashmiri separatists, was later fueled by Pakistan-backed Jihadist groups. The insurgency led to the exodus of Kashmiri Hindus (Pandits) and increased militarization in the region.
    • Article 370: The Indian Constitution included Article 370, granting special autonomous status to Jammu and Kashmir. This article has been a point of contention, with some advocating for its abrogation and full integration of Kashmir into India. It specified that the State must concur in the application of laws by Indian parliament, except those that pertain to Communications, Defence and Foreign Affairs. Central Government could not exercise its power to interfere in any other areas of governance of the state.
    • Post 2000s: “The 2010s were marked by civil unrest within the Kashmir Valley, fuelled by unyielding militarisation, rights violations, mis-rule and corruption,” demonstrating the ongoing tensions. Further unrest in the region erupted after the 2019 Pulwama attack.

    II. National Stances:

    • India: Considers Kashmir an “integral part” of India, based on the Instrument of Accession. India does not accept the two-nation theory and considers that Kashmir, despite being a Muslim-majority region, is in many ways an “integral part” of secular India. Willing to grant autonomy within the Indian constitution if there was consensus among political parties on this issue.
    • Pakistan: Maintains that Kashmir is a disputed territory and the “jugular vein of Pakistan”, whose final status should be determined by the Kashmiri people. Pakistan’s claims to the disputed region are based on the rejection of Indian claims to Kashmir, namely the Instrument of Accession.
    • China: China has a secondary role, controlling Aksai Chin and the Shaksgam Valley.
    • Kashmiri Views: A significant portion of Kashmiris desire independence or accession to Pakistan, while others support remaining with India with greater autonomy.

    III. UN Involvement and Settlement Formulas:

    • UN Mediation: The UN has been involved since 1948, passing resolutions calling for a plebiscite to determine the future of Kashmir. The UNCIP appointed its successor, Sir Owen Dixon, to implement demilitarisation prior to a statewide plebiscite.
    • Dixon Plan: Sir Owen Dixon proposed that a plebiscite be limited to the Valley, agreeing that people in Jammu and Ladakh were clearly in favor of India; equally clearly, those in Azad Kashmir and the Northern Areas wanted to be part of Pakistan. Pakistan did not accept this plan because it believed that India’s commitment to a plebiscite for the whole state should not be abandoned.
    • Contemporary Views: The article notes that, many neutral parties to the dispute have noted that the UN resolution on Kashmir is no longer relevant.

    IV. Pakistan’s Relation with Militants:

    • Support for Militancy: Several sources, including Pakistani officials, acknowledge Pakistan’s support for militant groups operating in Kashmir. “In 2009, the President of Pakistan Asif Zardari asserted at a conference in Islamabad that Pakistan had indeed created Islamic militant groups as a strategic tool for use in its geostrategic agenda and ‘to attack Indian forces in Jammu and Kashmir.’”
    • ISI Involvement: The British Government have formally accepted that there is a clear connection between Pakistan’s Inter-Services Intelligence (ISI) and three major militant outfits operating in Jammu and Kashmir, Lashkar-e-Tayiba, Jaish-e-Mohammed and Harkat-ul-Mujahideen, provided with “weapons, training, advice and planning assistance”.

    V. Human Rights Abuses:

    • Indian-Administered Kashmir: Accusations of human rights violations by Indian security forces, including extrajudicial killings, arbitrary arrests, and sexual violence. Popular perception holds that the Indian Armed Forces are more to blame for human rights violations than the separatist groups.
    • Pakistan-Administered Kashmir: Concerns regarding political freedoms, electoral credibility, and the status of women. “UNCR reports that the status of women in Pakistani-administered Kashmir is similar to that of women in Pakistan. They are not granted equal rights under the law, and their educational opportunities and choice of marriage partner remain ‘circumscribed’”.
    • Gilgit-Baltistan: The main demand of the people of Gilgit-Baltistan is constitutional status for the region as a fifth province of Pakistan. “Almost six decades after Pakistan’s independence, the constitutional status of the Federally Administered Northern Areas (Gilgit and Baltistan), once part of the former princely state of Jammu and Kashmir and now under Pakistani control, remains undetermined, with political autonomy a distant dream.”

    VI. Key Issues and Themes:

    • Self-determination vs. Territorial Integrity: The conflict revolves around the Kashmiri people’s right to self-determination versus India’s claim to territorial integrity.
    • Role of Pakistan: Pakistan’s involvement, both overt and covert, has significantly shaped the conflict.
    • Human Rights: The conflict has resulted in widespread human rights abuses on both sides.
    • Regional Instability: The Kashmir dispute remains a major source of tension between India and Pakistan, with the potential to escalate into larger conflicts.

    This briefing provides a foundation for understanding the complexities of the Kashmir conflict. Further research into specific events, political figures, and socio-economic factors is recommended for a more comprehensive analysis.

    The Kashmir Conflict: Frequently Asked Questions

    Frequently Asked Questions: The Kashmir Conflict

    • What are the historical roots of the Kashmir conflict?
    • The Kashmir conflict stems from the 1947 partition of British India into India and Pakistan. Princely states were given the choice to join either nation or remain independent. Jammu and Kashmir, a princely state with a Muslim-majority population ruled by a Hindu Maharaja, Hari Singh, initially chose to remain independent. However, an invasion by Pakistani tribesmen, combined with internal revolts, led the Maharaja to accede to India in October 1947. This accession is disputed by Pakistan, which argues that the Maharaja was an unpopular ruler who used force to suppress the Kashmiri population. The conflict has its origins in the tensions surrounding Partition, the indecision of the Maharaja, and the competing claims of India and Pakistan over the region. Also of note is that From 1846 till the 1947 partition of India, Kashmir was ruled by maharajas of Gulab Singh’s Dogra dynasty, as a princely state under British Paramountcy. The British Raj managed the defence, external affairs, and communications for the princely state and stationed a British Resident in Srinagar to oversee the internal administration. According to the 1941 census, the state’s population was 77 percent Muslim, 20 percent Hindu and 3 percent others (Sikhs and Buddhists).[ 56 ] Despite its Muslim majority, the princely rule was an overwhelmingly a Hindu-dominated state.[ 57 ] The Muslim majority suffered under the high taxes of the administration and had few opportunities for growth and advancement.
    • What is the Instrument of Accession and why is it significant?
    • The Instrument of Accession is the legal document signed by Maharaja Hari Singh in October 1947, acceding the state of Jammu and Kashmir to India. India considers this document the legal basis for its claim over Kashmir. The Indian government accepted the accession but stated that it would be submitted to a “reference to the people” (a plebiscite) after the state was cleared of invaders. Pakistan disputes the validity of the Instrument of Accession, arguing that it was obtained through “fraud and violence” and did not reflect the will of the Kashmiri people. They insist states should accede according to their majority population. The instrument, and its contested validity, remain central to the dispute.
    • What are the main positions of India and Pakistan regarding Kashmir?
    • India considers Kashmir an integral part of India by virtue of the Instrument of Accession. While willing to grant autonomy to the region, India rejects any external interference and views cross-border militancy as terrorism sponsored by Pakistan. Pakistan maintains that Kashmir is a disputed territory whose final status must be determined by the Kashmiri people through a plebiscite, citing the UN resolutions and the initial Indian promise of a reference to the people. Pakistan accuses India of human rights abuses and suppression of the Kashmiri population. They insist that the Maharaja was not a popular leader, and was regarded as a tyrant by most Kashmiris. Pakistan maintains that the Maharaja used brute force to suppress the population.
    • What role have UN resolutions played in the Kashmir conflict?
    • The United Nations has passed several resolutions on Kashmir, primarily calling for a plebiscite to determine the future of the region. These resolutions are based on the premise of allowing the Kashmiri people to exercise their right to self-determination. However, due to disagreements between India and Pakistan over the conditions for holding a plebiscite, such as troop withdrawal, the resolutions have never been implemented. Some argue that these resolutions are no longer relevant, as the conditions for a free and fair plebiscite can no longer be met.
    • What has been the impact of militancy and insurgency in Kashmir?
    • In 1989, an armed insurgency erupted against Indian rule in Indian-administered Kashmir Valley, after years of political disenfranchisement and alienation, with logistical support from Pakistan. The insurgency was actively opposed in Jammu and Ladakh, where it revived long-held demands for autonomy from Kashmiri dominance and greater integration with India. Spearheaded by a group seeking creation of an independent state based on demands for self-determination, the insurgency was taken over within the first few years of its outbreak by Pakistan-backed Jihadist groups striving for merger with Pakistan. The militancy has resulted in tens of thousands of casualties, including both combatants and civilians. It has also led to human rights abuses by both state and non-state actors, including extrajudicial killings, torture, and sexual violence. The militancy also resulted in the exodus of Kashmiri Hindus (Pandits) from the predominantly Muslim Kashmir Valley in the early 1990s. Counterinsurgency by the Indian government was coupled with repression of the local population and increased militarisation of the region, while various insurgent groups engaged in a variety of criminal activity. The 2010s were marked by civil unrest within the Kashmir Valley, fuelled by unyielding militarisation, rights violations, mis-rule and corruption, wherein protesting local youths violently clashed with Indian security forces, with large-scale demonstrations taking place during the 2010 unrest triggered by an allegedly staged encounter, and during the 2016 unrest which ensued after the killing of a young militant from a Jihadist group, who had risen to popularity through social media. Further unrest in the region erupted after the 2019 Pulwama attack.
    • What is the role of external actors, particularly China and the United States, in the Kashmir conflict?
    • China has a secondary role in the Kashmir conflict, administering the Aksai Chin region and the Shaksgam Valley, both of which are claimed by India. China officially opposes “unilateral actions” to resolve the Kashmir issue. The United States, while not directly involved in the dispute, has urged India and Pakistan to seek a bilateral solution. The US has also expressed concerns about the presence of Al-Qaeda and other terrorist groups in the region and their potential to destabilize the region and provoke conflict between India and Pakistan.
    • What are some of the human rights concerns in the region?
    • Both Indian-administered and Pakistani-administered Kashmir have been subject to significant human rights concerns. In Indian-administered Kashmir, these concerns include excessive use of force by security forces, extrajudicial killings, arbitrary arrests and detentions, torture, and restrictions on freedom of expression and assembly. Some surveys have found that in the Kashmir region itself (where the bulk of separatist and Indian military activity is concentrated), popular perception holds that the Indian Armed Forces are more to blame for human rights violations than the separatist groups. In Pakistani-administered Kashmir, concerns include restrictions on political freedoms, lack of an independent judiciary, and discrimination against women. UNCR reports that the status of women in Pakistani-administered Kashmir is similar to that of women in Pakistan. They are not granted equal rights under the law, and their educational opportunities and choice of marriage partner remain “circumscribed”. Domestic violence, forced marriage, and other forms of abuse continue to be issues of concern.
    • What are some of the proposed solutions to the Kashmir conflict?
    • Various solutions have been proposed over the years, including:
    • Plebiscite: Holding a plebiscite under UN supervision to allow the Kashmiri people to choose between joining India or Pakistan or becoming independent.
    • Partition: Dividing the territory along the Line of Control, with adjustments to reflect demographic realities and strategic considerations. The Chenab formula is also one of these.
    • Autonomy: Granting greater autonomy to both Indian-administered and Pakistani-administered Kashmir, with guarantees of human rights and democratic governance.
    • Joint Control: Establishing a joint Indo-Pakistani mechanism to manage the region, with the possibility of eventual self-governance.
    • No Solution: Maintaining the status quo, which neither side is willing to do.

    The Kashmir Conflict: History, Perspectives, and Resolution Efforts

    The Kashmir conflict is a territorial dispute over the Kashmir region, primarily between India and Pakistan, but also involving China. The conflict began after the partition of India in 1947, with both India and Pakistan claiming the entire former princely state of Jammu and Kashmir. The conflict has led to multiple wars and skirmishes between India and Pakistan.

    Background:

    • From 1752, the Afghan Durrani Empire ruled Kashmir until 1819 when the Sikh Empire conquered it.
    • After the First Anglo-Sikh War (1845–1846), Kashmir was ceded to the East India Company, which then transferred it to Gulab Singh, the Raja of Jammu, who became the Maharaja of Jammu and Kashmir.

    Internal Conflict & Political Movements:

    • In 1932, Sheikh Abdullah and Chaudhry Ghulam Abbas founded the All-Jammu and Kashmir Muslim Conference to advocate for the rights of Muslims in the state.
    • In 1938, the party was renamed the National Conference to represent all Kashmiris regardless of religion.

    National Stances:

    • India’s View:
    • The Instrument of Accession signed by Maharaja Hari Singh in 1947 was a legal and irrevocable act.
    • The Constituent Assembly of Jammu and Kashmir ratified the accession to India and called for a permanent merger.
    • India considers Kashmir an integral part of its secular nation, despite the Muslim-majority population.
    • India accuses Pakistan of fueling insurgency and terrorism in Kashmir.
    • Pakistan’s View: Pakistan views Kashmir as its “jugular vein” and believes the issue should be resolved according to UN resolutions, suggesting a plebiscite to allow Kashmiris to decide their future.
    • China’s View: China is also party to the Kashmir conflict, holding approximately 15% of the land area.

    Efforts to Resolve the Dispute:

    • Proposed solutions have included independence for Kashmir, formal partition between India and Pakistan, and greater autonomy for Azad Kashmir and Jammu and Kashmir.
    • The Simla Agreement of 1972 stipulates that all differences, including Kashmir, should be settled through bilateral negotiations between India and Pakistan.
    • As of 2024, there has been little meaningful dialogue to end the conflict, and India holds the territorially advantageous position.

    Human Rights Abuses:

    • There are concerns over human rights abuses in both Indian-administered and Pakistan-administered Kashmir.
    • In the Muslim-majority Kashmir Valley, there is a high rate of concern over human rights abuses, whereas, in the Hindu and Buddhist majority areas, concerns are low.

    The Kashmir Conflict: An Overview of India and Pakistan’s Dispute

    The Kashmir conflict is a major point of contention in India-Pakistan relations. The conflict began after the partition of India in 1947 when both countries claimed the entirety of the former princely state of Jammu and Kashmir. This dispute has led to multiple wars and skirmishes between the two nations.

    Historical Context:

    • The conflict’s roots trace back to the end of British rule in the Indian subcontinent in 1947, which led to the creation of India and Pakistan.
    • The British Paramountcy over the 562 Indian princely states ended and these states were left to decide whether to join India, Pakistan, or remain independent.
    • Jammu and Kashmir, the largest of these princely states, had a predominantly Muslim population ruled by a Hindu Maharaja, Hari Singh, who initially decided to remain independent.

    Accession and War:

    • After the partition of India and a rebellion in the western districts of the state, Pakistani tribal militias invaded Kashmir, leading the Hindu ruler of Jammu and Kashmir to join India.
    • The resulting Indo-Pakistani War ended with a UN-mediated ceasefire along a line that was eventually named the Line of Control.

    Points of contention for India:

    • India considers itself to be in legal possession of Jammu and Kashmir due to the accession of the state.
    • India views Pakistan’s assistance to rebel forces as a hostile act and the involvement of the Pakistani army as an invasion of Indian territory.
    • From India’s perspective, a plebiscite was meant to confirm the accession, which it considered already complete.
    • India accuses Pakistan of fueling instability through proxy wars.

    Points of contention for Pakistan:

    • Pakistan maintains that Kashmir is its “jugular vein” and that its final status should be determined by the Kashmiri people.
    • Pakistan rejects India’s claim to Kashmir, arguing that the Maharaja was unpopular and used force to suppress the population.
    • Pakistan holds that the popular Kashmiri insurgency demonstrates that the Kashmiri people no longer wish to remain within India and that Kashmir either wants to be with Pakistan or independent.
    • Pakistan views India as disregarding UN Security Council resolutions by not holding a plebiscite.

    Attempts to resolve the conflict:

    • Numerous attempts have been made to resolve the conflict, including UN mediation and bilateral agreements such as the Simla Agreement of 1972.
    • The Simla Agreement stated that the countries would settle their differences by peaceful means through bilateral negotiations while maintaining the sanctity of the Line of Control.

    Other considerations:

    • China also claims portions of the Kashmir region.
    • The conflict has had a significant impact on the people of Kashmir, with many becoming refugees or internally displaced.
    • Both India and Pakistan have been accused of human rights abuses in the region.

    Kashmir Conflict: Human Rights Concerns and Allegations

    The Kashmir conflict has a significant human rights dimension, with accusations against both India and Pakistan.

    Reports and Findings:

    • The OHCHR (Office of the High Commissioner for Human Rights) has released reports on the human rights situation in both Indian-Administered Kashmir and Pakistan-Administered Kashmir.
    • Freedom House categorizes both Indian-administered Kashmir and Pakistani-administered Kashmir as “not free”.
    • A 2010 Chatham House opinion poll found that concern over human rights abuses varied across the region, with high concern in the Muslim-majority Kashmir Valley and low concern in the Hindu and Buddhist-majority areas.

    Human Rights Abuses in Indian-Administered Kashmir:

    • Scholars and organizations have reported human rights abuses by Indian forces, including extrajudicial killings, rape, torture, and enforced disappearances.
    • Amnesty International has accused the Indian government of refusing to prosecute perpetrators of abuses and notes that no member of the Indian military in Jammu and Kashmir had been tried in a civilian court as of June 2015.
    • Armed Forces Special Powers Act (AFSPA): This act grants broad powers to the military, including the right to shoot to kill and detain individuals without charge, leading to concerns about human rights violations. Some human rights organizations have asked the Indian government to repeal the Public Safety Act, since “a detainee may be held in administrative detention for a maximum of two years without a court order”.
    • Enforced Disappearances and Mass Graves: The State Human Rights Commission (SHRC) has found thousands of unmarked graves believed to contain victims of unlawful killings and enforced disappearances.
    • Sexual Violence: Reports indicate a high incidence of sexual abuse and rape, with allegations that security forces use rape as a cultural weapon of war.
    • Kashmiri Pandits: There have been killings and displacement of Kashmiri Pandits (Hindus) due to the conflict.

    Human Rights Abuses in Pakistan-Administered Kashmir:

    • There have been instances of human rights abuses in Azad Kashmir, including political repressions and forced disappearances.
    • Lack of Freedoms: Residents of Azad Kashmir are reportedly not free, with Pakistani authorities exercising strict controls on basic freedoms.
    • Human Rights Watch has accused the ISI (Pakistan’s intelligence agency) and the military of torture.
    • Religious Discrimination: Claims of religious discrimination and restrictions on religious freedom in Azad Kashmir have been made against Pakistan.
    • Lack of Representation: Criticisms have been raised regarding the lack of human rights, justice, democracy, and Kashmiri representation in the Pakistan National Assembly.

    Kashmiri Perspectives:

    • Kashmiri scholars claim that India’s military occupation inflicts violence and humiliation, with Indian forces responsible for human rights abuses.
    • There are assertions that the Kashmiri people have not been able to exercise the right to self-determination.

    Kashmiri Perspectives on the Kashmir Conflict

    Kashmiri views on the Kashmir conflict are varied and complex, with a central theme of a desire for self-determination.

    Key aspects of Kashmiri perspectives include:

    • Historical Grievances: Kashmiris feel they have been ruled by various empires and governments, fostering a sense of not being in control of their own fate for centuries.
    • Right to Self-determination: Since the 1947 accession of Kashmir to India was provisional and conditional, Kashmiris maintain their right to determine their future. They assert that state elections do not satisfy this requirement.
    • Desire for a Plebiscite: Many Kashmiris want a plebiscite to achieve freedom. A constitutional expert, A. G. Noorani, says the people of Kashmir are very much a party to the dispute.
    • Rejection of Indian Rule: A significant portion of Kashmiris oppose Indian rule, citing broken promises of a plebiscite, violations of autonomy, and subversion of the democratic process as reasons for the 1989-1990 rebellion. Some Kashmiris believe that they were better off under Dogra rule than under Indian rule.
    • Views on Elections: Kashmiris assert that except for the 1977 and 1983 elections, no state election has been fair. The Hurriyat parties do not want to participate in elections under the framework of the Indian Constitution, viewing them as a diversion from self-determination.
    • Impact of Military Presence: Opponents of Indian rule say that India has a large military presence in Kashmir, resulting in violence, human rights abuses, and a sense of humiliation among Kashmiris.
    • Divergent Regional Views:
    • A 2007 poll indicated that 87% of people in Srinagar wanted independence.
    • In contrast, 95% of people in Jammu city felt the state should be part of India.
    • Economic Considerations: Some, like Markandey Katju, argue that secession would harm Kashmir’s economy due to its dependence on Indian markets.
    • Identity and Religion: Kashmiris have a distinct sense of identity, with Islam being an integral part of it. Some Kashmiris might prefer Pakistan due to religious affinity and socio-economic links if India and Pakistan cannot guarantee the existence and peaceful development of an independent Kashmir.
    • Views on Voter Turnout: High voter turnout is not necessarily an endorsement of Indian rule, as voters may be motivated by factors such as development and local governance.
    • Settlement Formulas: Kashmiris seek an “honourable solution” that ensures their dignity without necessarily signifying a victory for either India or Pakistan.

    Al-Qaeda and the Kashmir Conflict: Involvement and Claims

    Al-Qaeda’s involvement in the Kashmir conflict is a complex issue with various reports and claims.

    Key points regarding Al-Qaeda’s involvement:

    • Osama bin Laden’s Stance: In a 2002 “Letter to American People,” Osama bin Laden stated that one of the reasons he was fighting America was its support for India on the Kashmir issue.
    • US Intelligence Assessments: In 2002, US Secretary of Defense Donald Rumsfeld suggested Al-Qaeda was active in Kashmir, though without hard evidence. US officials believed Al-Qaeda aimed to provoke conflict between India and Pakistan, potentially forcing Pakistan to move troops to the Indian border and relieving pressure on Al-Qaeda elements in Pakistan. US intelligence analysts also suggested that Al-Qaeda and Taliban operatives in Pakistani-administered Kashmir were assisting terrorists trained in Afghanistan to infiltrate Indian-administered Kashmir.
    • Al-Qaeda’s Claims: In 2006, Al-Qaeda claimed to have established a wing in Kashmir, raising concerns for the Indian government.
    • Counterclaims: In 2007, the Indian Army stated that there was no evidence to verify media reports of an Al-Qaeda presence in Indian-administered Jammu and Kashmir. They also ruled out Al-Qaeda ties with militant groups in Kashmir, including Lashkar-e-Taiba and Jaish-e-Mohammed, though they had information about Al-Qaeda’s strong ties with these groups’ operations in Pakistan.
    • Destabilization Efforts: In 2010, US Defense Secretary Robert Gates stated that Al-Qaeda was seeking to destabilize the region and planning to provoke a nuclear war between India and Pakistan.
    • Links to Militant Groups: Fazlur Rehman Khalil, leader of Harkat-ul-Mujahideen, signed al-Qaeda’s 1998 declaration of holy war, which called on Muslims to attack all Americans and their allies.
    • Killing of Ilyas Kashmiri: In June 2011, a US drone strike killed Ilyas Kashmiri, chief of Harkat-ul-Jihad al-Islami, a Kashmiri militant group associated with Al-Qaeda. He was described as a “prominent” Al-Qaeda member and the head of military operations for Al-Qaeda.
    • New Battlefields: Waziristan became a new battlefield for Kashmiri militants fighting NATO in support of Al-Qaeda.
    • Appointment of Farman Ali Shinwari: In April 2012, Farman Ali Shinwari, a former member of Kashmiri separatist groups Harkat-ul-Mujahideen and Harkat-ul-Jihad al-Islami, was appointed chief of al-Qaeda in Pakistan.
    • Investigation Findings: A 2002 investigation by a Christian Science Monitor reporter claimed that Al-Qaeda and its affiliates were prospering in Pakistani-administered Kashmir with the tacit approval of Pakistan’s Inter-Services Intelligence agency (ISI).

    By Amjad Izhar
    Contact: amjad.izhar@gmail.com
    https://amjadizhar.blog

  • Wikipedia: A Comprehensive Overview

    Wikipedia: A Comprehensive Overview

    Wikipedia is a collaboratively edited, free online encyclopedia. The provided text gives an overview of its history, creation, governance, community, and content policies. It also addresses criticisms, such as accuracy concerns, biases, censorship, and explicit content. The text highlights Wikipedia’s language editions, its access methods, and its cultural influence including its impact on education and journalism. It details various studies about the reliability of Wikipedia content. Finally, the source also lists awards that the website has won and describes associated projects.

    Wikipedia: A Comprehensive Study Guide

    Content Overview

    This study guide covers the history, structure, policies, community, and cultural impact of Wikipedia, drawing from the provided Wikipedia article. It’s designed to help you review the key concepts and details presented in the source material.

    Key Concepts

    • History and Founding: Understand the origins of Wikipedia and its relationship to Nupedia.
    • Openness and Collaboration: Explore Wikipedia’s model of open collaboration and its consequences, including vandalism and edit wars.
    • Policies and Content: Familiarize yourself with the core content policies, including Neutral Point of View (NPOV), Verifiability, and No Original Research.
    • Governance: Learn about the roles of administrators and the Arbitration Committee in managing disputes and maintaining order.
    • Community and Diversity: Understand the demographics of Wikipedia editors and the ongoing challenges related to diversity and bias.
    • Language Editions: Explore the multilingual nature of Wikipedia and the variations in content and policies across different language versions.
    • Reception and Criticism: Consider the criticisms of Wikipedia, including concerns about accuracy, systemic bias, and discouragement in education.
    • Operation and Technology: Review the technological infrastructure, including the LAMP platform, automated editing, and mobile access.
    • Cultural Influence: Examine Wikipedia’s impact on education, journalism, and research.

    Quiz: Short-Answer Questions

    Answer each question in 2-3 sentences.

    1. What were the two main goals of Jimmy Wales and Larry Sanger in creating Wikipedia?
    2. Explain the meaning of the name “Wikipedia.”
    3. What is the “neutral point of view” policy, and why is it important to Wikipedia?
    4. Describe the role of Wikipedia administrators.
    5. What is the Arbitration Committee, and what does it do?
    6. What are some of the challenges Wikipedia faces related to diversity?
    7. List three of the largest language editions of Wikipedia by article count as of February 2025, according to the document.
    8. Explain the concept of “systemic bias” in the context of Wikipedia.
    9. What are Wikipedia bots, and what role do they play in maintaining the encyclopedia?
    10. How does Wikipedia combat misinformation about current events, like the COVID-19 pandemic?

    Quiz: Answer Key

    1. Jimmy Wales aimed to create a publicly editable encyclopedia, while Larry Sanger suggested using a wiki to achieve this goal. Together, they wanted to create a free encyclopedia of the highest possible quality, accessible to every person in their own language.
    2. The name “Wikipedia” is a blend of the words “wiki,” referring to the collaborative editing system, and “encyclopedia,” indicating its purpose as a comprehensive source of information. This combination highlights the collaborative nature of the encyclopedia.
    3. The “neutral point of view” (NPOV) policy requires articles to represent significant views fairly, proportionately, and without bias. NPOV is crucial for ensuring the encyclopedia is seen as objective and trustworthy by a global audience.
    4. Wikipedia administrators are volunteer editors who have been granted additional technical abilities, including the ability to delete pages, protect pages from editing, and block users. They help enforce policies and maintain order within the Wikipedia community.
    5. The Arbitration Committee is a group of editors elected by the Wikipedia community to resolve disputes that cannot be solved through other methods. They have the authority to issue binding rulings and sanctions to maintain the integrity of the encyclopedia.
    6. Wikipedia faces challenges related to gender, geographic, and ideological diversity among its editors and content. These challenges can lead to systemic biases in the coverage of topics and perspectives.
    7. As of February 2025, the English Wikipedia had 6,956,747 articles, the Cebuano Wikipedia had 6,116,785 articles, and the German Wikipedia had 2,989,789 articles.
    8. “Systemic bias” refers to the ways in which Wikipedia’s content and structure may reflect the perspectives and priorities of certain groups, such as Western cultures or English speakers. This bias can result in underrepresentation or misrepresentation of other cultures, topics, or viewpoints.
    9. Wikipedia bots are computer programs used to perform simple and repetitive tasks, such as correcting common misspellings, formatting articles, and detecting vandalism. These bots help maintain the encyclopedia’s quality and consistency.
    10. Wikipedia combats misinformation by relying on its community of editors to monitor and verify content, citing reliable sources, and adhering to its neutral point of view policy. It also partners with organizations like the World Health Organization to combat health-related misinformation.

    Essay Questions

    1. Discuss the impact of Wikipedia’s open editing model on the quality and reliability of its content. What are the benefits and drawbacks of allowing anyone to edit?
    2. Analyze the challenges Wikipedia faces in achieving and maintaining a neutral point of view across its diverse range of articles and language editions.
    3. Explore the criticisms of Wikipedia’s coverage of topics and the existence of systemic biases. How might these biases be addressed and mitigated?
    4. Evaluate Wikipedia’s role as a source of information in education. Should students be encouraged to use Wikipedia, and if so, how should they be taught to critically assess its content?
    5. Discuss the role and impact of Wikipedia bots on the functioning and content of the website. How do these bots help maintain the integrity of Wikipedia, and what are the potential downsides to relying on automated editing?

    Glossary of Key Terms

    • Administrator: A Wikipedia editor granted additional technical abilities, including the ability to delete pages, protect pages, and block users.
    • Arbitration Committee (ArbCom): A group of editors elected by the Wikipedia community to resolve complex disputes.
    • Bot: A computer program used to perform automated tasks on Wikipedia, such as correcting errors or reverting vandalism.
    • CC Attribution / Share-Alike 4.0: A Creative Commons license allowing users to share and adapt content with proper attribution.
    • Edit War: A content dispute on Wikipedia where editors repeatedly revert each other’s changes to an article.
    • GFDL (GNU Free Documentation License): A copyleft license for free documentation, often used in conjunction with Creative Commons on Wikipedia.
    • LAMP platform: A web service stack comprising Linux, Apache, MySQL, and PHP/Python/Perl.
    • MediaWiki: The wiki software used by Wikipedia.
    • Nupedia: A free online encyclopedia project that predated Wikipedia and served as its original inspiration.
    • Neutral Point of View (NPOV): A core content policy requiring articles to represent significant viewpoints fairly, proportionately, and without bias.
    • No Original Research: A core content policy prohibiting the inclusion of unpublished facts, ideas, or arguments in Wikipedia articles.
    • Systemic Bias: Skews in Wikipedia content resulting from the demographics and perspectives of its editors.
    • Vandalism: Deliberate attempts to disrupt Wikipedia by adding false, biased, or nonsensical content.
    • Verifiability: A core content policy requiring all material in Wikipedia articles to be attributable to reliable, published sources.
    • Wikimedia Foundation: The American nonprofit organization that hosts Wikipedia and its sister projects.
    • Wikipedians: Volunteers who write and maintain Wikipedia.
    • Wikification: The process of finding “missing” links in Wikipedia.
    • Wiki: Software that allows users to easily create and edit web pages collaboratively.
    • Wikipedia Zero: An initiative to provide free access to Wikipedia in developing countries, which was later discontinued.

    Wikipedia: History, Content, Community, and Challenges

    Wikipedia Briefing Document

    This document summarizes the main themes and important ideas presented in the provided Wikipedia article about Wikipedia itself.

    I. Overview & Key Facts:

    • Definition: Wikipedia is a “free-content online encyclopedia written and maintained by a community of volunteers, known as Wikipedians, through open collaboration and the wiki software MediaWiki.”
    • Scale: It is “the largest and most-read reference work in history” and consistently ranked among the most visited websites globally.
    • Founding & Hosting: Founded by Jimmy Wales and Larry Sanger on January 15, 2001, and hosted by the Wikimedia Foundation since 2003.
    • Governance: The Wikimedia Foundation is an American nonprofit funded by donations from readers.
    • Language Editions: As of February 2025, there are 341 language editions. The largest editions (by article count) are English, Cebuano, German, French, Swedish, and Dutch.
    • Active Users: Over 309,457 active editors, and over 117,918,423 registered users.
    • Content License: CC Attribution / Share-Alike 4.0; most text is also dual-licensed under GFDL.
    • Traffic: As of February 2023, Wikipedia attracts around 2 billion unique devices monthly, with the English Wikipedia receiving 10 billion pageviews each month.

    II. History & Development:

    • Nupedia Precursor: Wikipedia began as a complementary project for Nupedia, a free online encyclopedia with expert-written and formally reviewed articles.
    • Wiki Strategy: Larry Sanger is credited with the idea of using a wiki to create a publicly editable encyclopedia. On January 10, 2001, Sanger proposed on the Nupedia mailing list to create a wiki as a “feeder” project for Nupedia.
    • Neutral Point of View: The “neutral point-of-view” policy was established early in Wikipedia’s development.
    • Rapid Growth: The site experienced rapid growth after its launch.

    III. Openness & Community:

    • Open Collaboration: Wikipedia relies on the principle of open collaboration by a community of volunteer editors.
    • Restrictions: Certain tasks require registration, like editing protected pages or creating new pages.
    • Review of Changes: Changes are reviewed by other editors, and some pages are protected to prevent vandalism.
    • Vandalism & Disputes: Vandalism and disputes are ongoing challenges, addressed through various mechanisms, including dispute resolution processes and the Arbitration Committee.

    IV. Policies & Content:

    • Content Policies: Core content policies and guidelines exist, including the requirement for verifiable information and a neutral point of view.
    • “Five Pillars”: Wikipedia operates under five fundamental principles (not explicitly defined in the excerpt but referenced).
    • Verifiability: “Wikipedia’s verifiability policy requires inline citations for any material challenged or likely to be challenged, and for all quotations, anywhere in article space.”
    • Notability: Articles must meet specific notability criteria to warrant inclusion.
    • No Original Research: “Wikipedia does not publish original thought.” Articles should be based on reliable, published sources.

    V. Governance & Administration:

    • Administrators: Administrators have elevated privileges to manage the site and enforce policies.
    • Dispute Resolution: A formal dispute resolution process exists, culminating in the Arbitration Committee.

    VI. Language Editions & Cultural Influence:

    • Global Reach: Jimmy Wales described Wikipedia as “an effort to create and distribute a free encyclopedia of the highest possible quality to every single person on the planet in their own language.”
    • Independent Editions: While sharing global policies, language editions may diverge in policy and practice.
    • Meta-Wiki Coordination: Meta-Wiki coordinates the various language editions and provides statistics.
    • Systemic Bias: There is recognition of systemic biases, leading to efforts to address them.
    • Combatting Fake News: Wikipedia is seen as a “trusted source to combat fake news.”
    • COVID-19 Coverage: The encyclopedia has been used extensively during the COVID-19 pandemic to disseminate information and combat misinformation.

    VII. Challenges & Criticisms:

    • Accuracy of Content: The accuracy of Wikipedia’s content is a recurring topic of debate and research.
    • Discouragement in Education: Some educators discourage students from citing Wikipedia due to concerns about reliability.
    • Systemic Bias: Concerns about systemic bias exist, including gender bias, geographical bias (“Wikipedia’s view of the world is written by the west”), and ideological bias.
    • Sexism: The article highlights specific instances raising concerns about sexism, such as the initial rejection of an article about Nobel Prize winner Donna Strickland due to perceived lack of media coverage, attributed partly to gender bias in media.
    • Vandalism & Edit Wars: The website faces constant challenges of vandalism and edit warring, requiring constant moderation.

    VIII. Operation & Technology:

    • Wikimedia Foundation: The Wikimedia Foundation oversees the technical infrastructure and operations.
    • Automated Editing: “Computer programs called bots have often been used to perform simple and repetitive tasks, such as correcting common misspellings and stylistic issues, or to start articles such as geography entries in a standard format from statistical data.”
    • Mobile Access: Wikipedia is accessible through mobile apps and optimized for mobile devices.
    • Wikipedia Zero (Discontinued): An initiative to provide free access to Wikipedia in developing countries.

    IX. Cultural Influence:

    • Impact on Publishing: Wikipedia’s availability has affected the biography publishing business.
    • Research Use: Wikipedia is widely used as a corpus for linguistic research.
    • Academic Studies: Studies have explored the influence of Wikipedia on various aspects of knowledge and culture.

    X. Key Quotes:

    • “Wikipedia is a free-content online encyclopedia written and maintained by a community of volunteers, known as Wikipedians, through open collaboration and the wiki software MediaWiki.”
    • “Wikipedia is the largest and most-read reference work in history.”
    • Jimmy Wales: “an effort to create and distribute a free encyclopedia of the highest possible quality to every single person on the planet in their own language.”
    • “Wikipedia’s verifiability policy requires inline citations for any material challenged or likely to be challenged, and for all quotations, anywhere in article space.”
    • “Computer programs called bots have often been used to perform simple and repetitive tasks, such as correcting common misspellings and stylistic issues, or to start articles such as geography entries in a standard format from statistical data.”

    This briefing document provides a comprehensive overview of Wikipedia based on the provided source material, touching on its history, governance, content, community, challenges, and cultural impact.

    Wikipedia: Origins, Governance, and Impact

    How did Wikipedia originate?

    Wikipedia began as a complementary project to Nupedia, a free online encyclopedia where articles were written and reviewed by experts. Larry Sanger proposed using a wiki as a feeder project for Nupedia, leading to Wikipedia’s launch on January 15, 2001. Jimmy Wales is credited with the vision of a publicly editable encyclopedia, and Sanger with the wiki strategy.

    What are the core principles that govern Wikipedia’s content?

    Wikipedia’s content is guided by several key policies, including “neutral point of view” (NPOV), verifiability, and no original research. Articles must be written from a neutral perspective, representing significant viewpoints fairly and proportionately. All material must be attributable to reliable, published sources, and original research is prohibited. Citing sources is required for anything challenged or likely to be challenged.

    How is Wikipedia governed and how are disputes resolved?

    The Wikimedia Foundation hosts Wikipedia and oversees the project, but the community of editors plays a significant role in governance. Disputes are resolved through discussion, and when necessary, more formal mechanisms like dispute resolution processes. Administrators have the ability to enforce policies, and the Arbitration Committee is the final step in dispute resolution.

    How does Wikipedia address vandalism and ensure the accuracy of information?

    Wikipedia employs various methods to combat vandalism, including bots that detect and revert malicious edits. Edits by new or unregistered users are closely monitored, and pages prone to vandalism can be protected, restricting editing to established users or administrators. “Flagged revisions” allow for community review of changes before they are visible to all readers. Despite these measures, errors and biases can still occur.

    What is the role of bots in Wikipedia’s operation?

    Bots play a crucial role in Wikipedia by performing simple, repetitive tasks such as correcting misspellings, standardizing article formats, and notifying editors of common errors. Some bots are designed to create geography entries and other articles from statistical data. Anti-vandal bots quickly detect and revert vandalism. All bots must be approved before activation.

    How does Wikipedia address systemic bias and ensure diversity in its content?

    Wikipedia acknowledges the existence of systemic biases, including gender, geographical, and ideological biases. Efforts are underway to counter these biases, such as initiatives to increase the representation of women editors and topics related to underrepresented regions and groups. The various language editions diverge on some points of policy and practice, which can lead to differing coverage of topics.

    How is Wikipedia funded, and how can users access it?

    Wikipedia is hosted by the Wikimedia Foundation, a non-profit organization primarily funded by donations from readers. Wikipedia’s content is available under a Creative Commons Attribution-ShareAlike license, allowing free use and distribution with attribution. Content can be accessed through the website, mobile apps, and some offline versions. The Wikimedia Foundation also promotes access in developing countries.

    How is Wikipedia being utilized and how is its influence perceived in various fields?

    Wikipedia has become a widely used general reference website. It serves as a corpus for linguistic research in computational linguistics, information retrieval, and natural language processing. It is used in entity linking (wikification) and word-sense disambiguation. Some view it as a trusted source to combat fake news. Wikipedia is cited by courts and has been suggested to have influenced a drop in biography sales.

    Wikipedia: Definition, Scope, History, Content, Community, and Criticism

    Here is a discussion of the overview of Wikipedia, based on the provided source:

    • Definition: Wikipedia is a free online encyclopedia that is written and maintained by a community of volunteers known as Wikipedians. It uses open collaboration and the MediaWiki software.
    • Scope and Popularity: Wikipedia is the largest and most-read reference work in history and is consistently ranked among the top ten most visited websites. As of December 2024, it was ranked fifth by Semrush and seventh by Similarweb.
    • History:
    • Wikipedia was founded by Jimmy Wales and Larry Sanger on January 15, 2001.
    • It began as a complementary project for Nupedia, a free online English-language encyclopedia project with articles written by experts and reviewed under a formal process.
    • The name “Wikipedia” is a blend of the words “wiki” and “encyclopedia”.
    • Content and Policies:
    • Wikipedia operates under a policy of “neutral point-of-view“.
    • Entries must be encyclopedic and meet standards of “notability,” meaning the topic has been covered in mainstream media or major academic journal sources independent of the article’s subject.
    • Wikipedia aims to convey established and recognized knowledge, avoiding original research.
    • Content requires references to reliable sources.
    • Wikipedia does not take sides and strives to present information from a neutral point of view.
    • Community and Editing:
    • Wikipedia is maintained by a community of volunteers, and each article has a “talk” page for discussion, coordination, and debate.
    • The community has been described as “cultlike“.
    • Editing restrictions exist for certain controversial or vandalism-prone pages, where only registered, autoconfirmed, or extended confirmed editors can make changes.
    • Dispute Resolution:
    • Wikipedia has a semi-formal dispute resolution process.
    • Editors can raise issues in community forums, seek third opinions, or initiate a “request for comment” to determine community consensus.
    • Language Editions:
    • Wikipedia aims to create and distribute a free encyclopedia of the highest possible quality to every person on the planet in their own language.
    • Each language edition functions independently but is coordinated by Meta-Wiki.
    • Reception and Criticism:
    • Wikipedia has faced criticism regarding its reliability, systemic bias, and unevenness of coverage.
    • Some critics argue that articles can be dominated by persistent voices with an “ax to grind”.
    • However, Wikipedia has also been lauded as a valuable source of information and a means to combat fake news.
    • Cultural Influence:
    • Wikipedia’s coverage of events such as the COVID-19 pandemic demonstrates its cultural significance and role in providing information [10.2.1].
    • Operation:
    • Wikipedia is hosted by the Wikimedia Foundation, a non-profit organization funded mainly by donations.
    • It involves software operations, automated editing, and hardware support.
    • Access to Content:
    • Wikipedia’s content is available under the CC Attribution / Share-Alike 4.0 license, with most text also dual-licensed under GFDL.
    • Content can be accessed through various methods, including mobile access [9.2.1].
    • Awards and Recognition:
    • Wikipedia has received awards such as the Erasmus Prize and the Princess of Asturias Award on International Cooperation.
    • Explicit Content:
    • Wikipedia has faced criticism for allowing information about graphic content, including images and videos of sexual content.
    • The policy of “Wikipedia is not censored” has been controversial.

    Wikipedia Community Dynamics: Culture, Contributions, and Challenges

    Here’s a discussion of the community aspects of Wikipedia, based on the provided source:

    • Community Maintenance: Wikipedia is maintained by a community of volunteers. These volunteers are known as “Wikipedians” [Me].
    • Communication Channels: Each article and user on Wikipedia has a dedicated “talk” page that serves as the primary communication channel for editors to discuss, coordinate, and debate.
    • Community Culture:Wikipedia’s community has been described as cultlike.
    • There is a preference for cohesiveness, which sometimes requires compromise, even if it means disregarding credentials. This has been referred to as “anti-elitism”.
    • Becoming a Wikipedia insider involves learning Wikipedia-specific technological codes, submitting to a dispute resolution process, and learning the internal culture.
    • Editor Contributions and Activity:The English Wikipedia has a large number of registered editors, but only a fraction are considered active. An editor is considered active if they have made one or more edits in the past 30 days.
    • Editors who do not comply with Wikipedia cultural rituals may be seen as outsiders, which could affect how their contributions are received.
    • Editors who do not log in may be considered “second-class citizens” because their contributions cannot be attributed to a particular editor with certainty.
    • Community Diversity & Bias: Academic studies show that Wikipedia over-represents the views of a specific demographic, typically an educated, technically inclined, English-speaking white male from a developed Christian country in the northern hemisphere. This bias results in cultural, gender, and geographical biases on Wikipedia.
    • Dispute Resolution: Wikipedia has developed a semi-formal dispute resolution process to determine community consensus. Editors can raise issues in community forums, seek third opinions, or initiate a “request for comment”. Wikipedia encourages local resolutions of conflicts. The Arbitration Committee is the ultimate dispute resolution process, but it focuses on how disputes are conducted rather than ruling on specific views.
    • Language Editions: Although each language edition of Wikipedia functions independently, some efforts are made to supervise them all. They are coordinated in part by Meta-Wiki.
    • Wikimedia Movement Affiliates: Wikipedia is supported by independently-run organizations and groups affiliated with the Wikimedia Foundation, including Wikimedia chapters, thematic organizations, and user groups. These affiliates participate in the promotion, development, and funding of Wikipedia.
    • Editor Harassment: Editor harassment has been identified as an issue within the Wikipedia community.
    • Increasing Diversity: Increasing diversity within the Wikimedia community is a focus.

    Wikipedia Content Accuracy and Reliability

    Here’s a discussion of content accuracy on Wikipedia, based on the provided source:

    • No Guarantee of Validity: Wikipedia “makes no guarantee of validity” of its content because no one is ultimately responsible for the accuracy of the claims made in it [24, W 54].
    • Expertise vs. Open Structure: Traditional encyclopedias, such as Encyclopædia Britannica, are written by experts, giving them a reputation for accuracy. Wikipedia’s open structure allows anyone to contribute.
    • Nature Study: A peer review in 2005 of scientific entries in both Wikipedia and Encyclopædia Britannica by the journal Nature found few differences in accuracy. The study concluded that “the average science entry in Wikipedia contained around four inaccuracies; Britannica, about three”.
    • However, this study has faced criticism regarding its sample size and selection method.
    • Encyclopædia Britannica disputed the findings by Nature, and Nature issued a rebuttal.
    • Vandalism: Any change that deliberately compromises Wikipedia’s integrity is considered vandalism. Obvious vandalism is generally easy to remove from Wikipedia articles, with a median time to detect and fix it being a few minutes. However, some vandalism can take much longer to detect and repair.
    • Seigenthaler Biography Incident: In the Seigenthaler biography incident, an anonymous editor introduced false information into the biography of American political figure John Seigenthaler in May 2005, falsely presenting him as a suspect in the assassination of John F. Kennedy. It remained uncorrected for four months. This incident led to policy changes at Wikipedia for tightening up the verifiability of biographical articles of living people.
    • “Verifiability, Not Truth”: Among Wikipedia editors, the guiding principle is often phrased as “verifiability, not truth,” meaning that readers are responsible for checking the truthfulness of articles and making their own interpretations [11, W 35]. This can sometimes lead to the removal of valid information if it is not properly sourced.
    • Conflicting Views on Reliability:
    • Tyler Cowen suggests that Wikipedia may be more likely to be accurate than the median refereed journal article on economics, while also cautioning that errors are frequently found on Internet sites.
    • Amy Bruckman argues that the content of a popular Wikipedia page is actually the most reliable form of information ever created due to the number of reviewers.
    • Critics argue that Wikipedia’s open nature and lack of proper sources for much of the information makes it unreliable.
    • Editors of traditional reference works such as the Encyclopædia Britannica have questioned the project’s utility and status as an encyclopedia.
    • Use as a Source: Legal Research in a Nutshell (2011) cites Wikipedia as a “general source” that “can be a real boon” in “coming up to speed in the law governing a situation” and, “while not authoritative, can provide basic facts as well as leads to more in-depth resources”.
    • Medical Information: A 2014 article in The Atlantic stated that 50% of physicians look up conditions on Wikipedia. James Heilman of WikiProject Medicine noted that less than 1% of Wikipedia’s medical articles have passed Wikipedia’s peer review process to be classified as “good” or “featured”.
    • Combating Fake News: Wikipedia co-founder Jimmy Wales has claimed that Wikipedia has largely avoided the problem of “fake news” because the Wikipedia community regularly debates the quality of sources in articles. In 2017–18, Facebook and YouTube announced they would rely on Wikipedia to help their users evaluate reports and reject false news.

    Wikipedia’s Language Editions: Structure, Content, and Global Reach

    Here’s a discussion of language editions of Wikipedia, based on the provided source:

    • Number of Editions: There are currently 341 language editions of Wikipedia, also referred to as language versions, or simply Wikipedias.
    • Article Count: As of February 2025, the six largest editions, in order of article count, are English, Cebuano, German, French, Swedish, and Dutch.
    • Bot Contributions: The Cebuano and Waray Wikipedias owe their positions to the article-creating bot Lsjbot. As of 2013, this bot had created about half the articles on the Swedish Wikipedia and most of the articles in the Cebuano and Waray Wikipedias.
    • Million+ Article Editions: Besides the top six, twelve other Wikipedias have more than a million articles each: Russian, Spanish, Italian, Polish, Egyptian Arabic, Chinese, Japanese, Ukrainian, Vietnamese, Waray, Arabic, and Portuguese.
    • Traffic Distribution: As of January 2021, the English Wikipedia receives 48% of Wikipedia’s cumulative traffic, with the remaining traffic split among other languages. The top 10 editions represent approximately 85% of the total traffic.
    • Contributors: Since Wikipedia is web-based, contributors to the same language edition may use different dialects or come from different countries, potentially leading to conflicts over spelling or points of view.
    • Global vs. Local Policies: While various language editions adhere to global policies like “neutral point of view”, they may diverge on policy and practice points, such as the use of non-free images under fair use claims.
    • Goal: Jimmy Wales described Wikipedia as “an effort to create and distribute a free encyclopedia of the highest possible quality to every single person on the planet in their own language” [22, W 49].
    • Coordination: Though each language edition functions independently, efforts are made to supervise them, coordinated in part by Meta-Wiki. Meta-Wiki provides statistics and maintains a list of articles every Wikipedia should have, covering basic content by subject.
    • Article Availability: Articles strongly related to a particular language may not have counterparts in other editions, even if they meet notability criteria.
    • Translation: Translated articles represent a small portion of articles in most editions, partly because fully automated translation is not allowed. Articles available in multiple languages may offer “interwiki links” to counterpart articles.
    • Regional Contributions: A 2012 study estimated that North America contributed 51% of the edits to the English Wikipedia and 25% to the Simple English Wikipedia.
    • Editor Retention: The Economist noted in 2014 that the English-language Wikipedia had seen a decline in the number of editors, while non-English Wikipedias had maintained a relatively constant number of active editors.

    Wikipedia’s Cultural Impact and Significance

    Here’s a discussion of the cultural impact of Wikipedia, based on the provided source:

    • Trusted Source: Wikipedia has become a trusted source to combat fake news. In 2017–18, Facebook and YouTube announced they would rely on Wikipedia to help their users evaluate reports and reject false news.
    • Cultural Significance:
    • Wikipedia’s content has been used in academic studies, books, conferences, and court cases [33, W 122, 272, 273].
    • The Parliament of Canada’s website refers to Wikipedia’s article on same-sex marriage in the “related links” section of its “further reading” list for the Civil Marriage Act.
    • The encyclopedia’s assertions are increasingly used as a source by organizations such as the US federal courts and the World Intellectual Property Organization.
    • Content appearing on Wikipedia has also been cited as a source and referenced in some US intelligence agency reports.
    • In December 2008, the scientific journal RNA Biology launched a new section for descriptions of families of RNA molecules and requires authors who contribute to the section to also submit a draft article on the RNA family for publication in Wikipedia.
    • Wikipedia has also been used as a source in journalism, often without attribution, and several reporters have been dismissed for plagiarizing from Wikipedia.
    • Recognition:
    • In 2006, Time magazine recognized Wikipedia’s participation (along with YouTube, Reddit, MySpace, and Facebook) in the rapid growth of online collaboration and interaction by millions of people worldwide.
    • The Washington Post reported in 2007 that Wikipedia had become a focal point in the 2008 US election campaign.
    • A 2007 Reuters article reported the recent phenomenon of how having a Wikipedia article vindicates one’s notability.
    • Governmental Affairs: Wikipedia was involved in a governmental affair in 2007, when an Italian politician raised a parliamentary question about the necessity of freedom of panorama, claiming that the lack of such freedom forced Wikipedia to forbid all images of modern Italian buildings and art, damaging tourist revenues.
    • Crowdsourcing: A working group led by Peter Stone called Wikipedia “the best-known example of crowdsourcing…that far exceeds traditionally-compiled information sources, such as encyclopedias and dictionaries, in scale and depth”.
    • Open and Decentralized Web: Hossein Derakhshan describes Wikipedia as “one of the last remaining pillars of the open and decentralized web”.
    • Awards: Wikipedia has won many awards, including a Golden Nica for Digital Communities of the annual Prix Ars Electronica contest in 2004, a Judges’ Webby Award for the “community” category in 2004, the Quadriga A Mission of Enlightenment award in 2008, the annual Erasmus Prize in 2015, and the Spanish Princess of Asturias Award on International Cooperation in 2015 [37, 38, W 123, 292, 294, 295, 296].
    • Satire: Wikipedia has been the subject of satire.
    • Publishing: The most obvious economic effect of Wikipedia has been the death of commercial encyclopedias, especially printed versions like Encyclopædia Britannica.
    • Biography Publishing: Wikipedia’s influence on the biography publishing business has been a concern for some.
    • Research Use: Wikipedia has been widely used as a corpus for linguistic research in computational linguistics, information retrieval, and natural language processing.

    By Amjad Izhar
    Contact: amjad.izhar@gmail.com
    https://amjadizhar.blog